Roles & Permissions
Roles & Permissions are located at Global Menu > Governance > Roles & Permissions.
Creating roles and permissions is exactly as it sounds. In this section, you'll define job roles and the associated permissions that determine what employees can and cannot do on the platform.
There are three types of users: Tenant, Client, and Member.
- Tenant: For users within your company.
- Client: For clients, customers, or other external users. (If someone from your company also uses your services as a client, it’s best to create a separate Client profile using an email address different from their Tenant account.)
- Member: For users from your clients’ or customers’ subsidiaries.
If your assigned role includes permission to create new roles, you can do so by clicking the Create button in the top right corner of your screen.
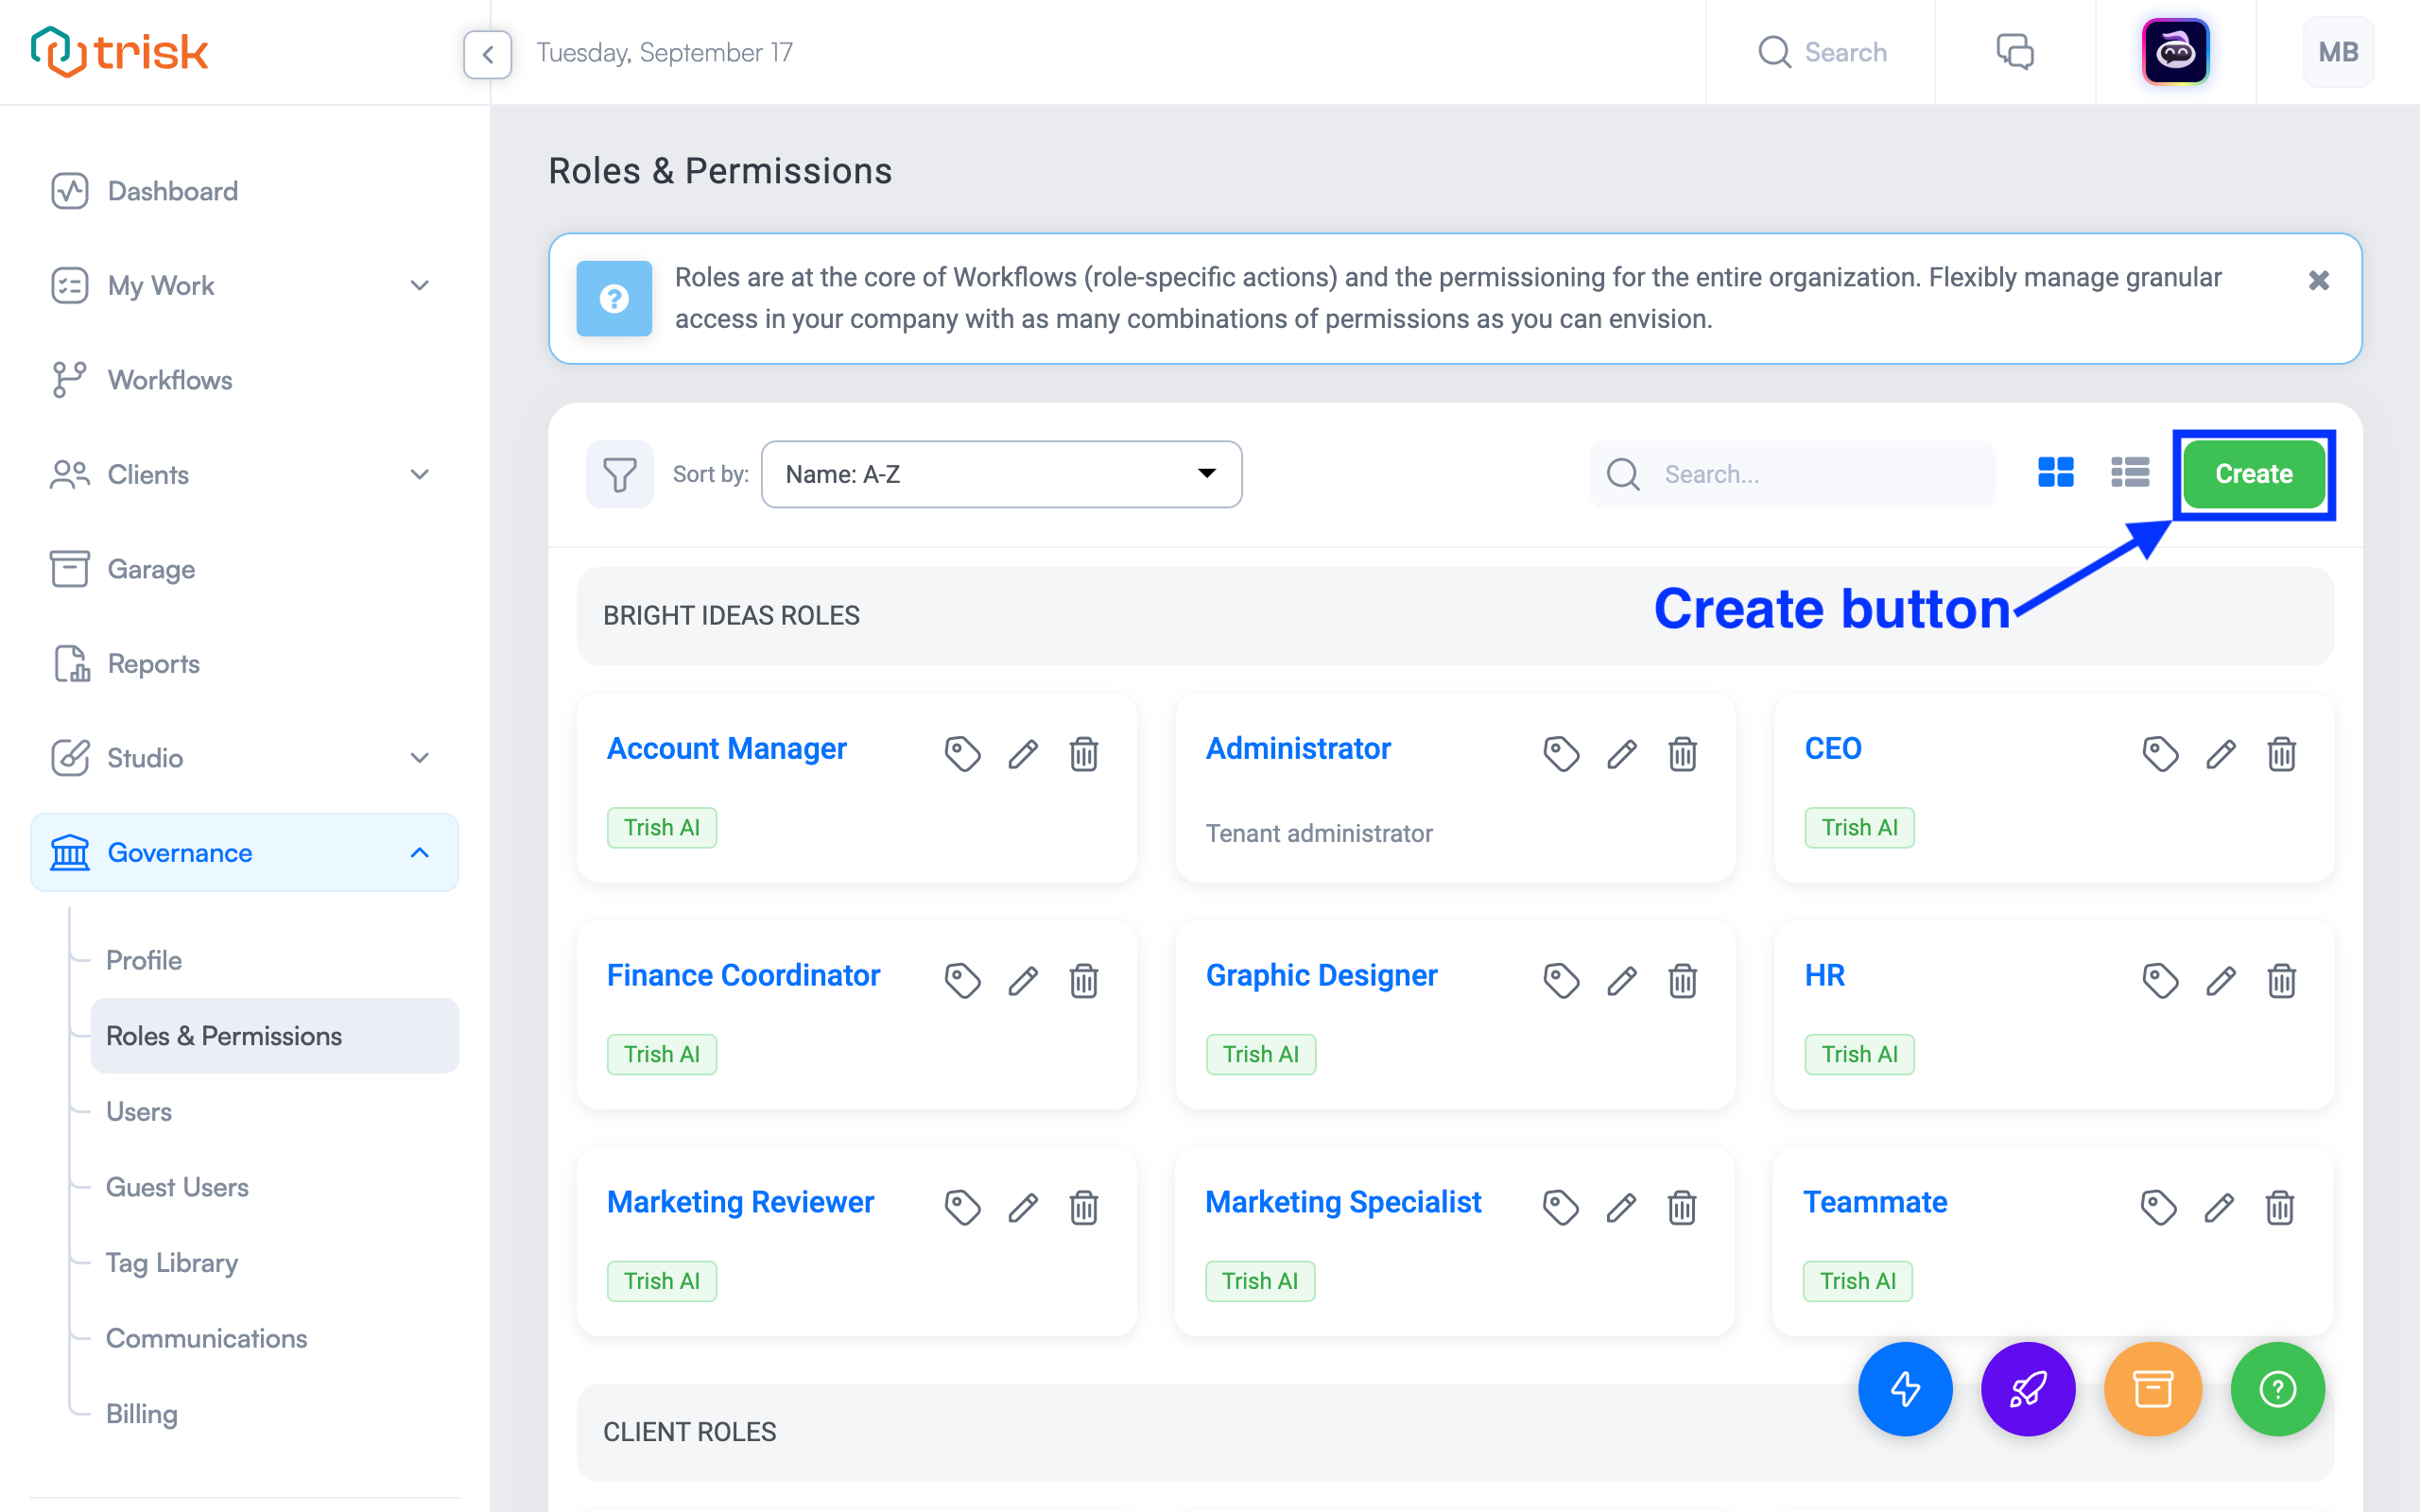
All roles can be labeled with specific Tags. To add Tags, click the grey tag icon next to the role name. Tags can be added if you have the necessary permissions. If a role is tagged, users can filter the list by clicking on the tag or delete the tag (if they have appropriate permissions).
Create Roles
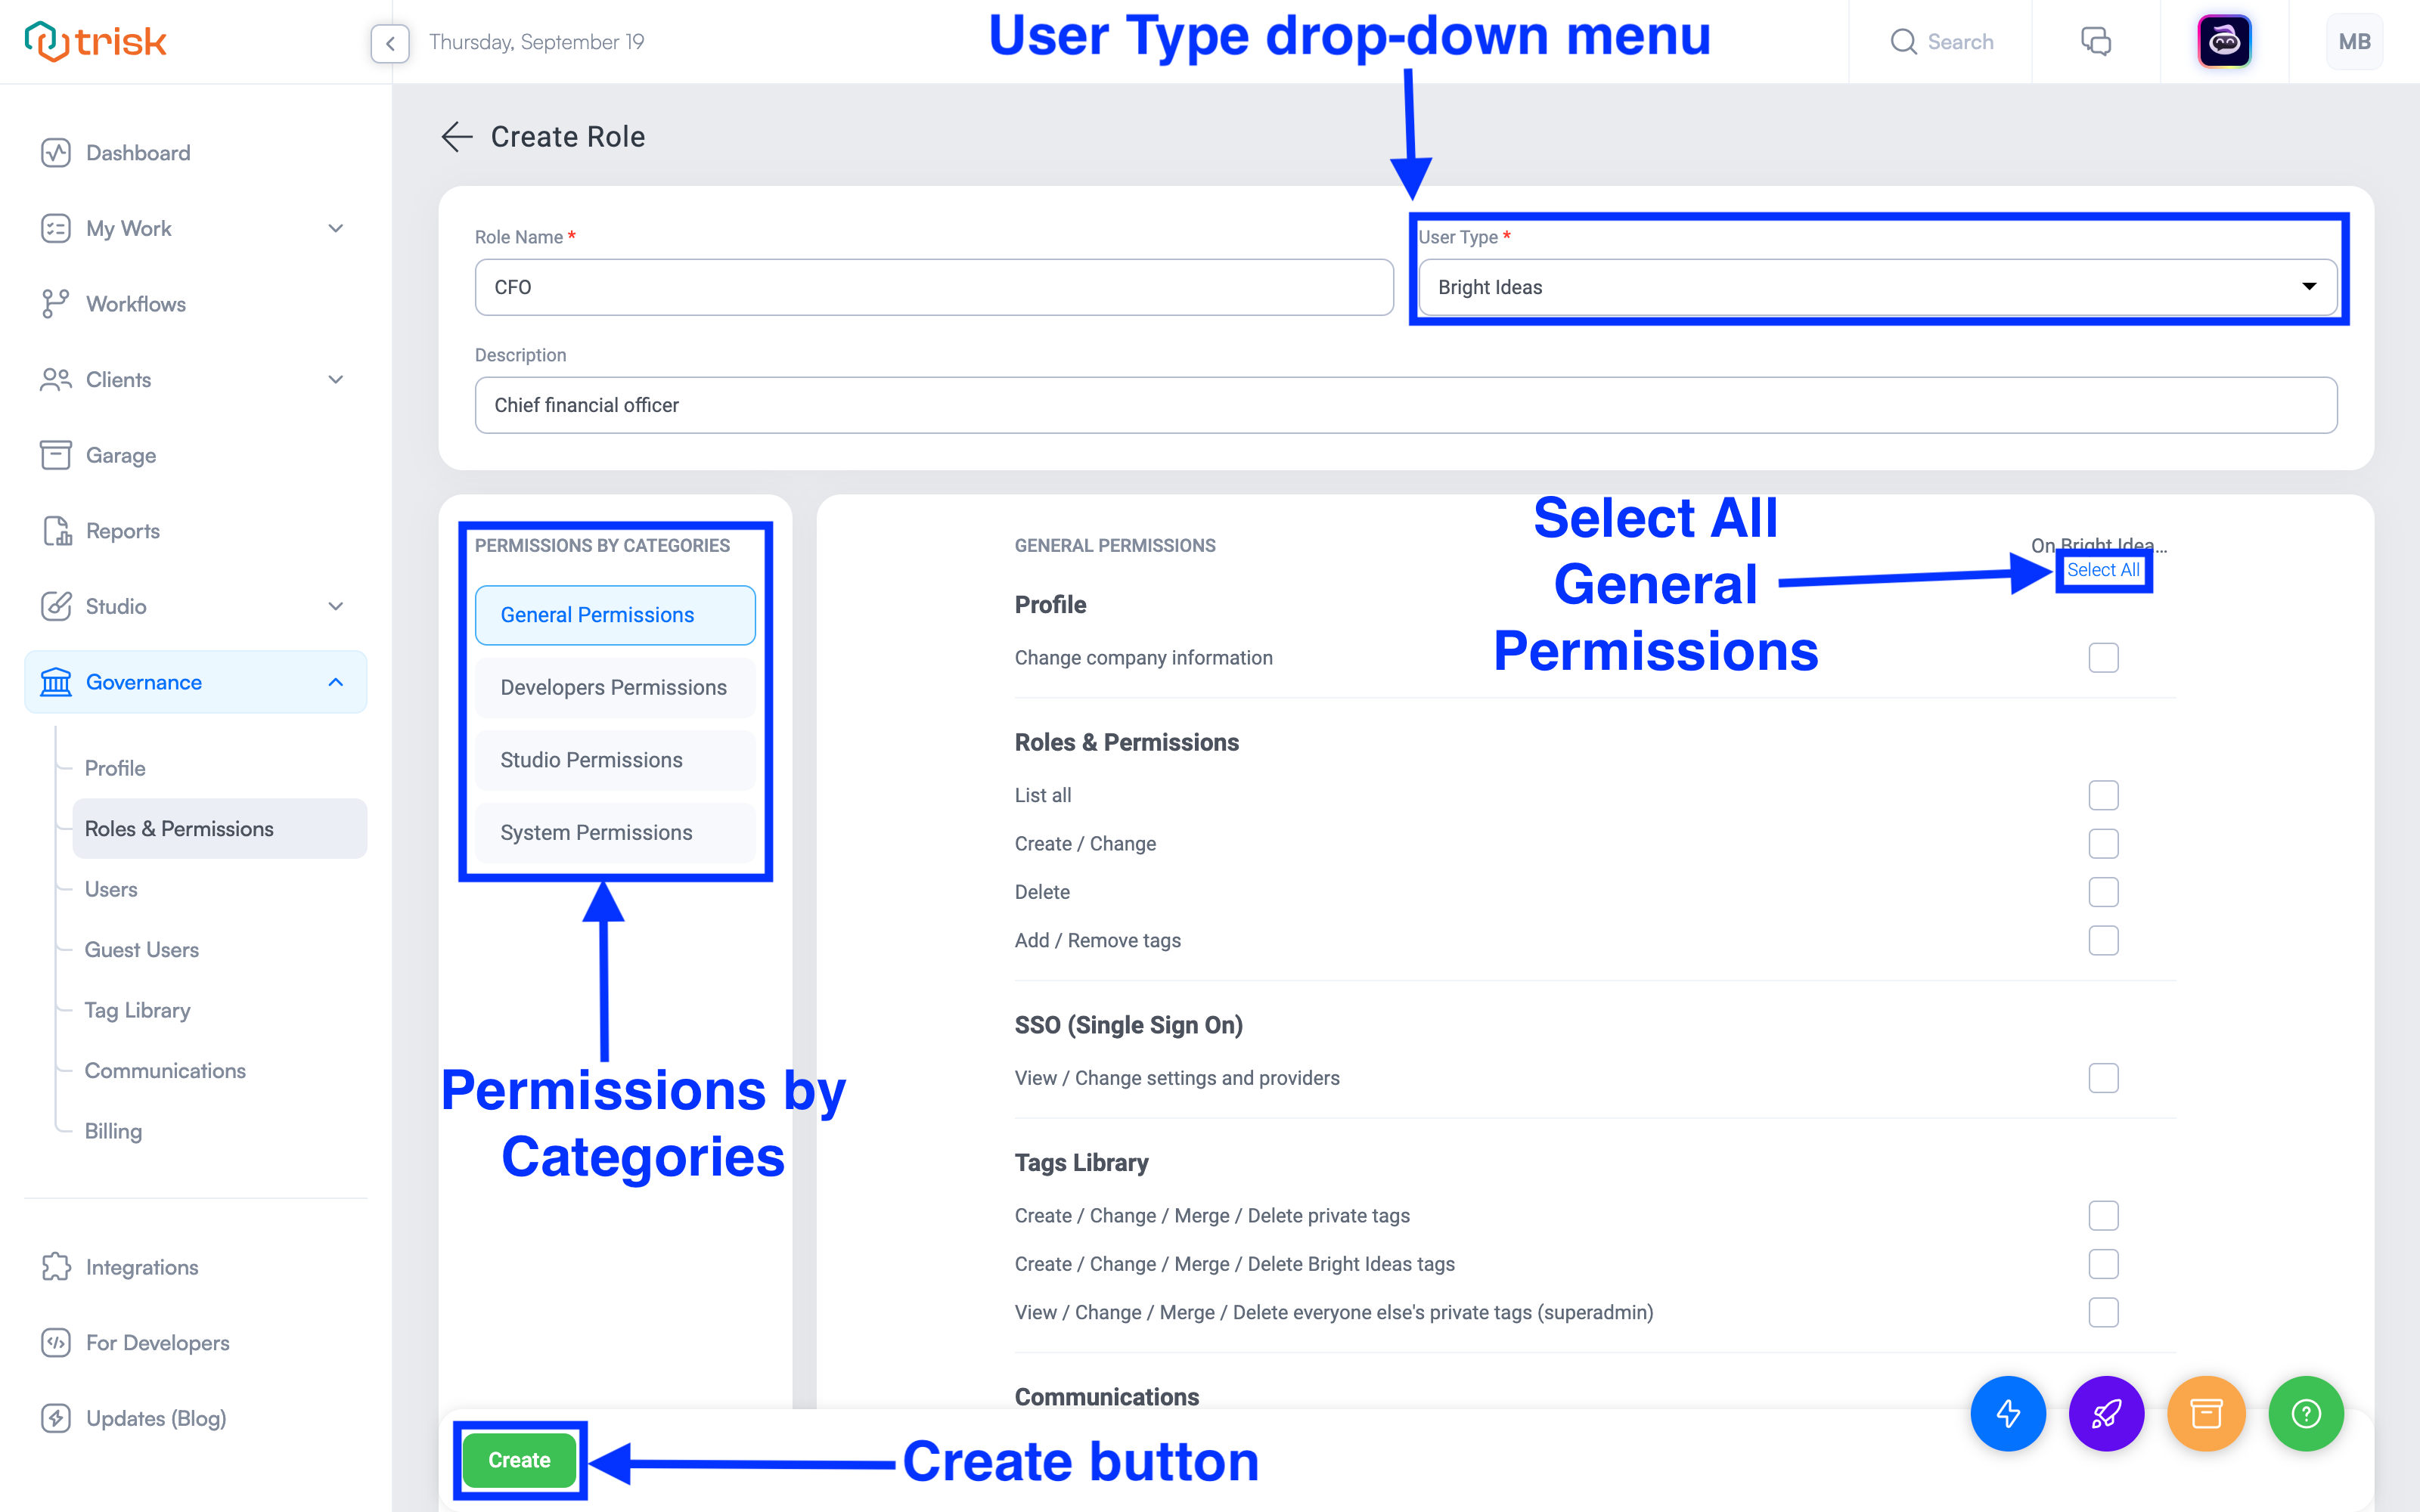
You can assign any name to a role, provided it is no longer than 255 characters. The name will be visible on the Roles list and elsewhere in Trisk, so it should be concise and clear. Click on the User Type drop-down menu and assign the User Type to either Tenant, Client, or Member when creating a role.
Trisk prioritizes data privacy, offering a variety of customizable permissions by role to ensure appropriate access and action capabilities within Trisk.
The role page is divided into two columns:
- In the Permissions by Categories column on the left, clicking a category hyperlink takes you to the detailed permissions for that item.
- In the Permissions box on the right, there are three columns with checkboxes next to each permission line item, labeled On Tenant Side, On Client Side, and On Member Side.
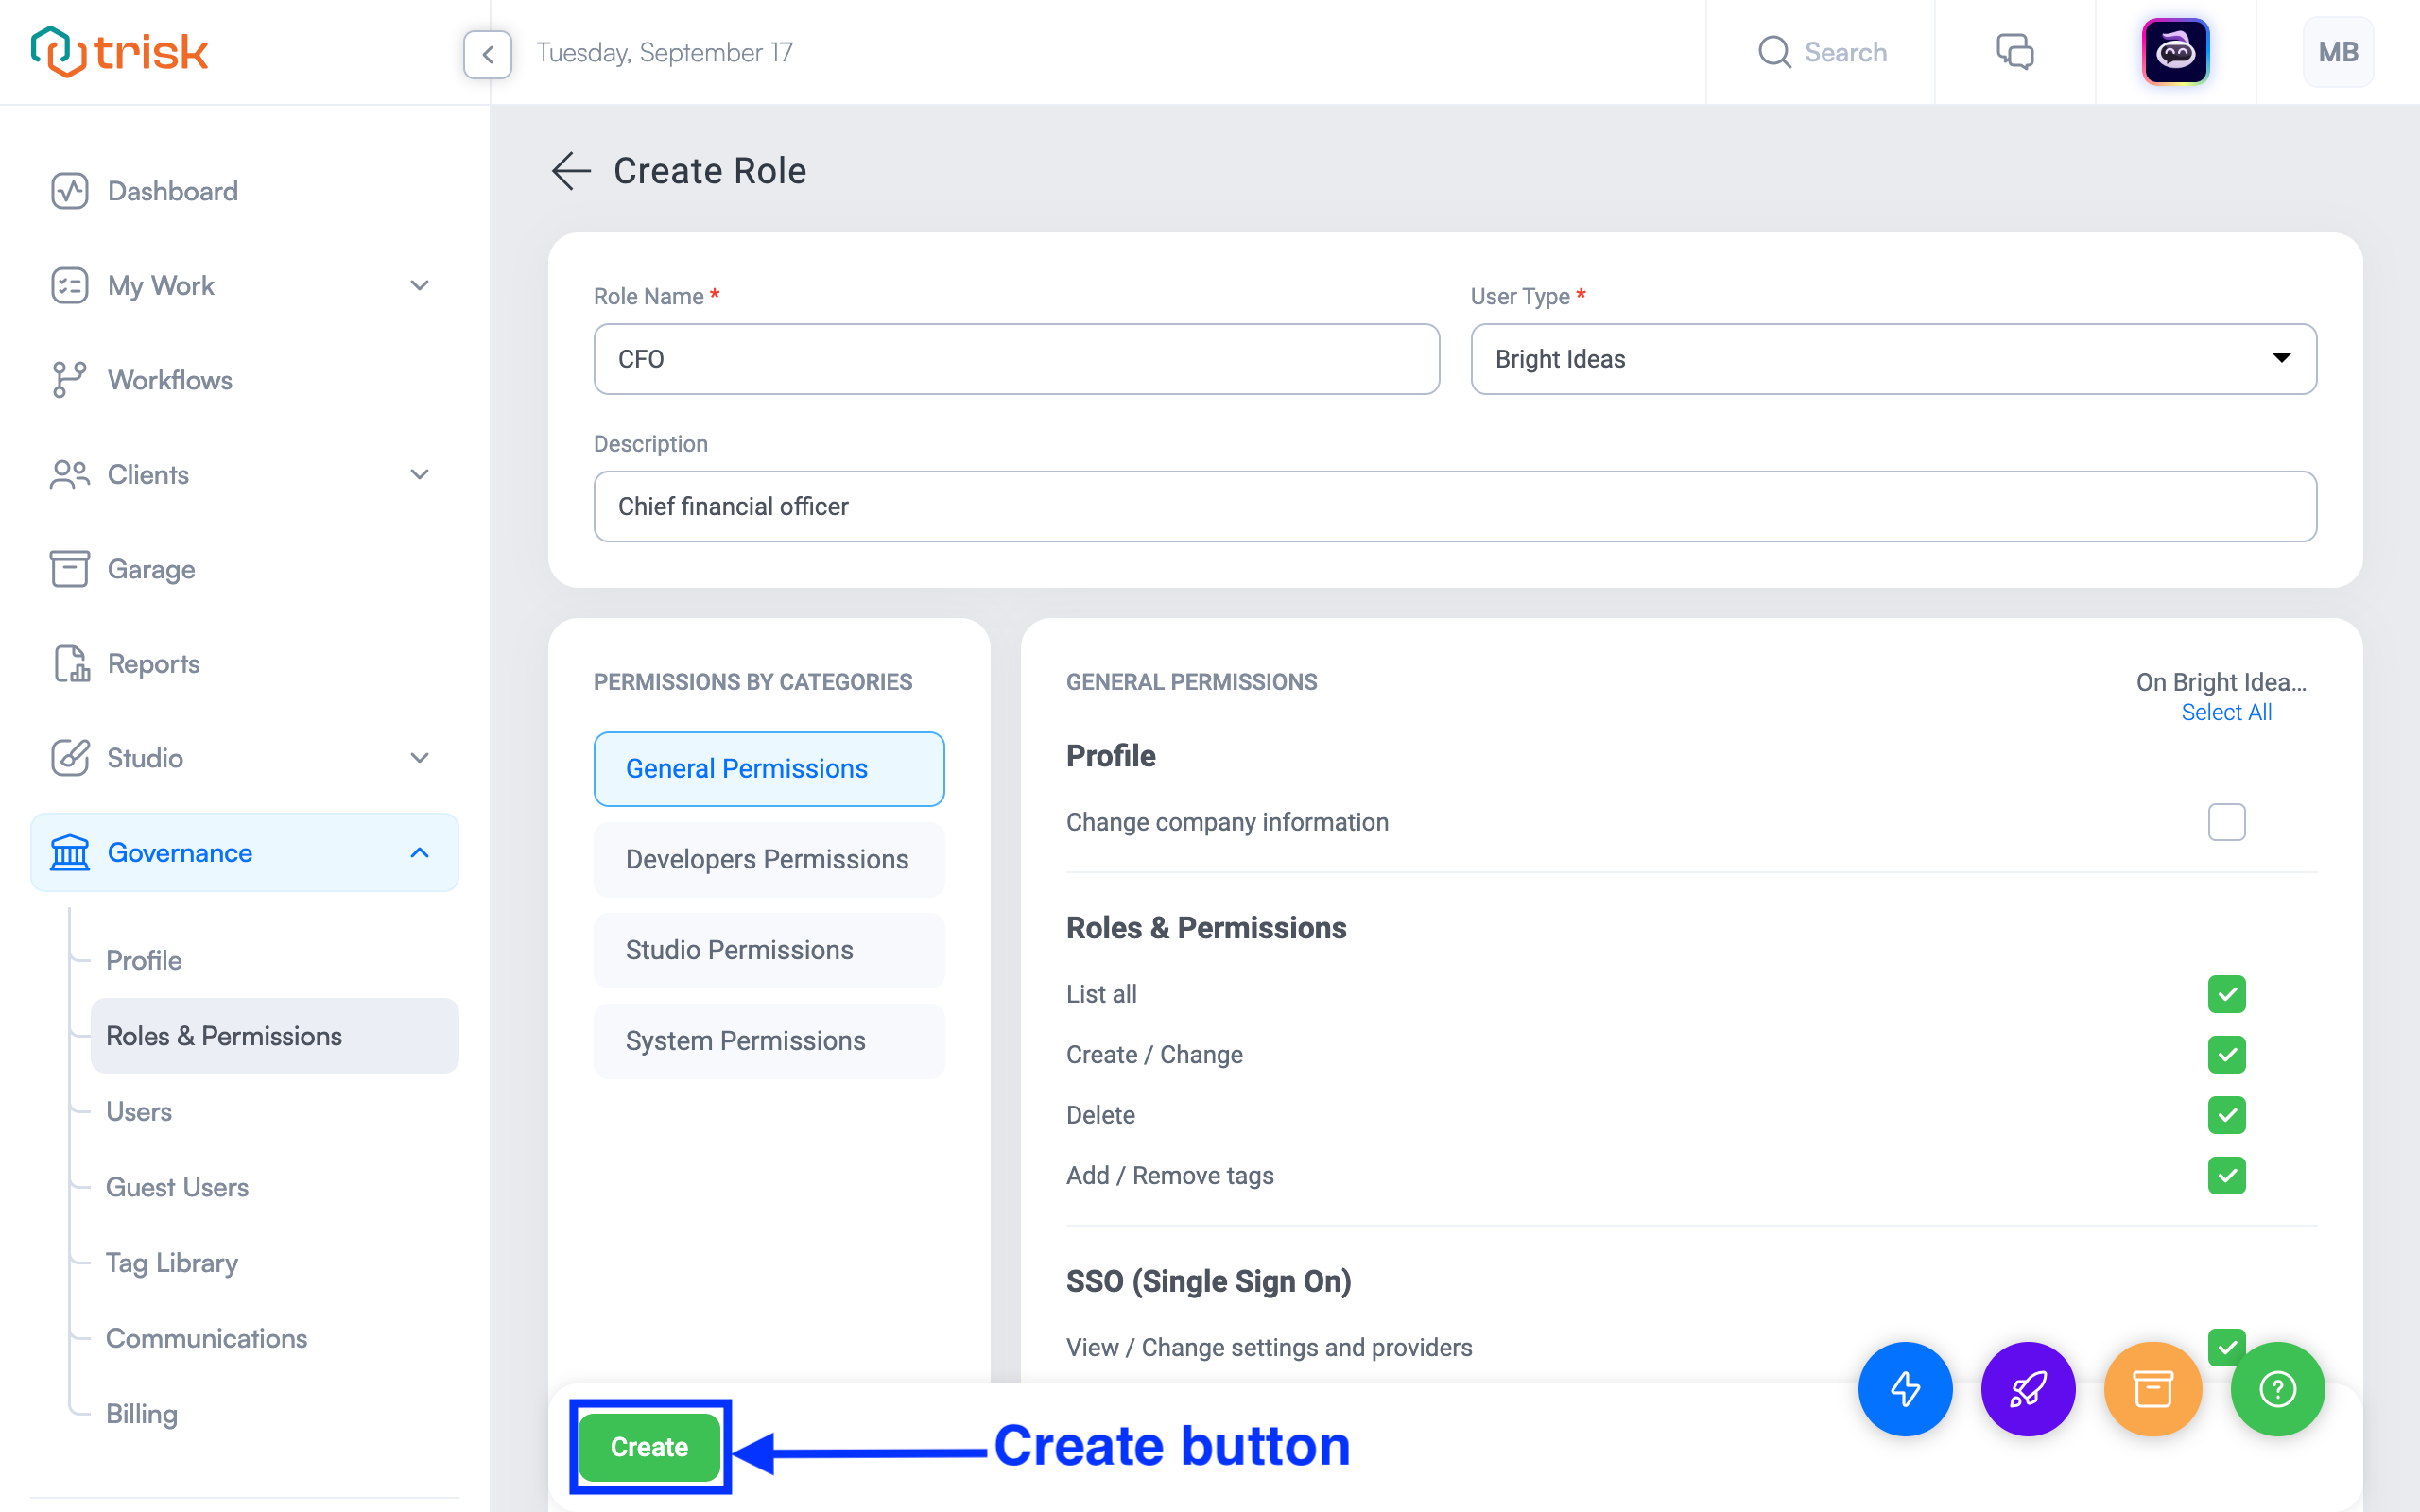
Select checkboxes in the On Tenant Side, On Client Side, or On Member Side column based on the User Type of the role. Disabled checkboxes indicate that the action is not permitted for the specific User Type. Hovering over a checkbox displays a detailed description of the permission.
Determining permissions
Initially, it is recommended to enable all permissions associated with the User Type of the role being created.
For example:
- For a Tenant Role, click the ‘Select All’ hyperlink under the On Tenant Side heading.
- For a Client Role, click the ‘Select All’ hyperlink under On Client Side.
Starting with full permissions allows initial users to explore the full range of Trisk functions. Permissions can be adjusted as you become more familiar with the platform and modify or add roles.
Finalize
After naming the role, selecting the User Type, and activating the desired permissions, click the green Create button to finalize the role.
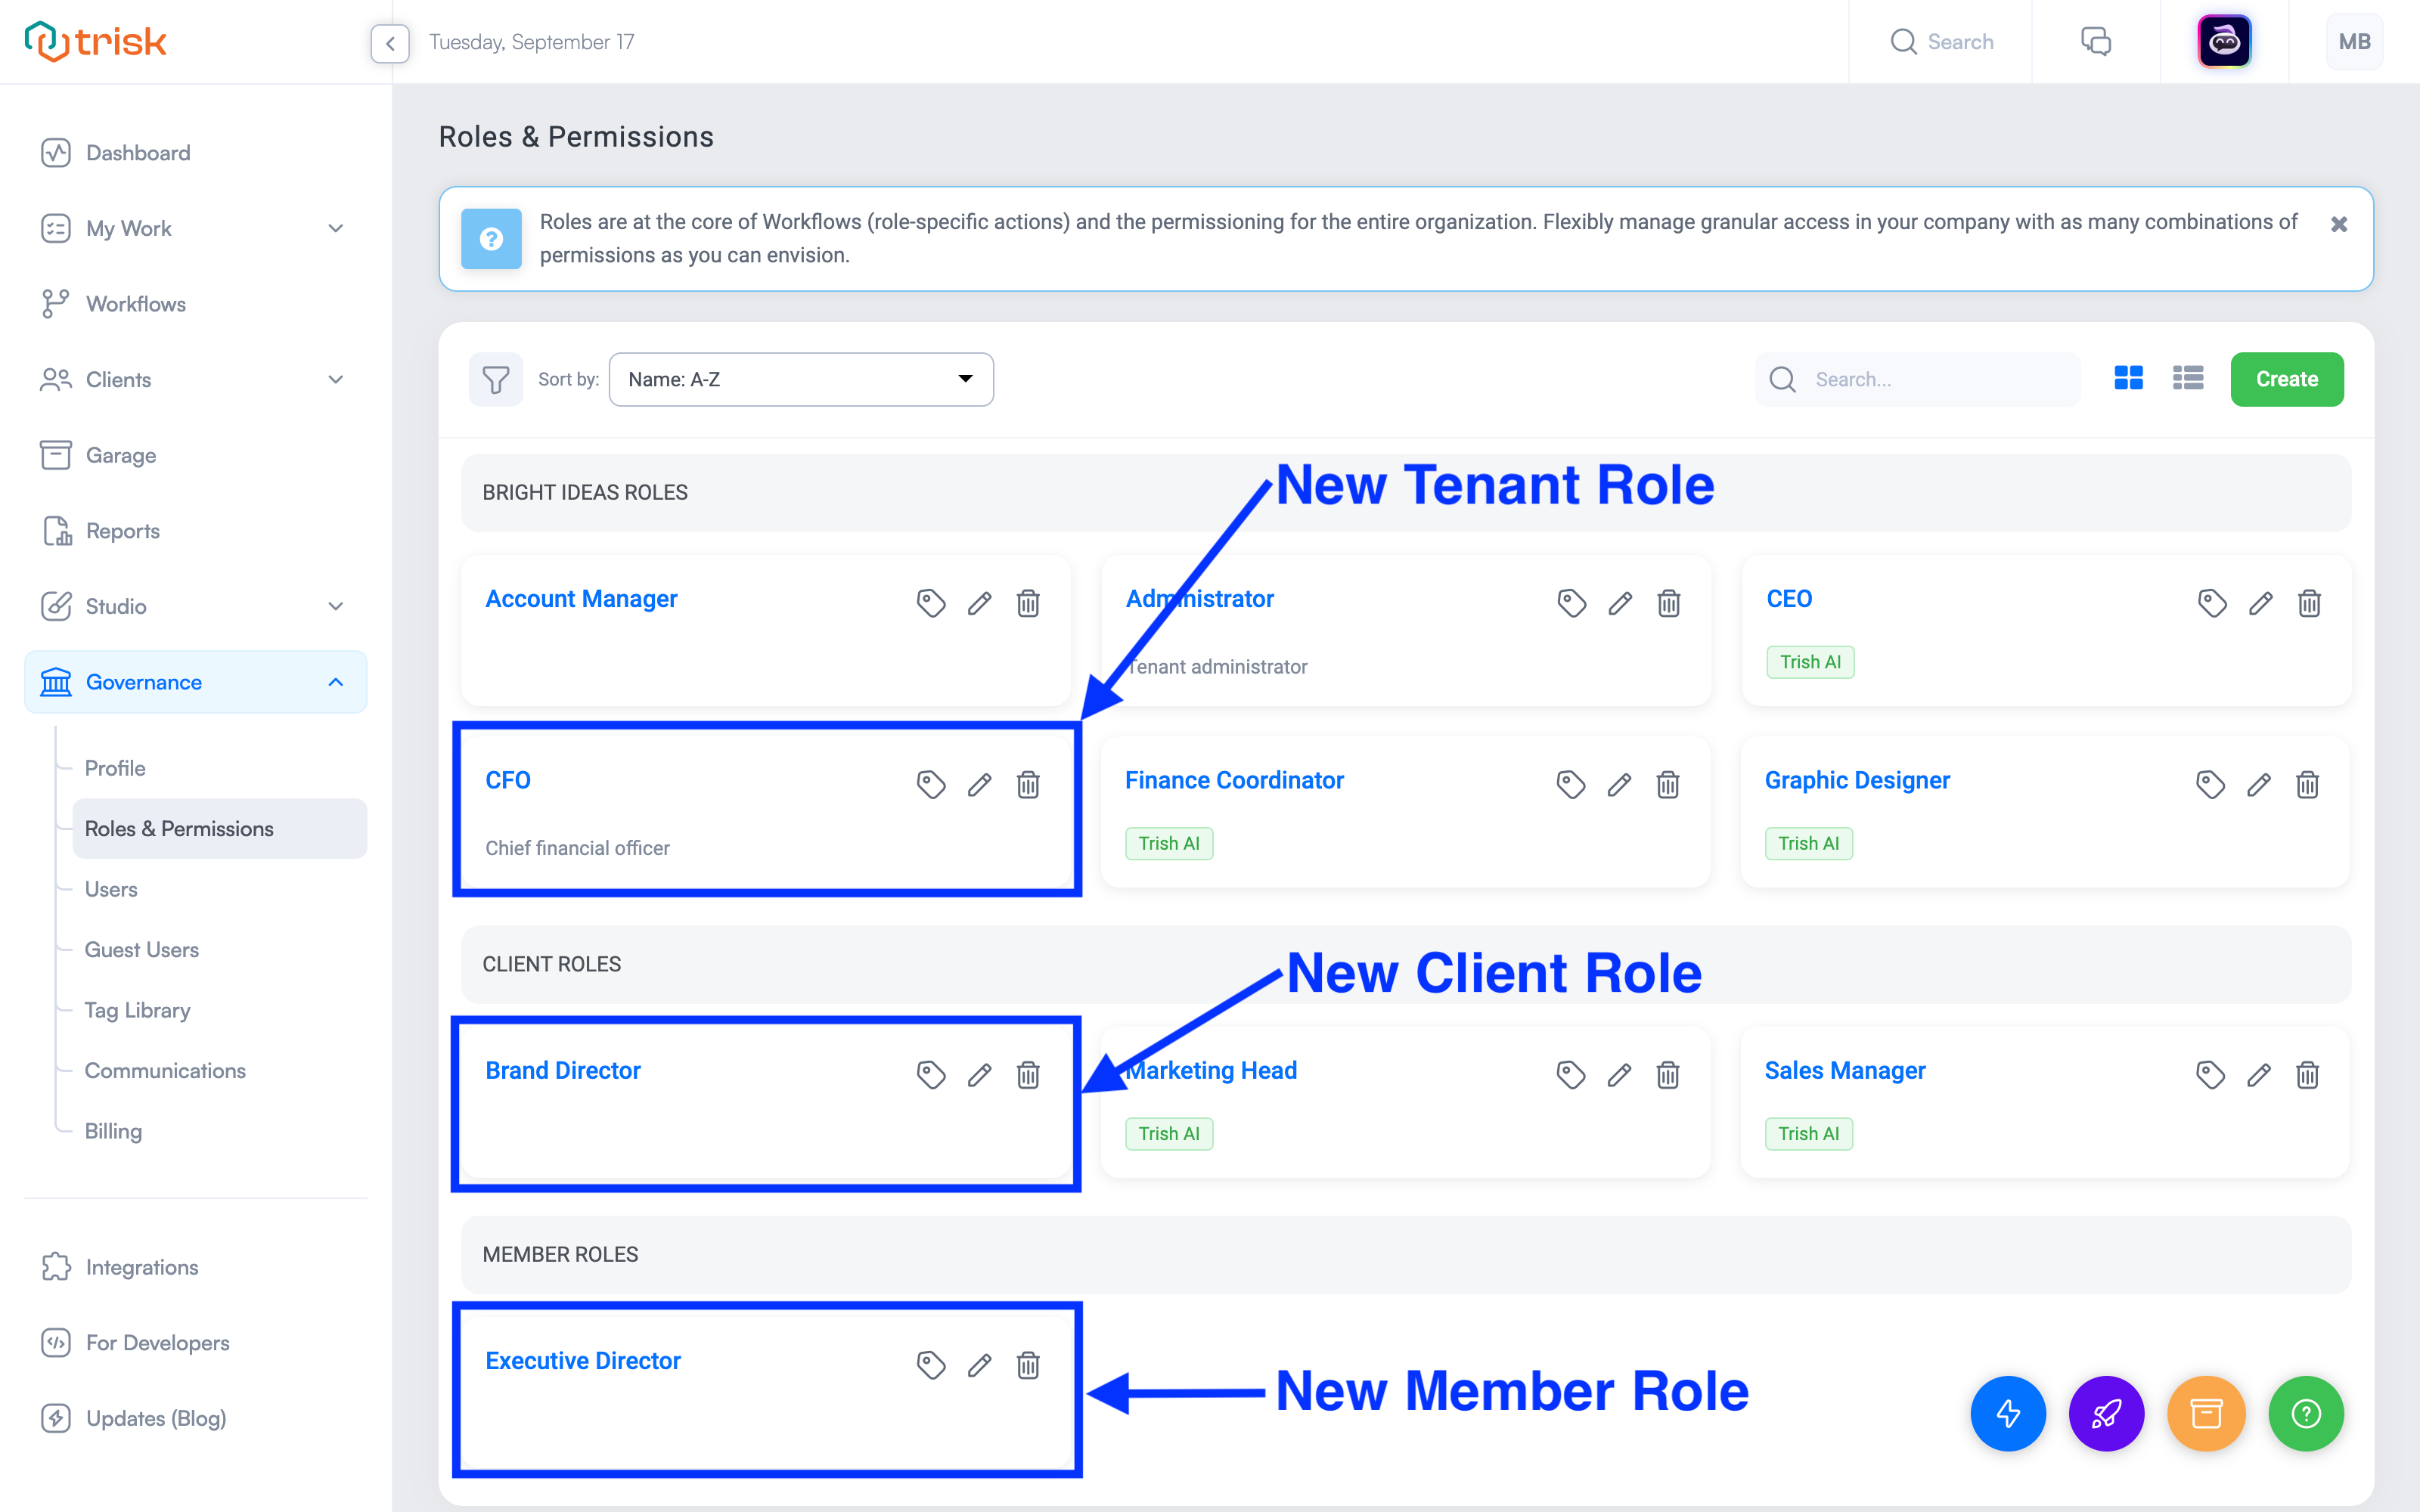
The new role will be added, and you will be redirected to the Roles page.
Each role type has its section, so Client Roles are in the Clients section, Tenant Roles in the first section, and Member Roles in the Member section.
You can edit any aspect of a role at any time by clicking the pencil icon next to the Role Name. This opens the Edit Role page (similar to the Create Role page), where you can modify your selections. After making changes, click the green Update button to save and return to the Roles page.