Form Task
Task Execution: Form Task
Form tasks are one of the most commonly used task types within Trisk, designed to collect structured data efficiently. As a user, you can access and complete Form tasks through several methods:
- Dashboard: Locate your assigned Form tasks directly on your dashboard.
- Global Menu: Navigate to My Work > My Tasks to view all tasks assigned to you.
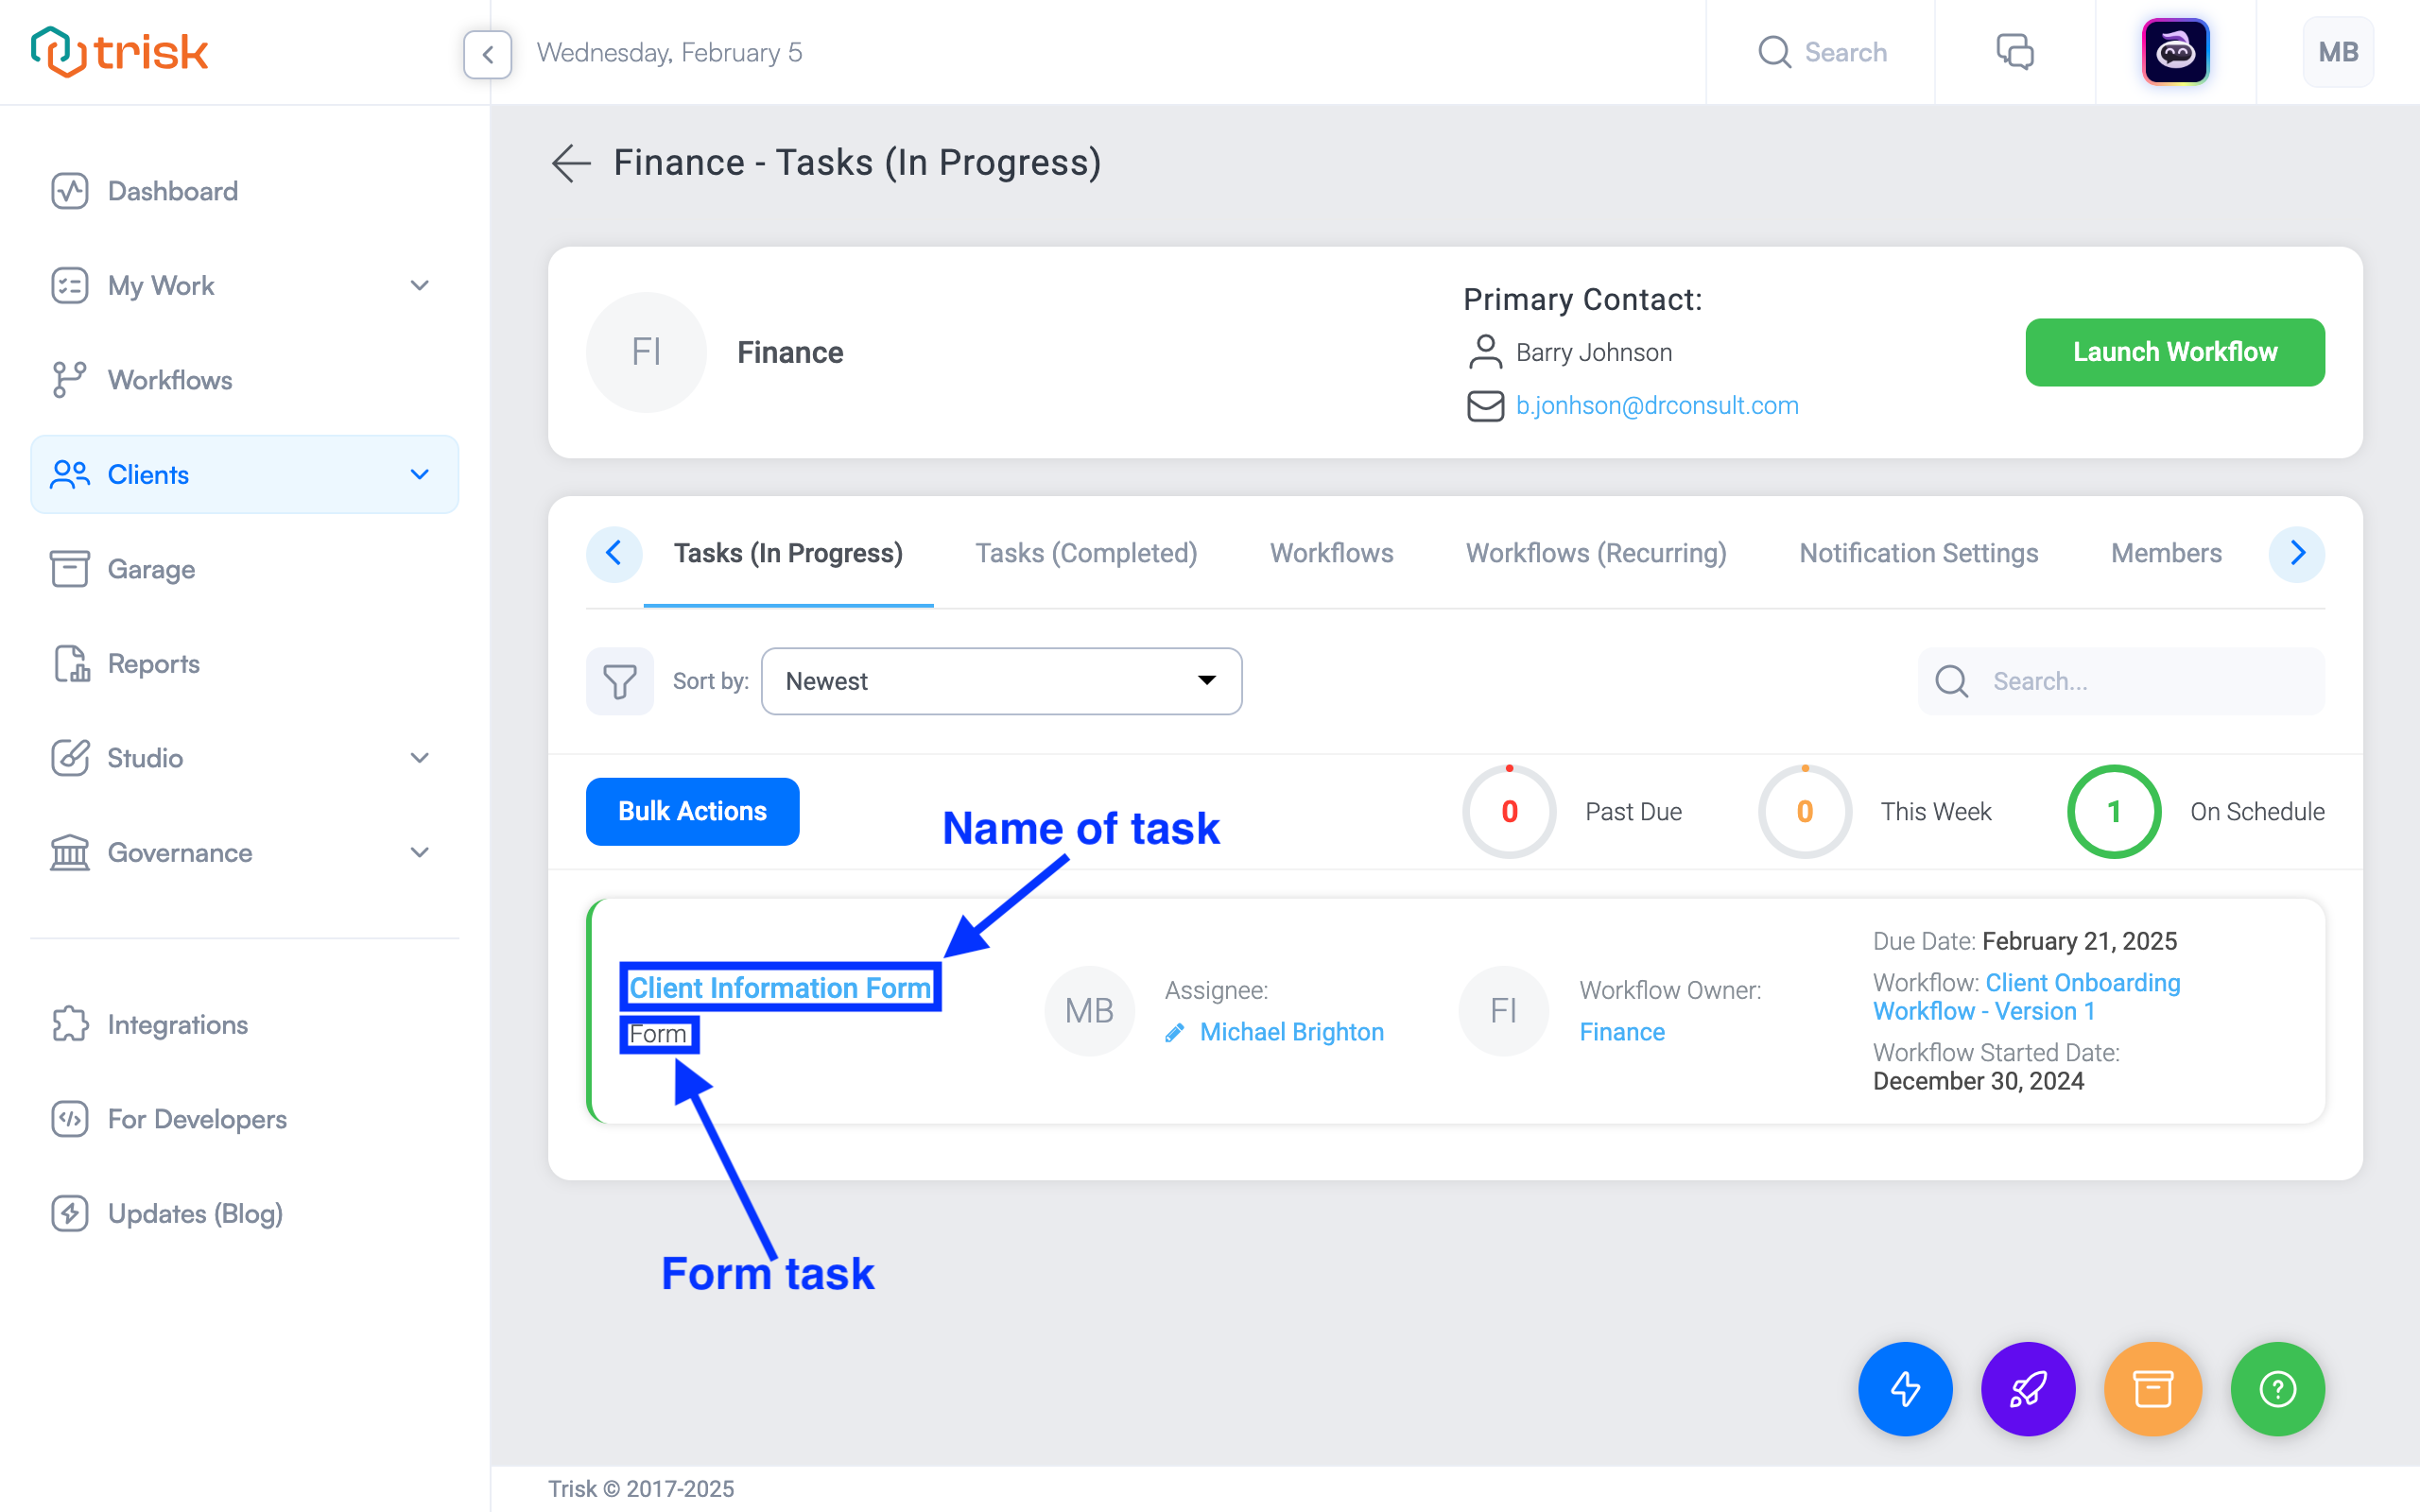
- Client Menu: Go to My Clients > Specific Client > Tasks (In Progress) to access tasks associated with a specific client.
- Email Notification: Use the link in your task notification email to open the task directly.
To navigate a Form, click on the Form Task Name from any of the screens listed above, which will take you to the Form Task.
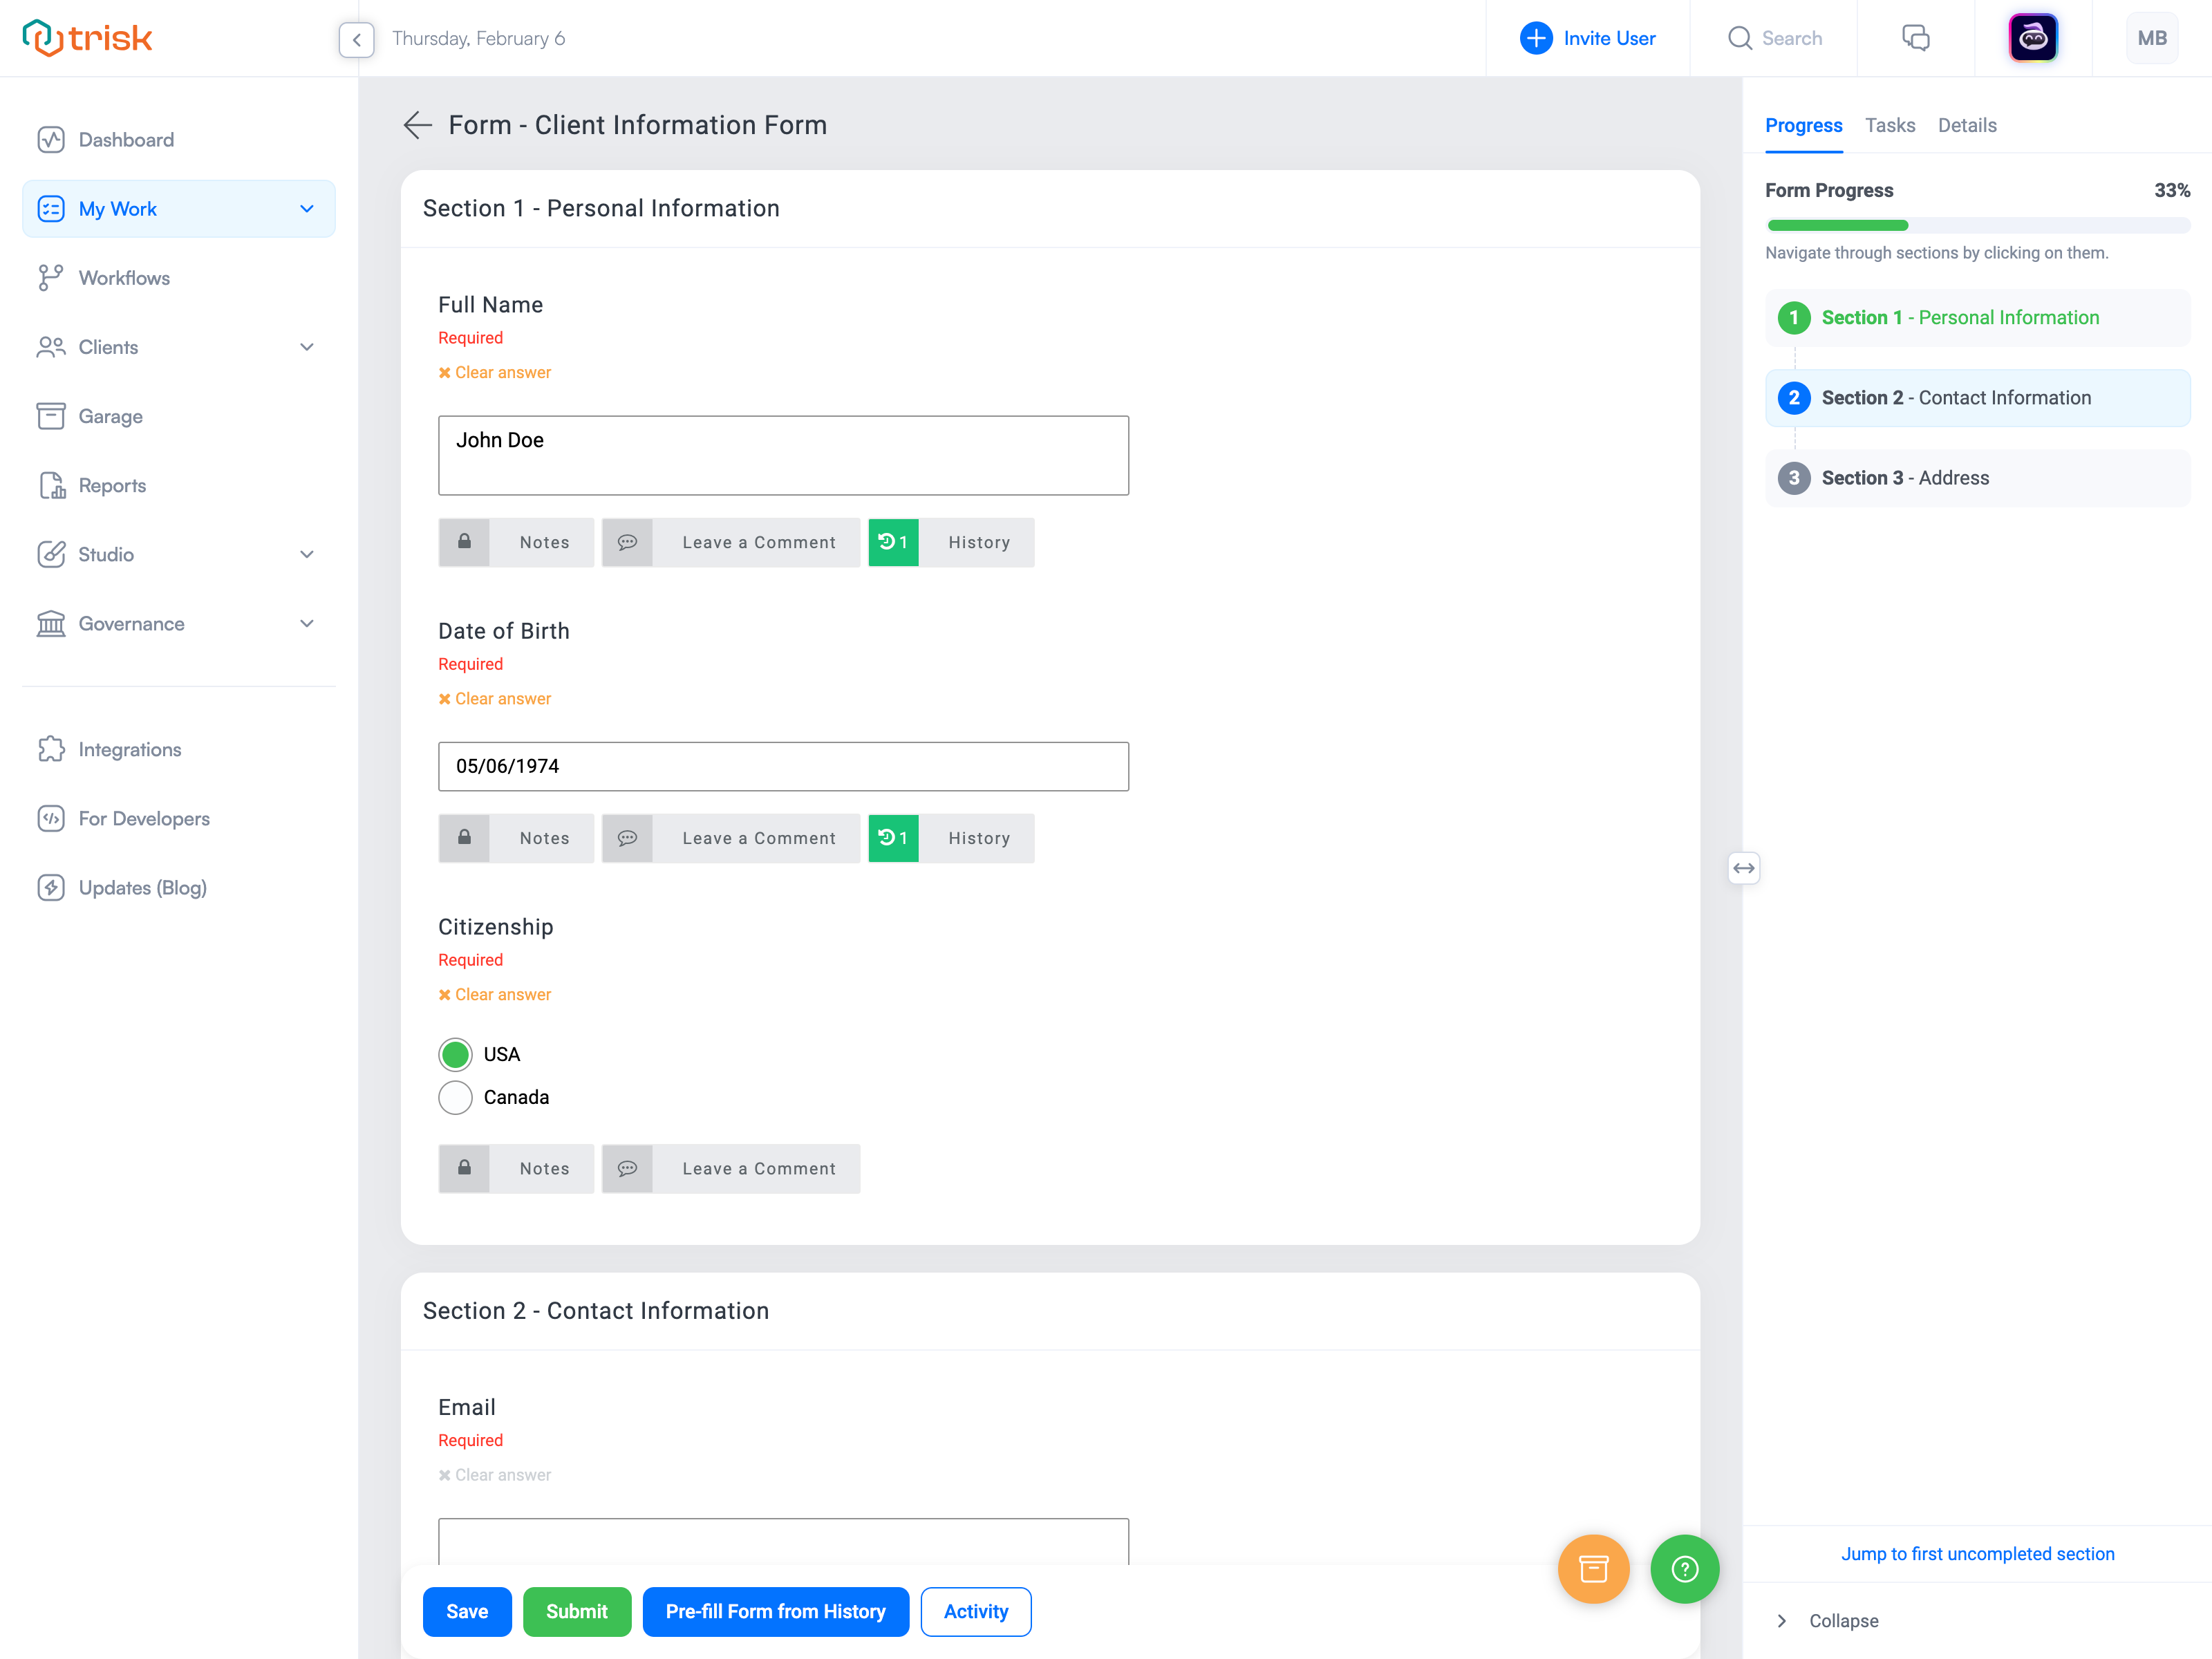
Buttons in Form Tasks
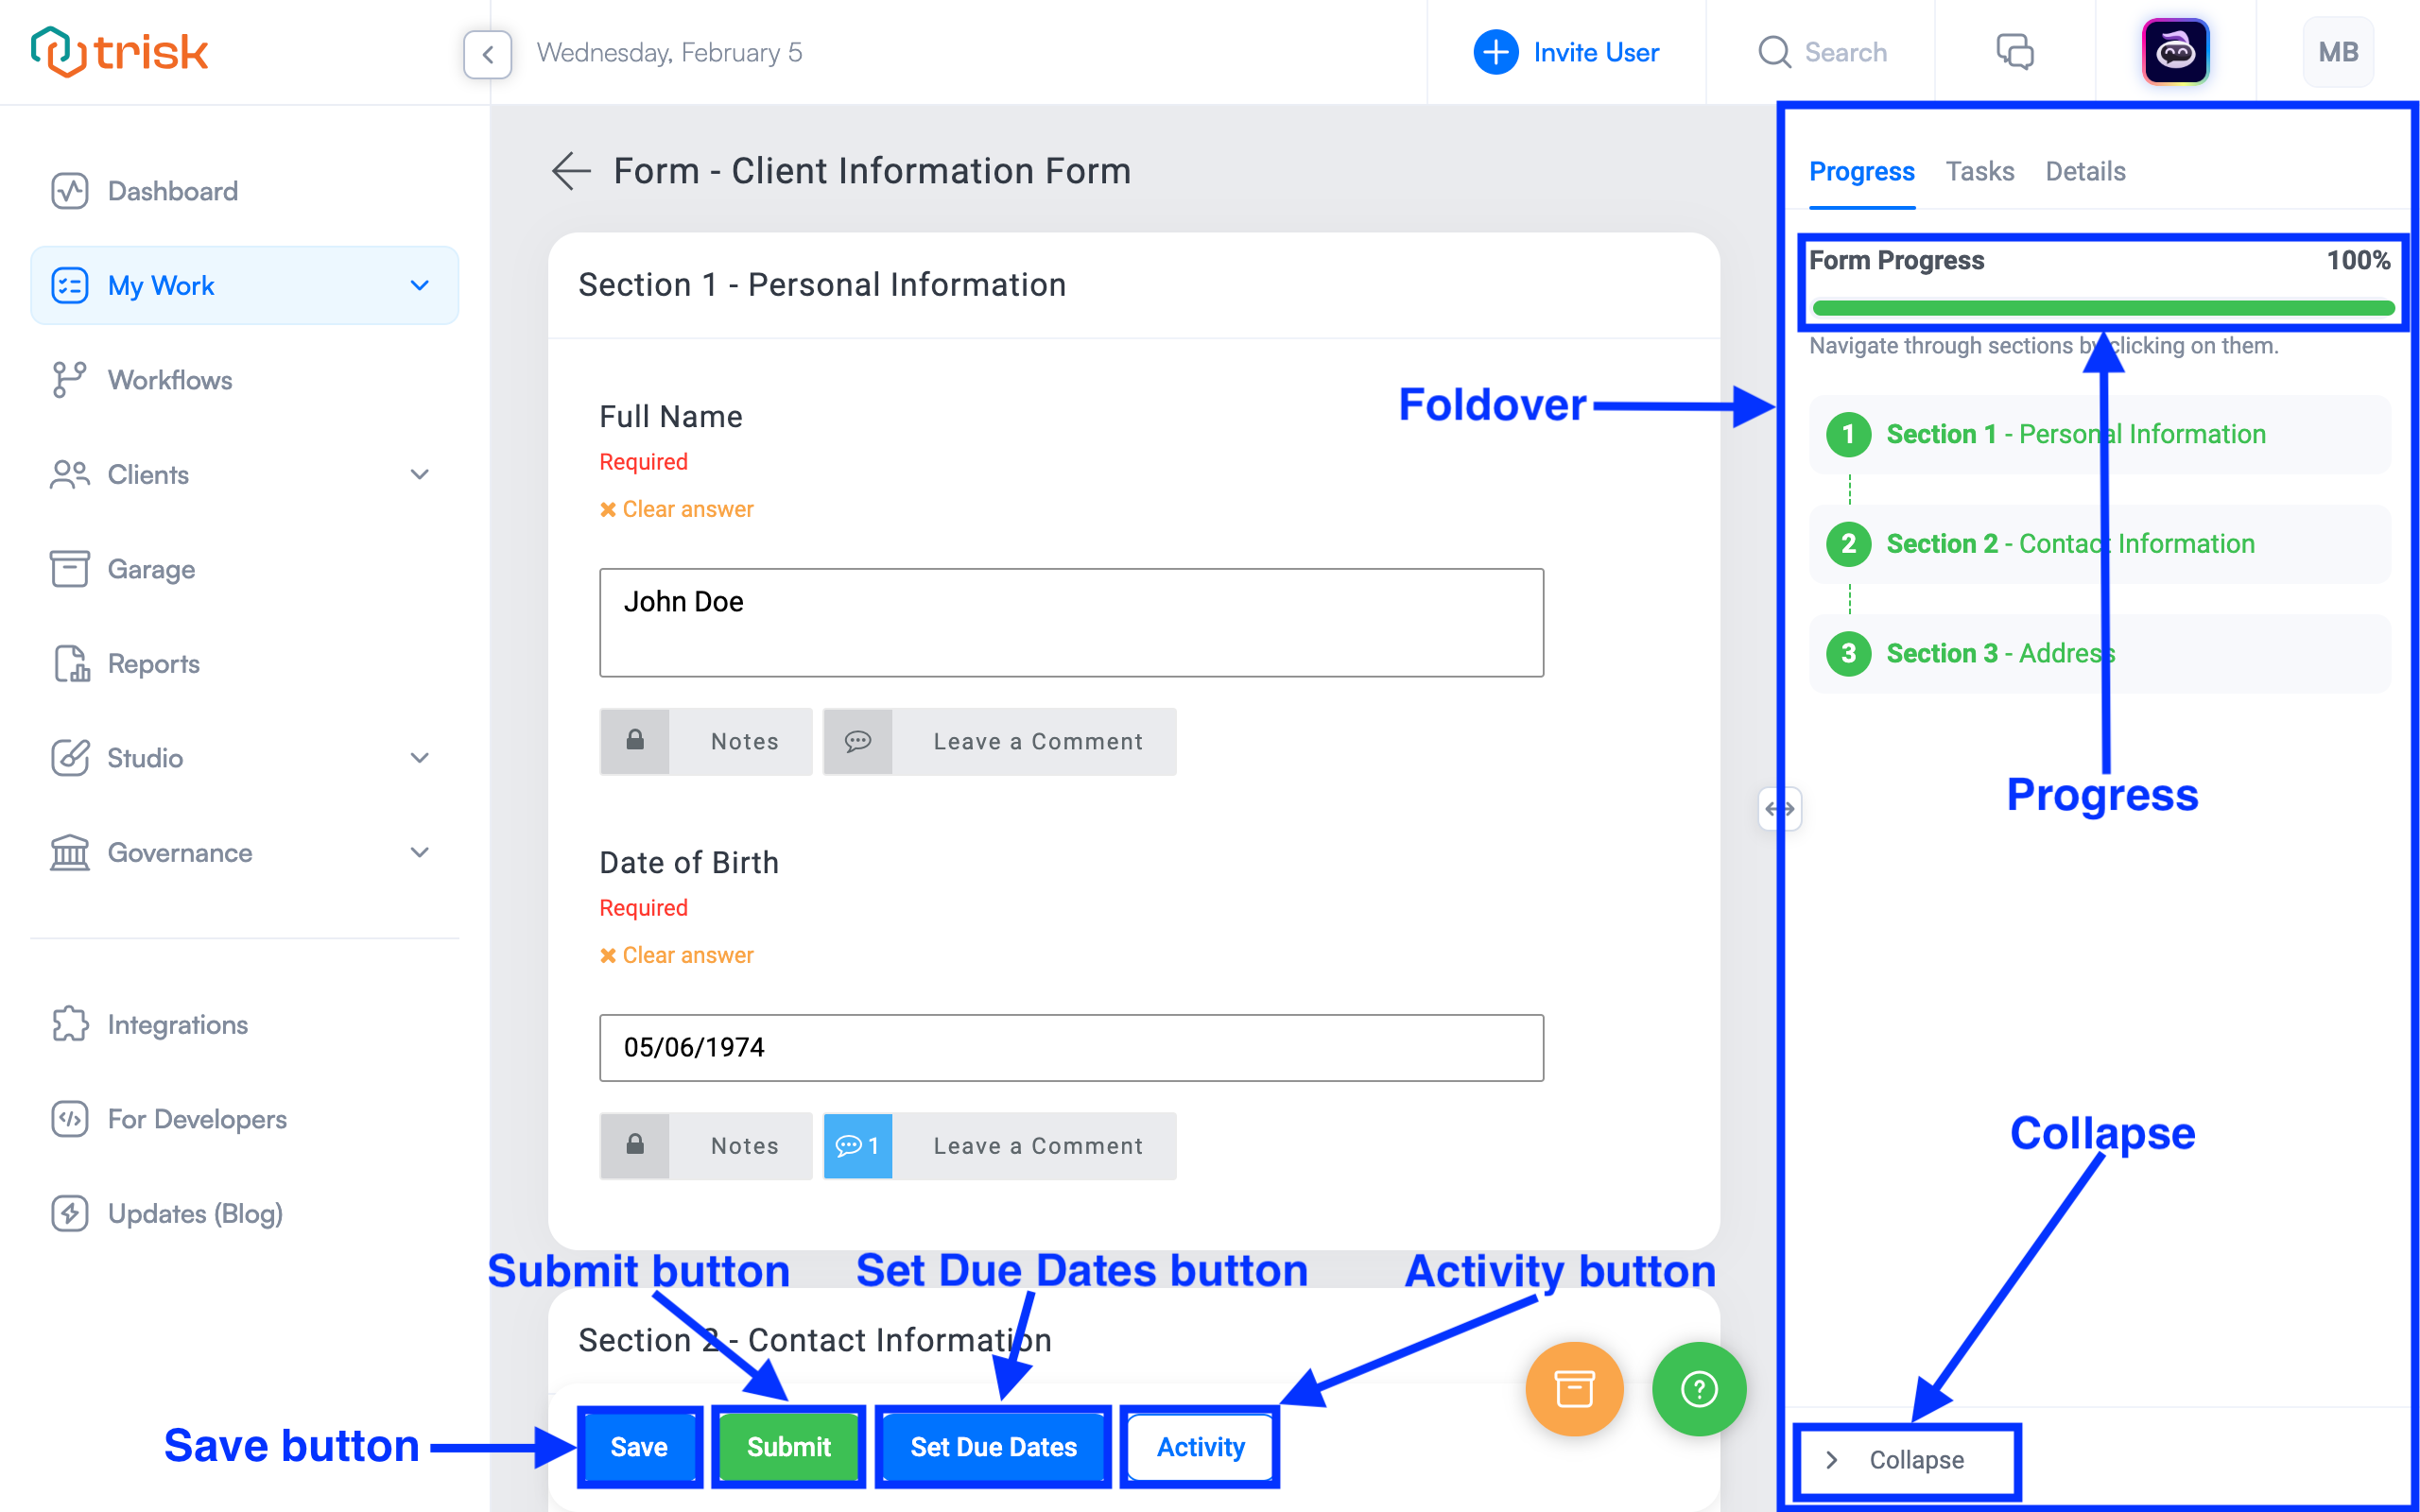
When accessing a launched Form task, several buttons are available at the bottom of the Form, each serving specific functions:
Save
A blue button that allows you to save your progress. Please note that all input is automatically saved, so clicking this button is optional.
Submit
Once you've completed all fields, click this green button to finalize and submit your form.
Set Due Dates
A blue button will appear if the Due Date Management feature is activated in the workflow.
You can use Set Due Dates button to adjust due dates through an interactive Gantt chart:
- View the chart broken down by stages with keys reflecting status and deadlines.
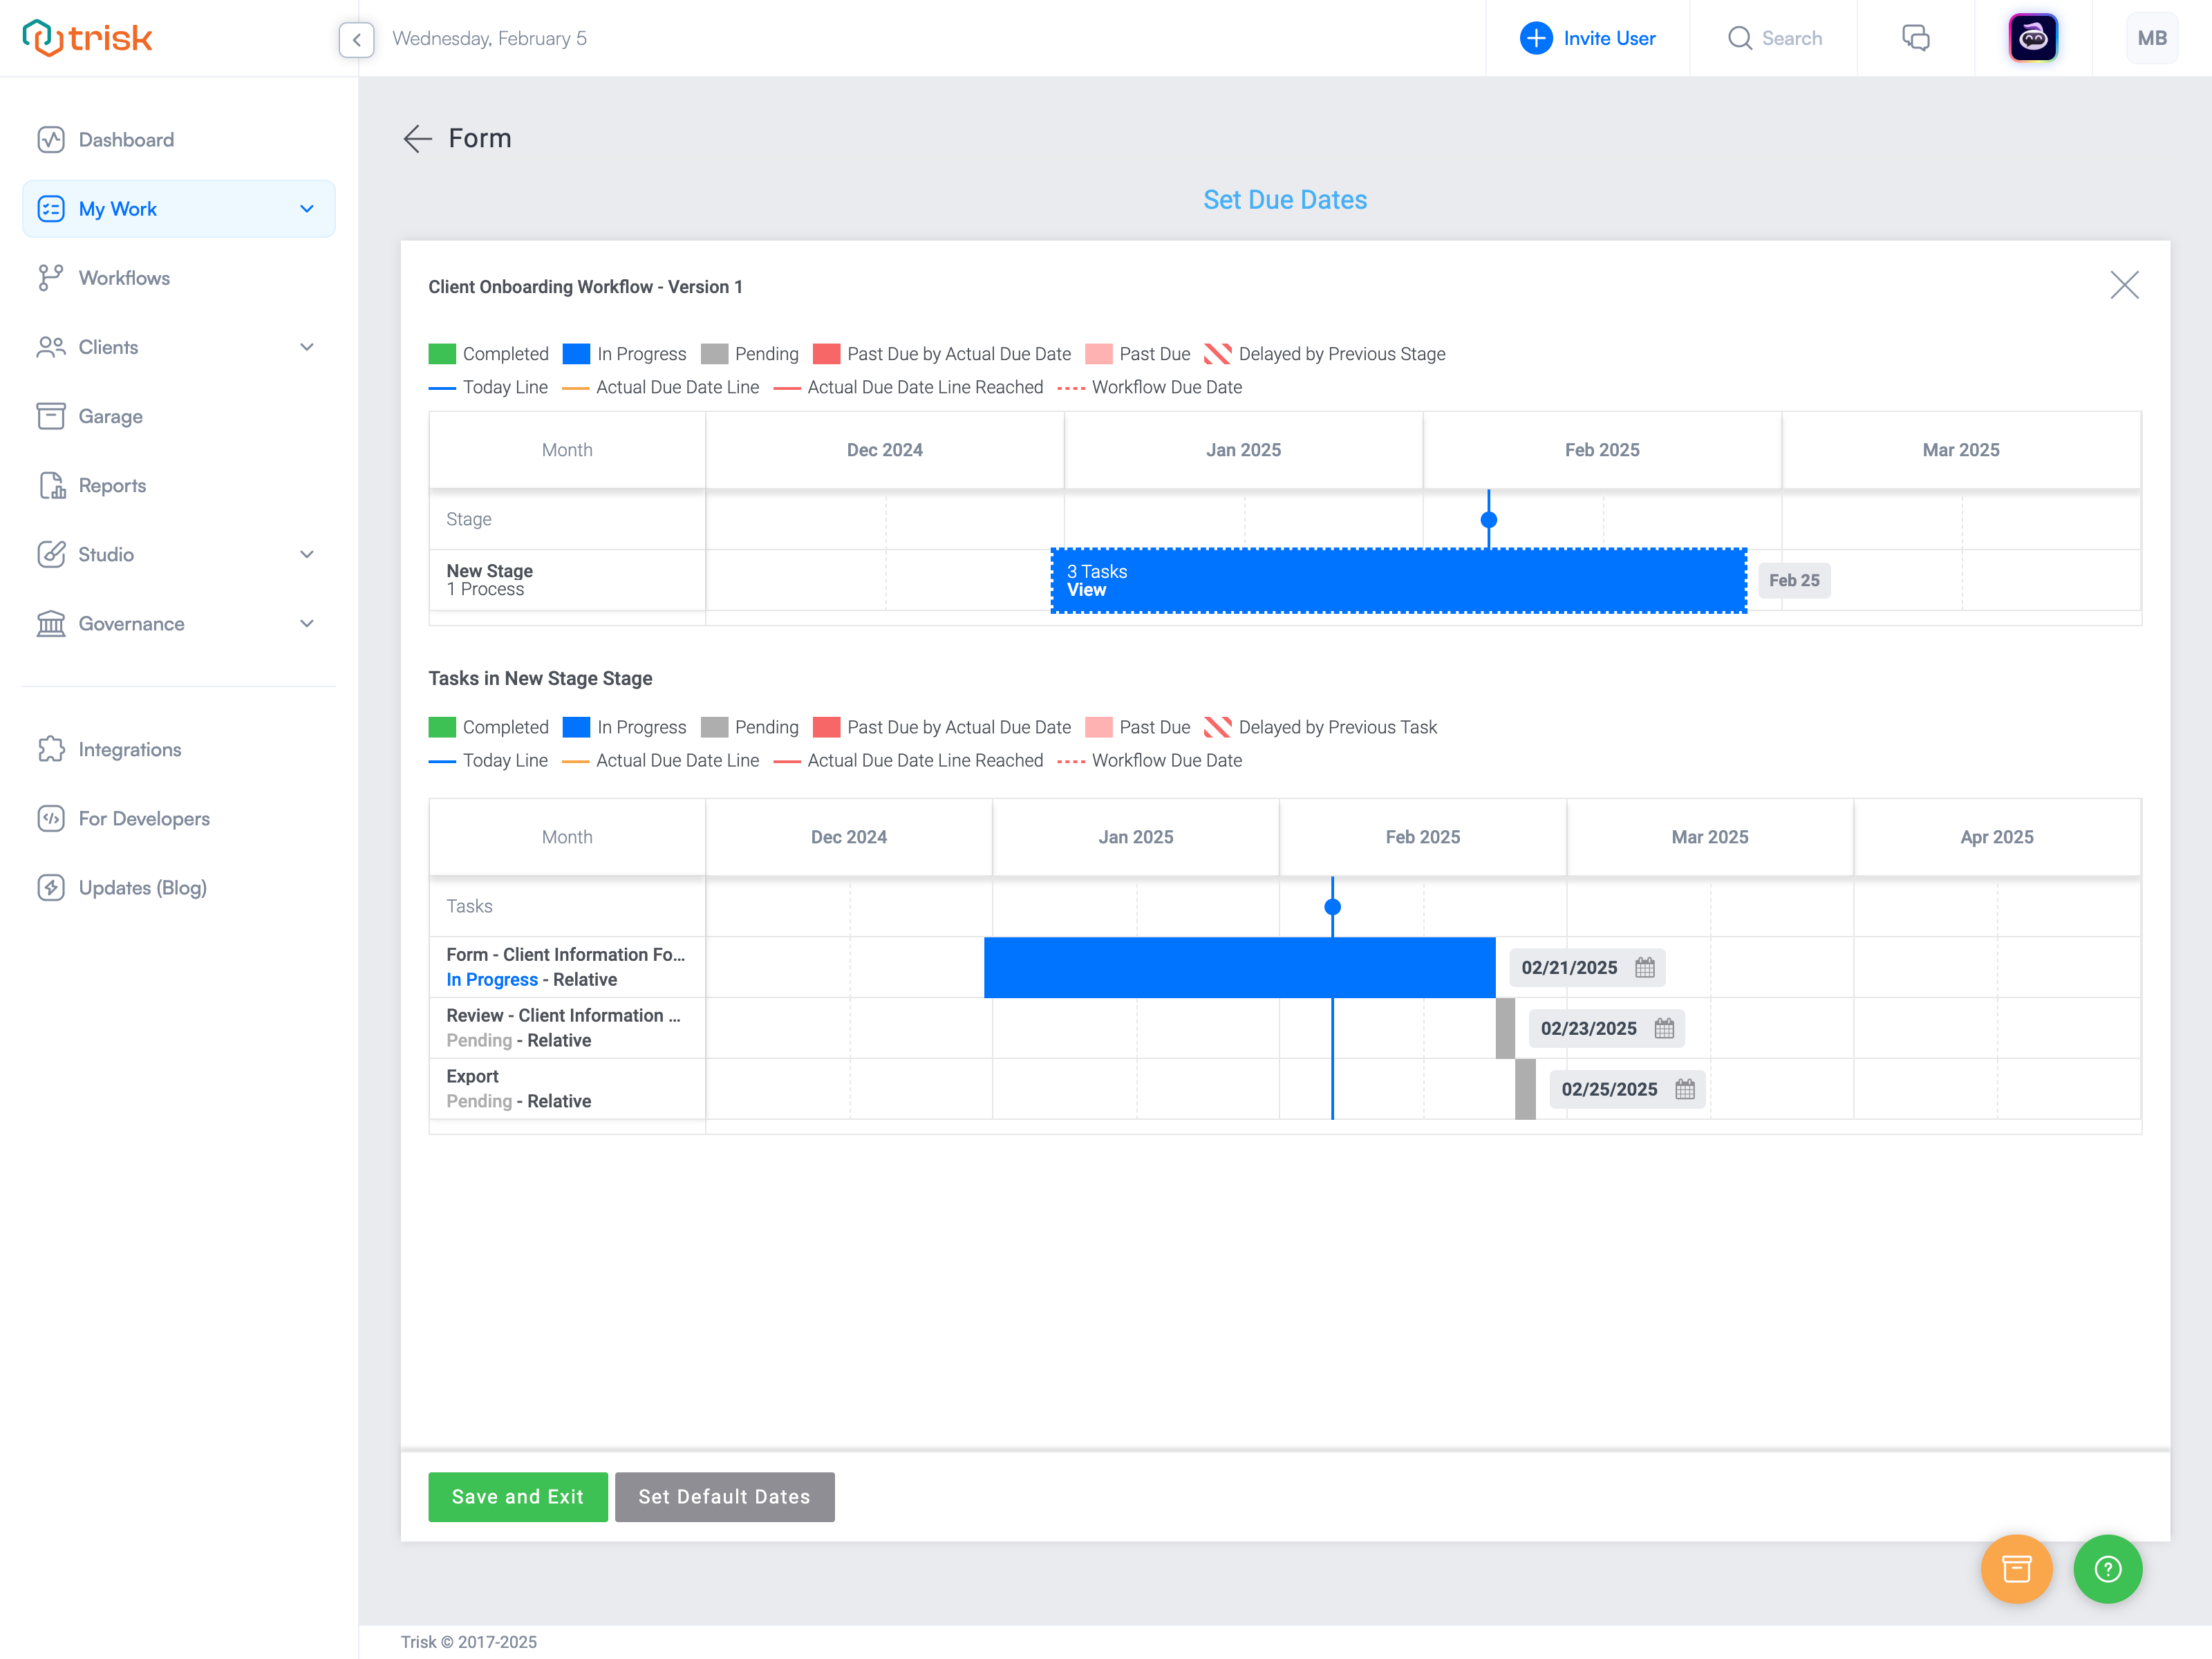
- Select a stage and review or update the due date by clicking the calendar icon.
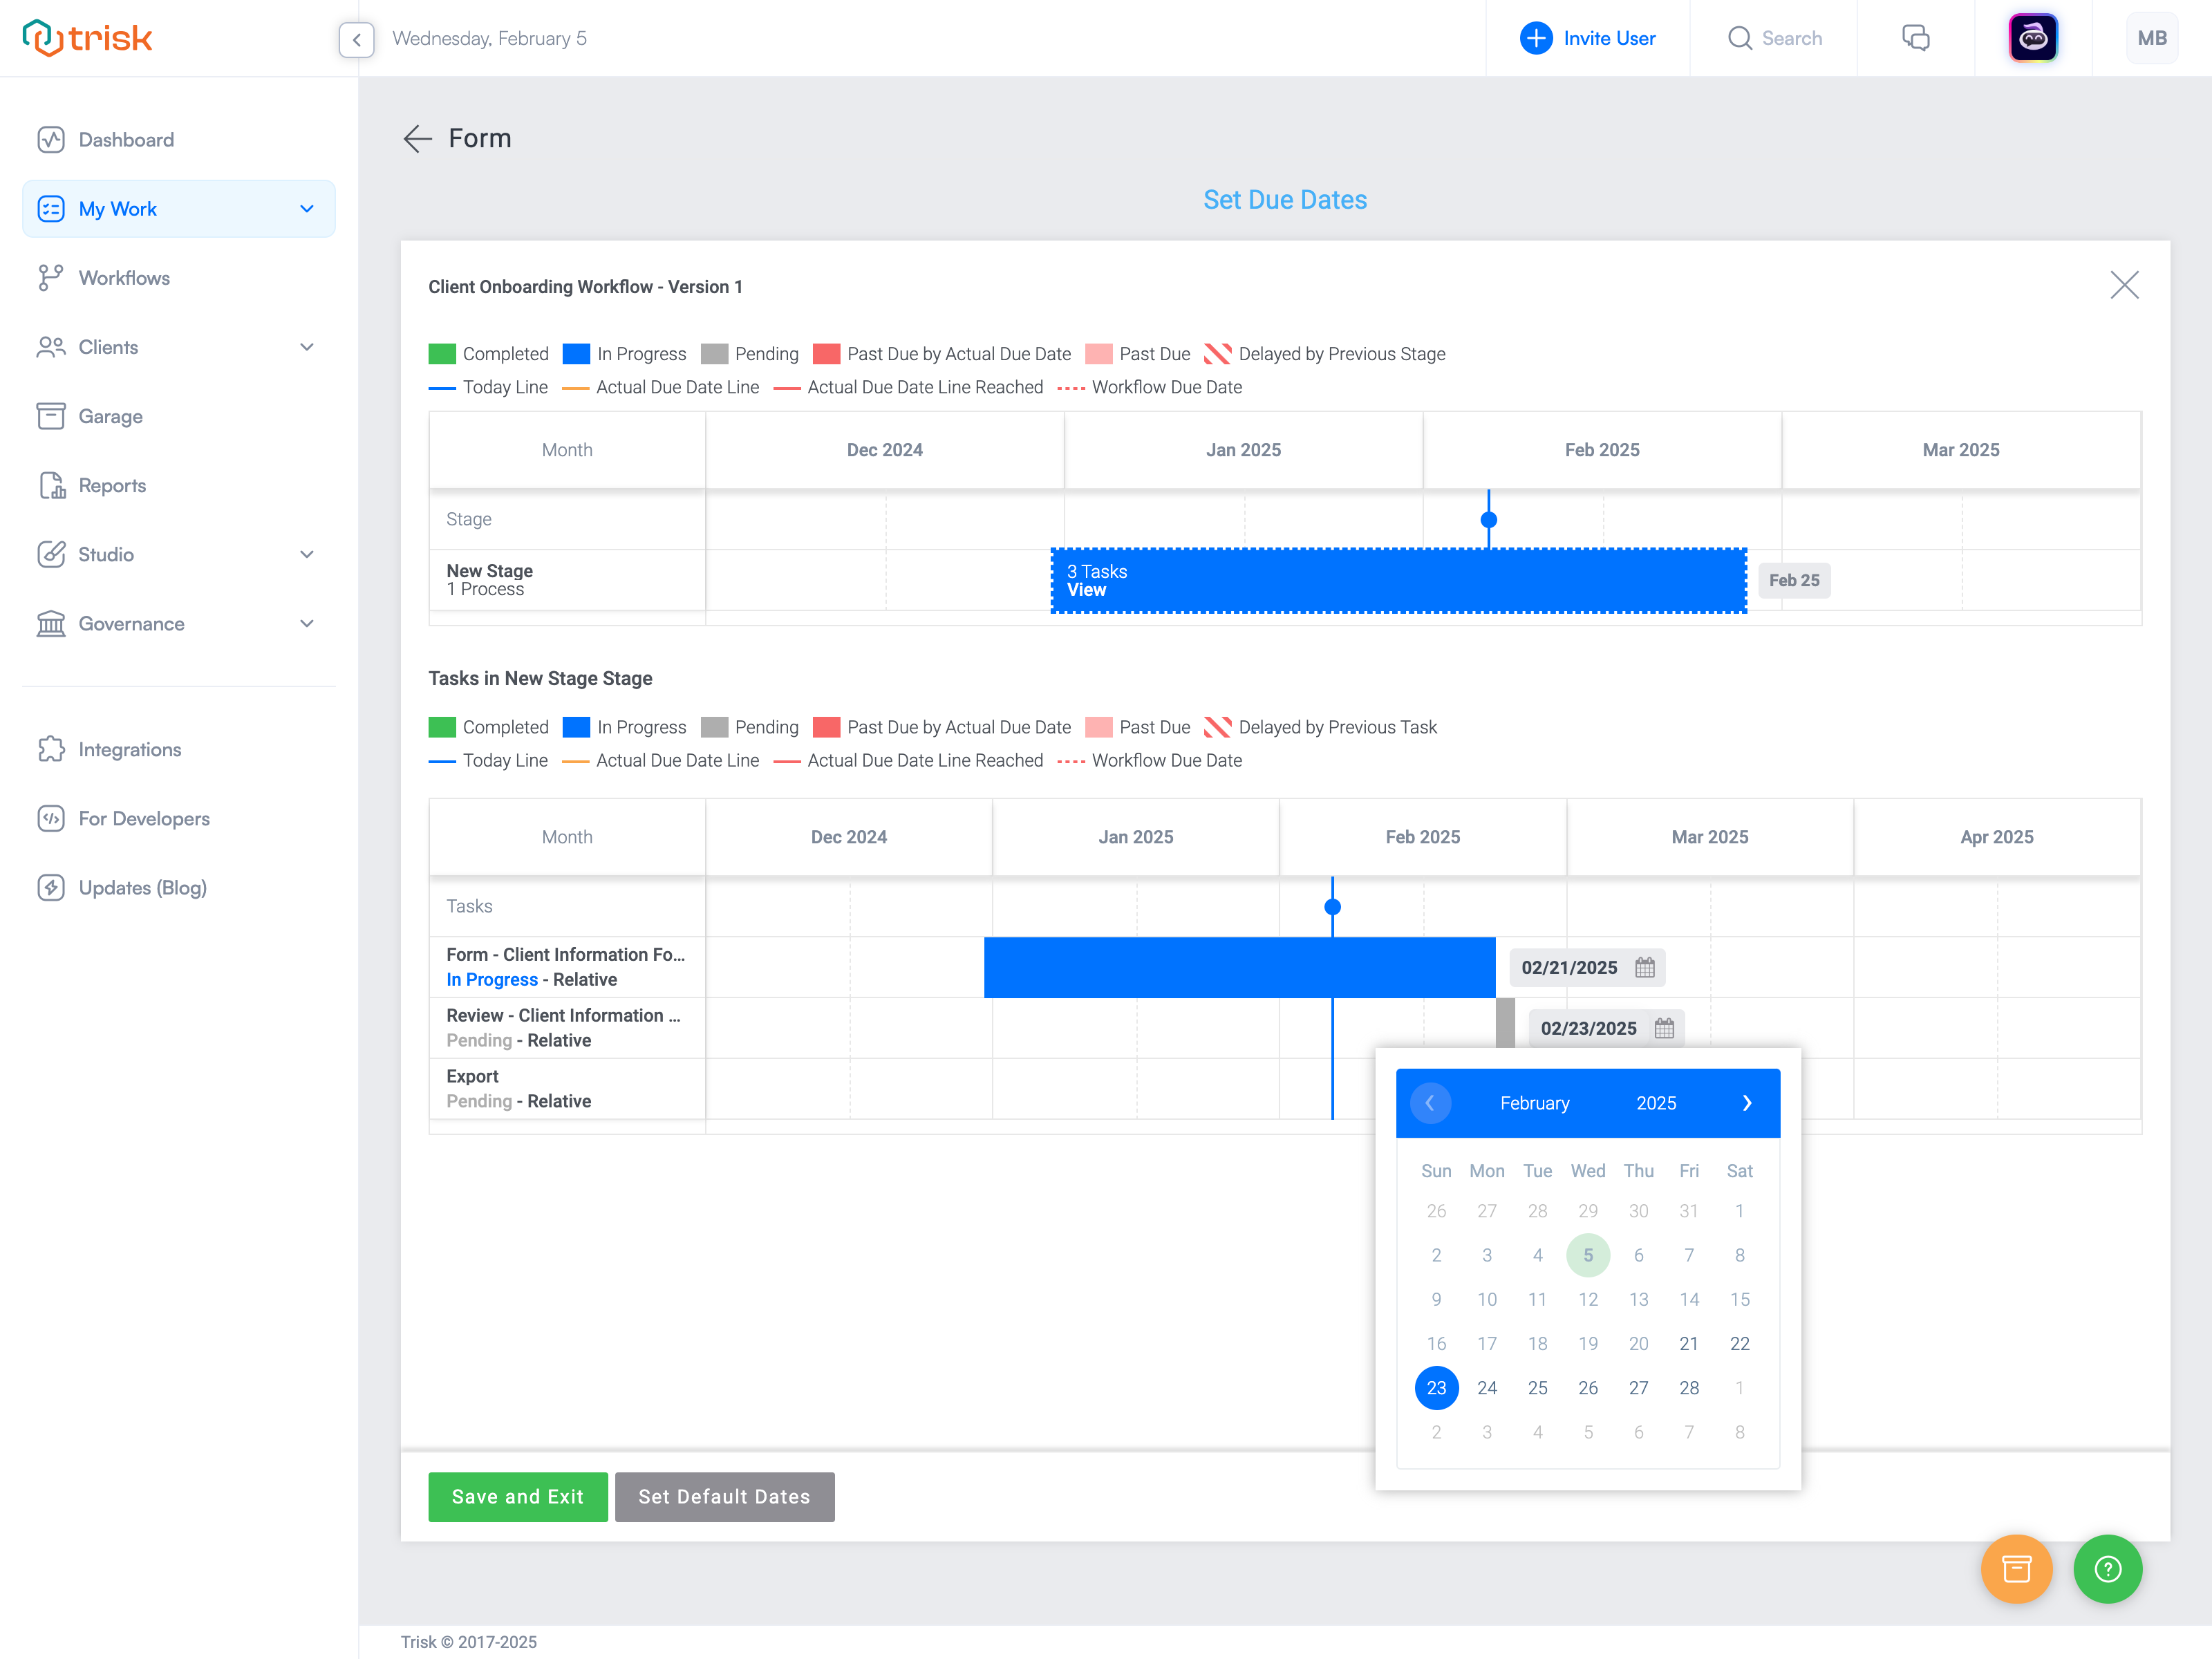
- All dependent tasks and stages will automatically recalibrate based on the updated date.
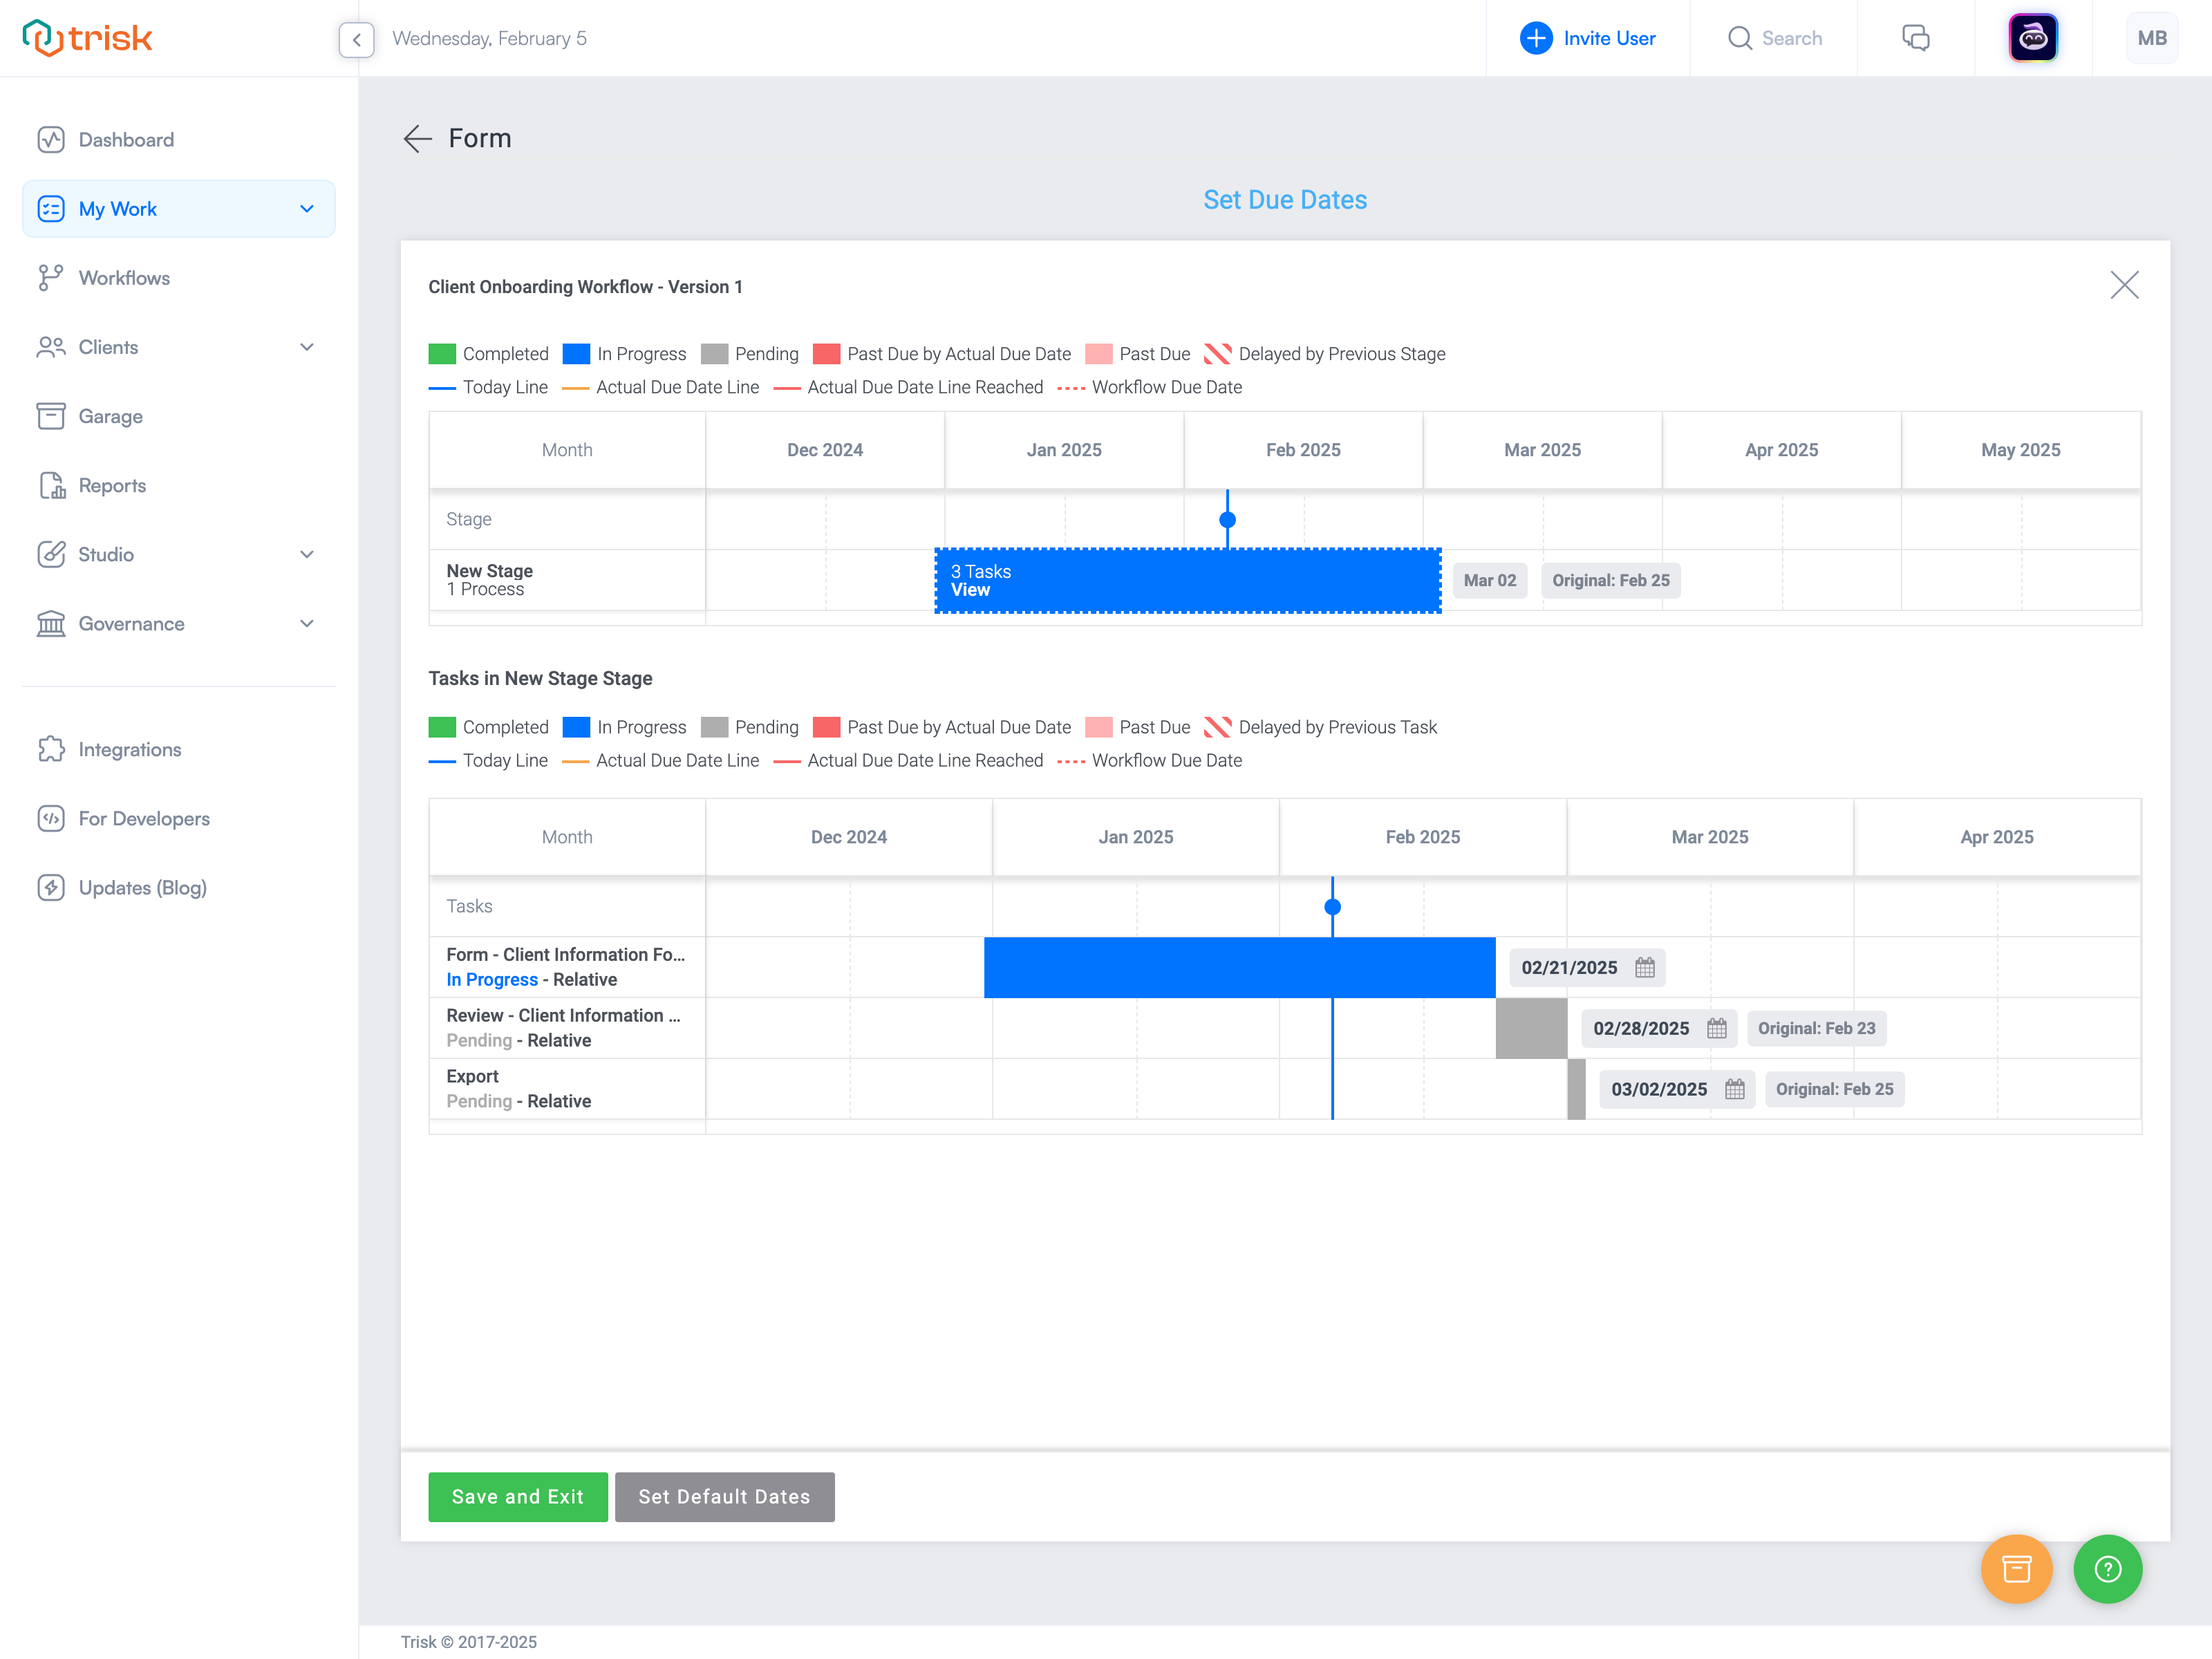
- Confirm changes by clicking the green Save and Exit button.
- The grey Set Default Dates button will return due dates predefined in the workflow.
Pre-fill Form from History
When the History functionality is enabled for this form in the workflow, a blue button appears, indicating that there is history from prior submissions. Click it to auto-fill the form using answers from the last submission.
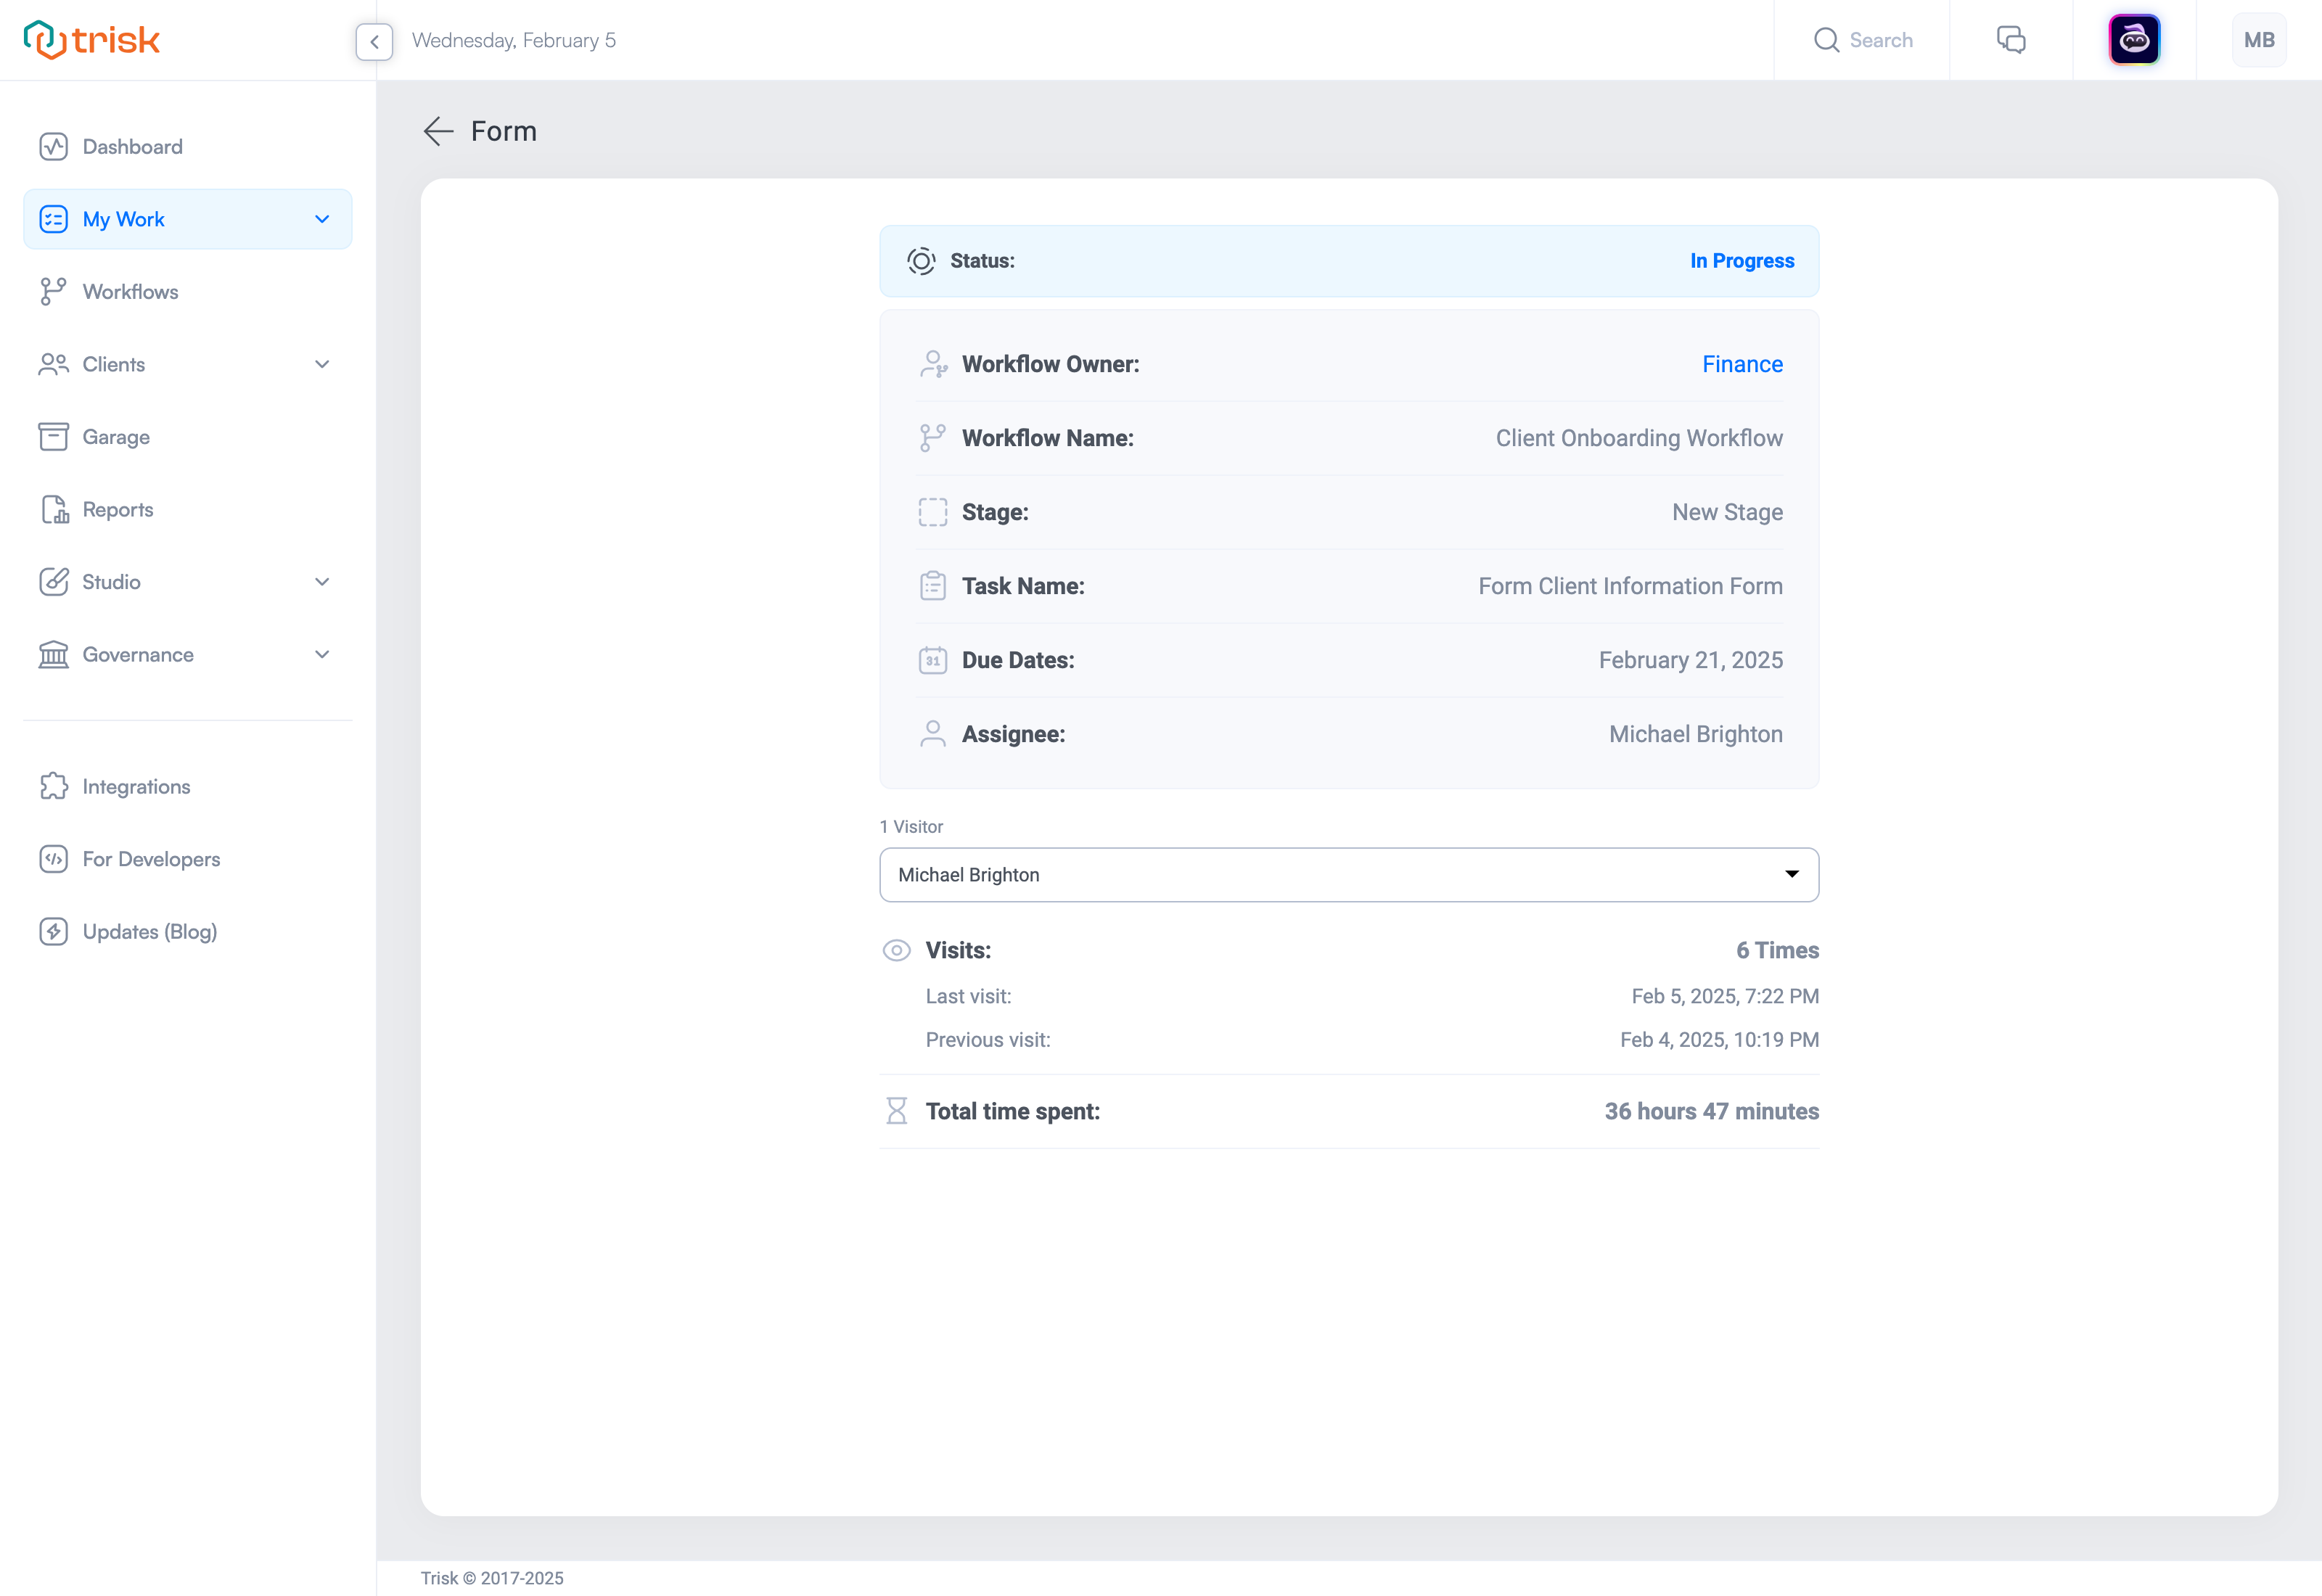
Activity
A blue outline button that redirects you to a detailed page with task statistics, including:
- Status
- Assignee
- Due dates
- Workflow owner
- Visitor logs and time spent on the task
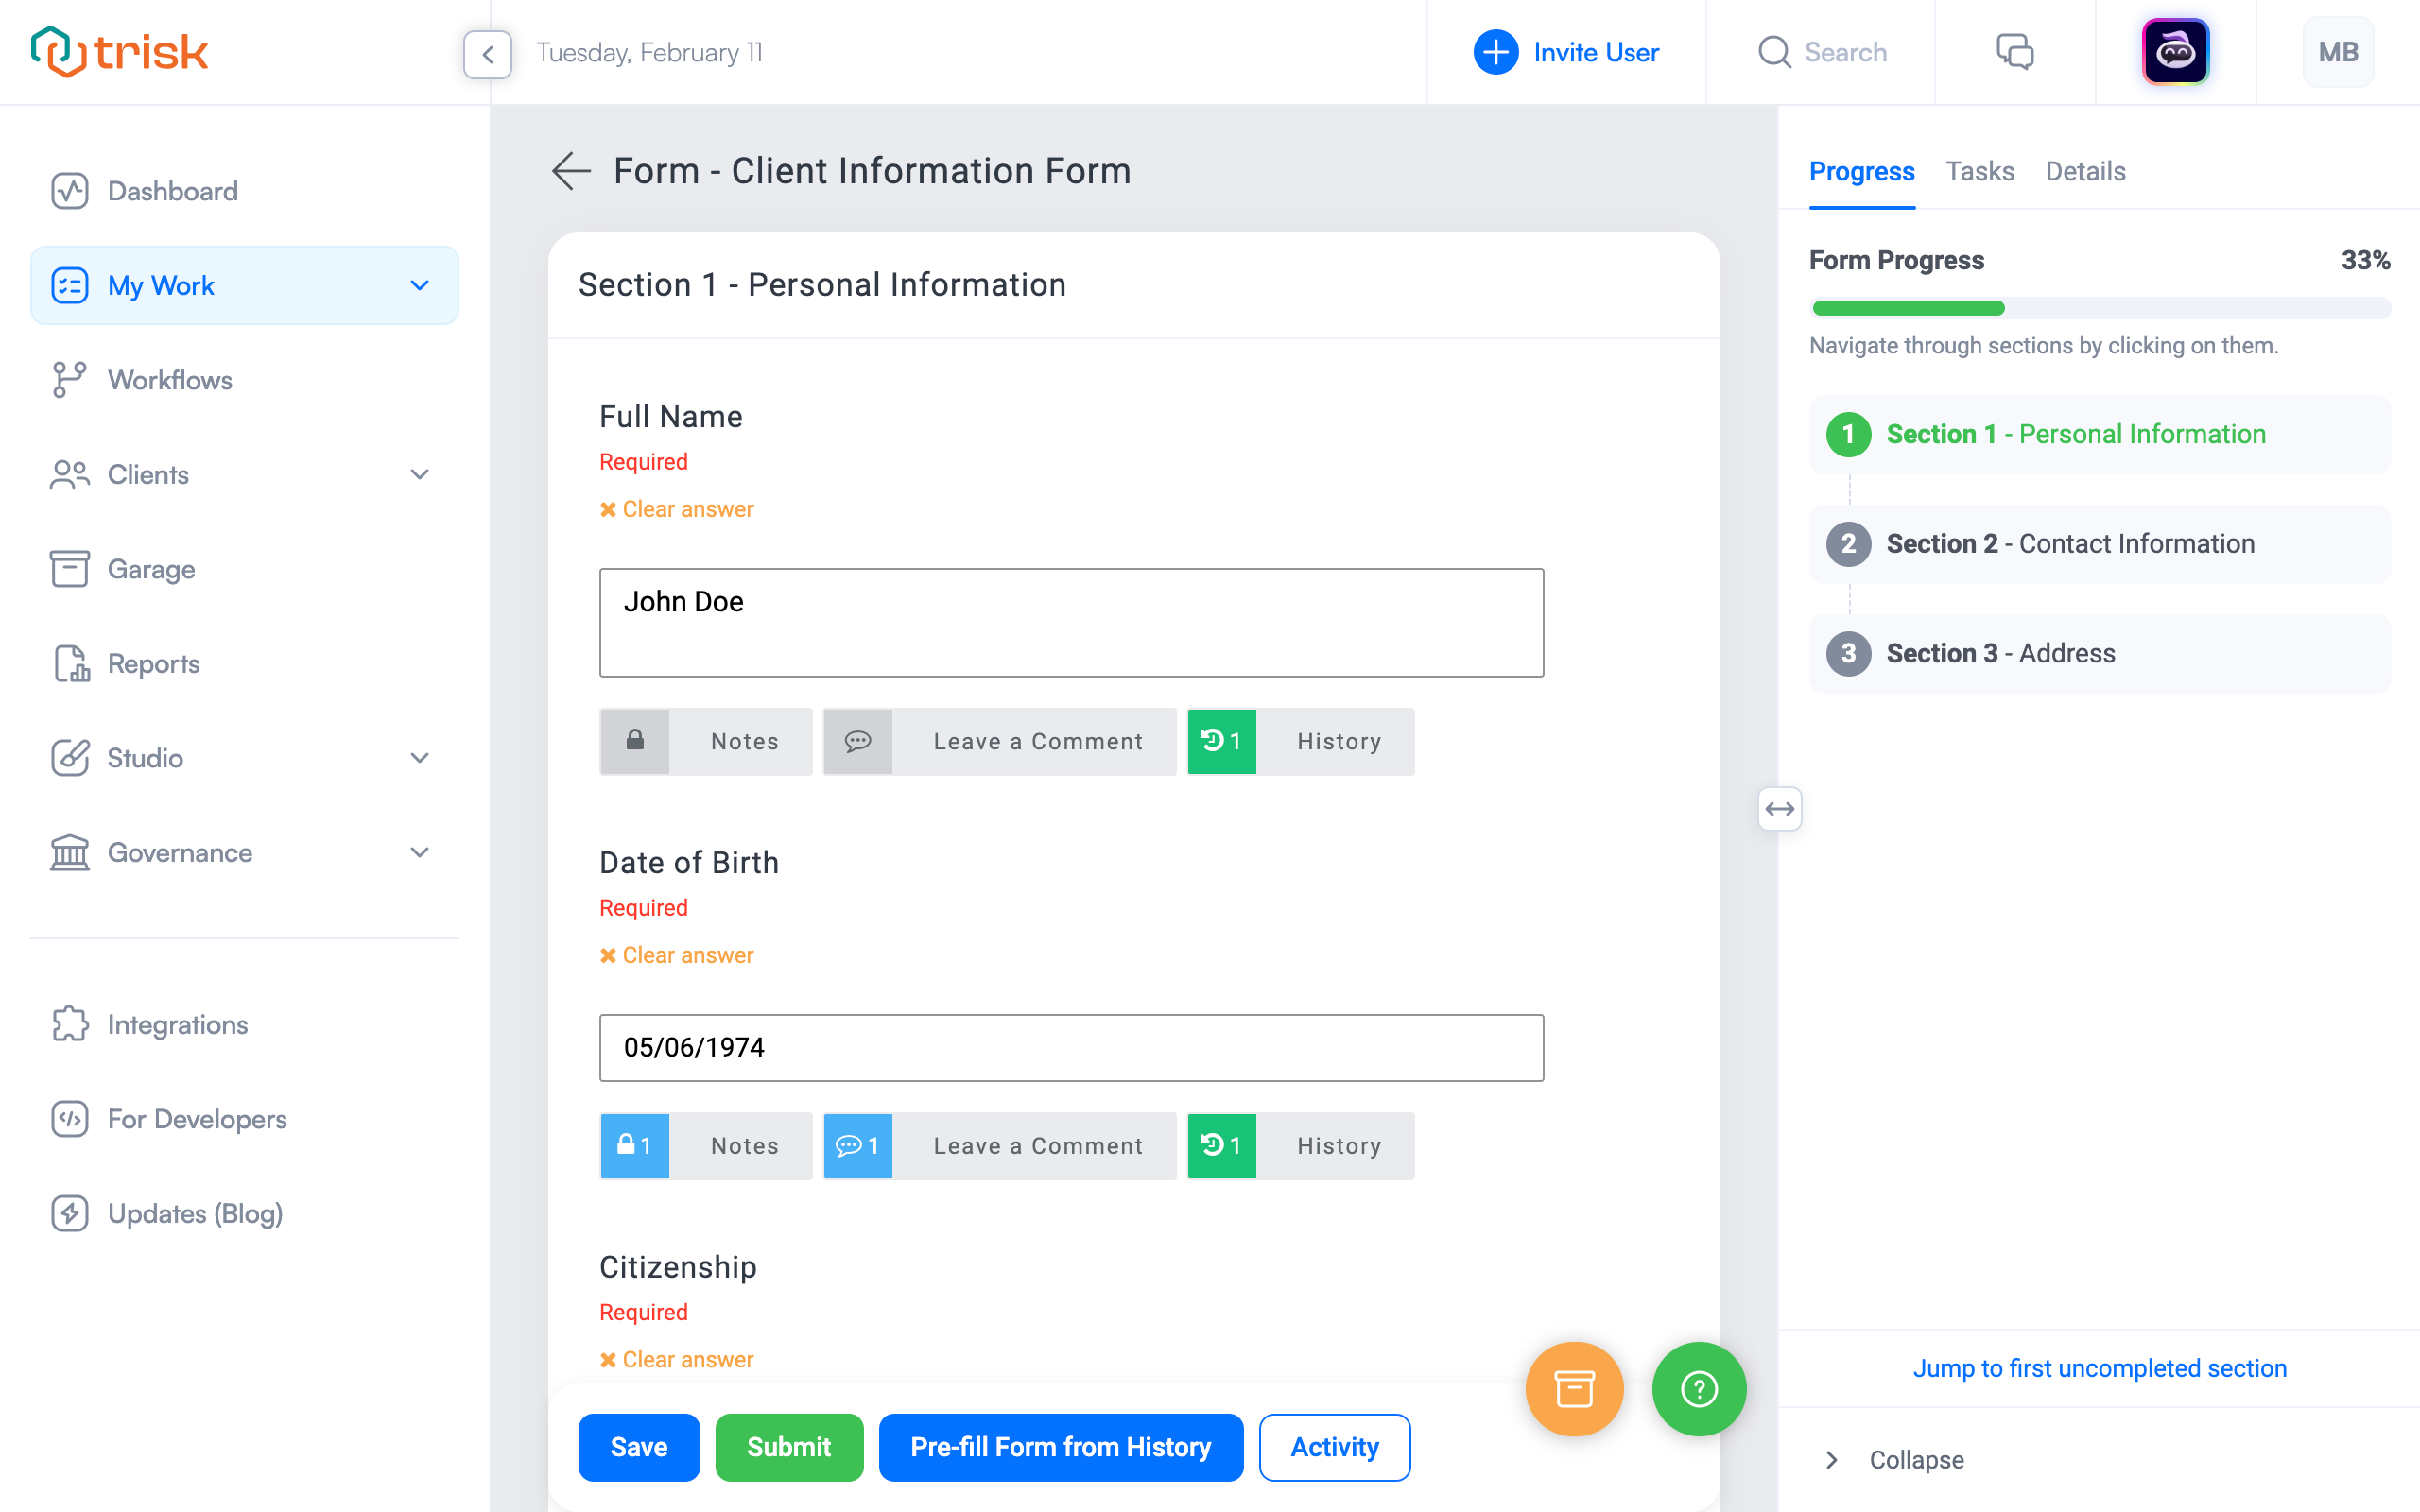
Buttons Near Form Fields
When you navigate to a launched Form task, you'll find the following buttons next to the form fields:
- Notes: A private space to leave personal notes visible only to you.
Tip: Use it to jot down reminders, draft thoughts, or keep track of details relevant to the task without sharing them with others. - Leave a Comment: A collaborative feature to leave public notes or ask questions visible to everyone with task access.
- History: This button appears when the History functionality is enabled for the form. It shows historical answers for each field.
The color of the history button indicates whether the current answer is consistent with the prior run:
- Amber: The question hasn’t been answered.
- Green: The answer matches the previous submission.
- Red: The answer differs from the preceding submission.
Clicking the History button displays prior answers. Selecting an answer will update the field with that response.
Foldover
When working on a Form task, the Foldover panel on the right side of the screen provides a wealth of information. It can be collapsed for convenience by clicking the Collapse button at the bottom of the panel and expanded again when needed by clicking the blue arrow icon.
Depending on your permissions, this panel includes the following tabs:
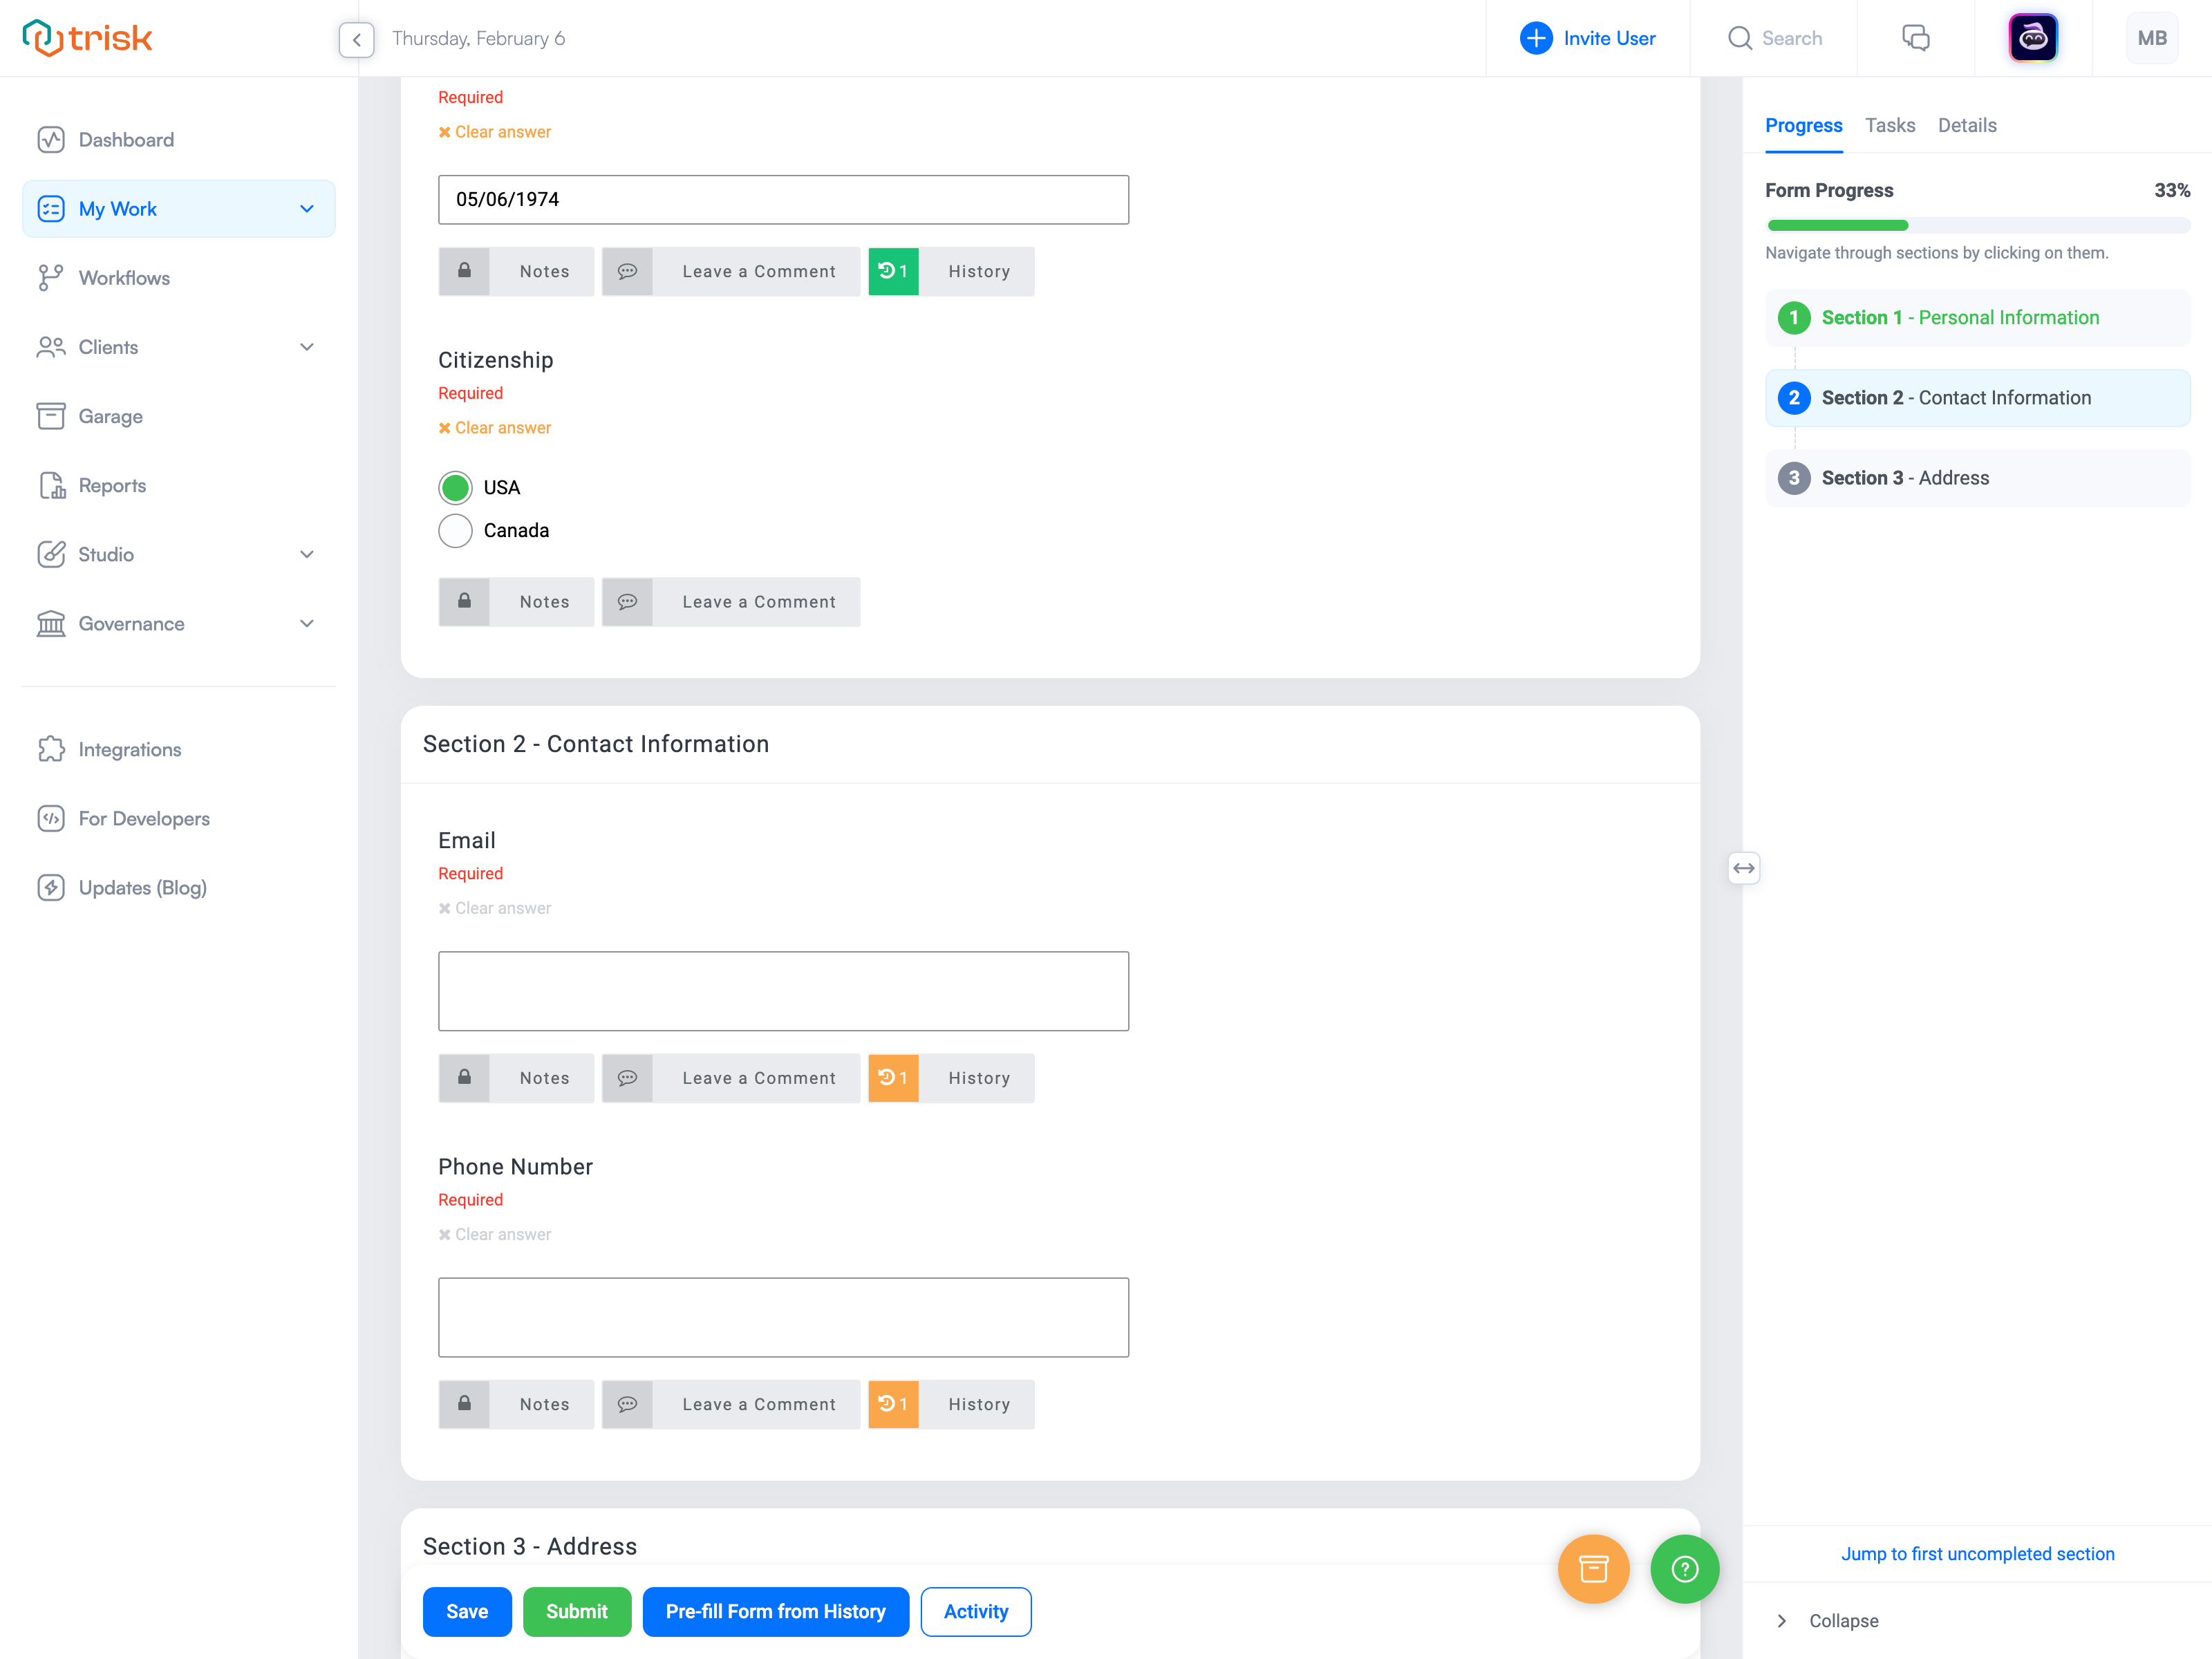
Progress Tab
- Progress Bar: A visual indicator showing your overall completion percentage on a colored scale.
- Progress by Section: A list of all form sections, categorized as:
- Green: Completed sections.
- Blue: The current section you’re working on.
- Gray: Incomplete sections.
Each section is a hyperlink, allowing quick navigation through the form.
- The "Jump to first uncompleted section" link, located at the bottom of the Progress tab, automatically directs you to the first uncompleted section of the form. This feature ensures no fields are missed and helps streamline task completion.
Tasks Tab
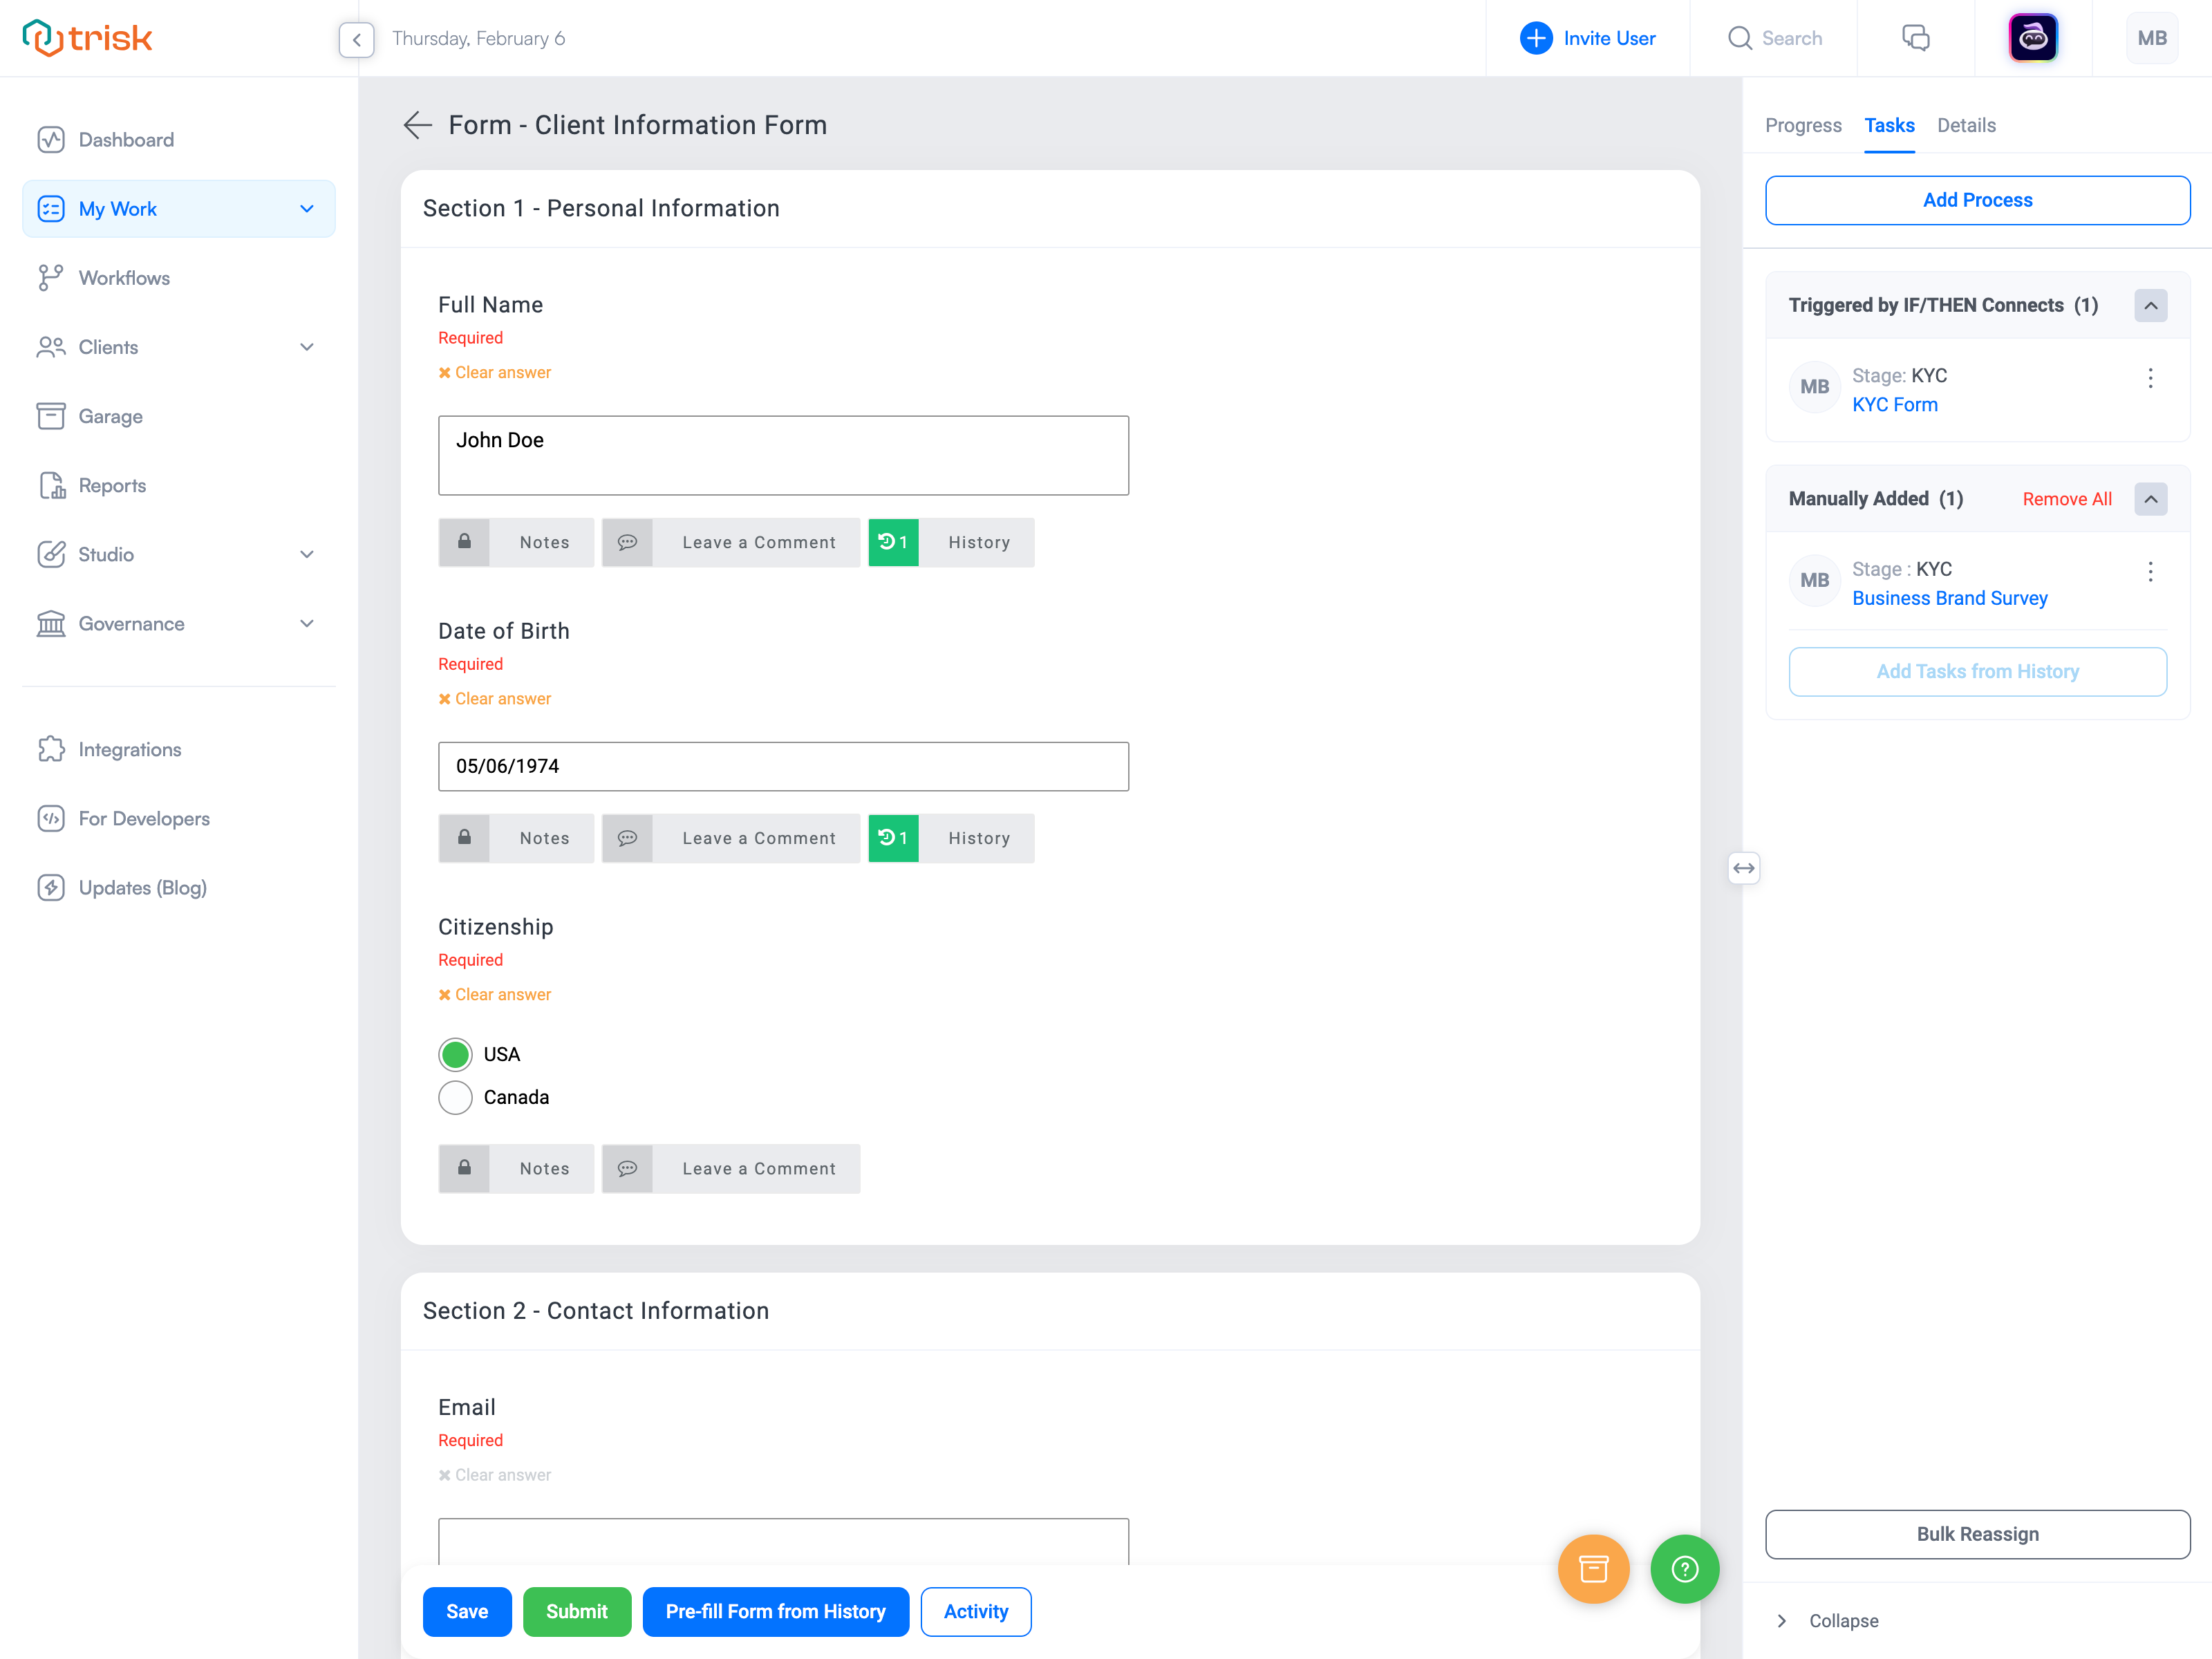
The Tasks tab provides options for managing Forms that trigger additional Forms upon submission. This feature helps streamline workflows by automating follow-up tasks based on predefined conditions or manual additions. It includes:
Adding Processes
To add a process, click the "Add Process" and select the desired form and stage. Please note: To manually add a process, the following stages must contain only Form tasks and/or Subsequent Workflows.
Triggered by IF/THEN Connects (Conditional)
Forms in this section launch automatically based on responses to specific questions within the form.
For each IF/THEN connected form, the following actions are available:
- Change Assignee – Reassign the form to another user.
- Edit Identifier – Assign a unique identifier for better tracking.
- Duplicate – Create an identical copy if required.
- Cancel – Remove the form from the launch process.
Manually Added (Unconditional)
This section displays forms manually added through the "Add Process."
Add Tasks from History
Add tasks from history to reuse previously submitted forms within the same workflow.
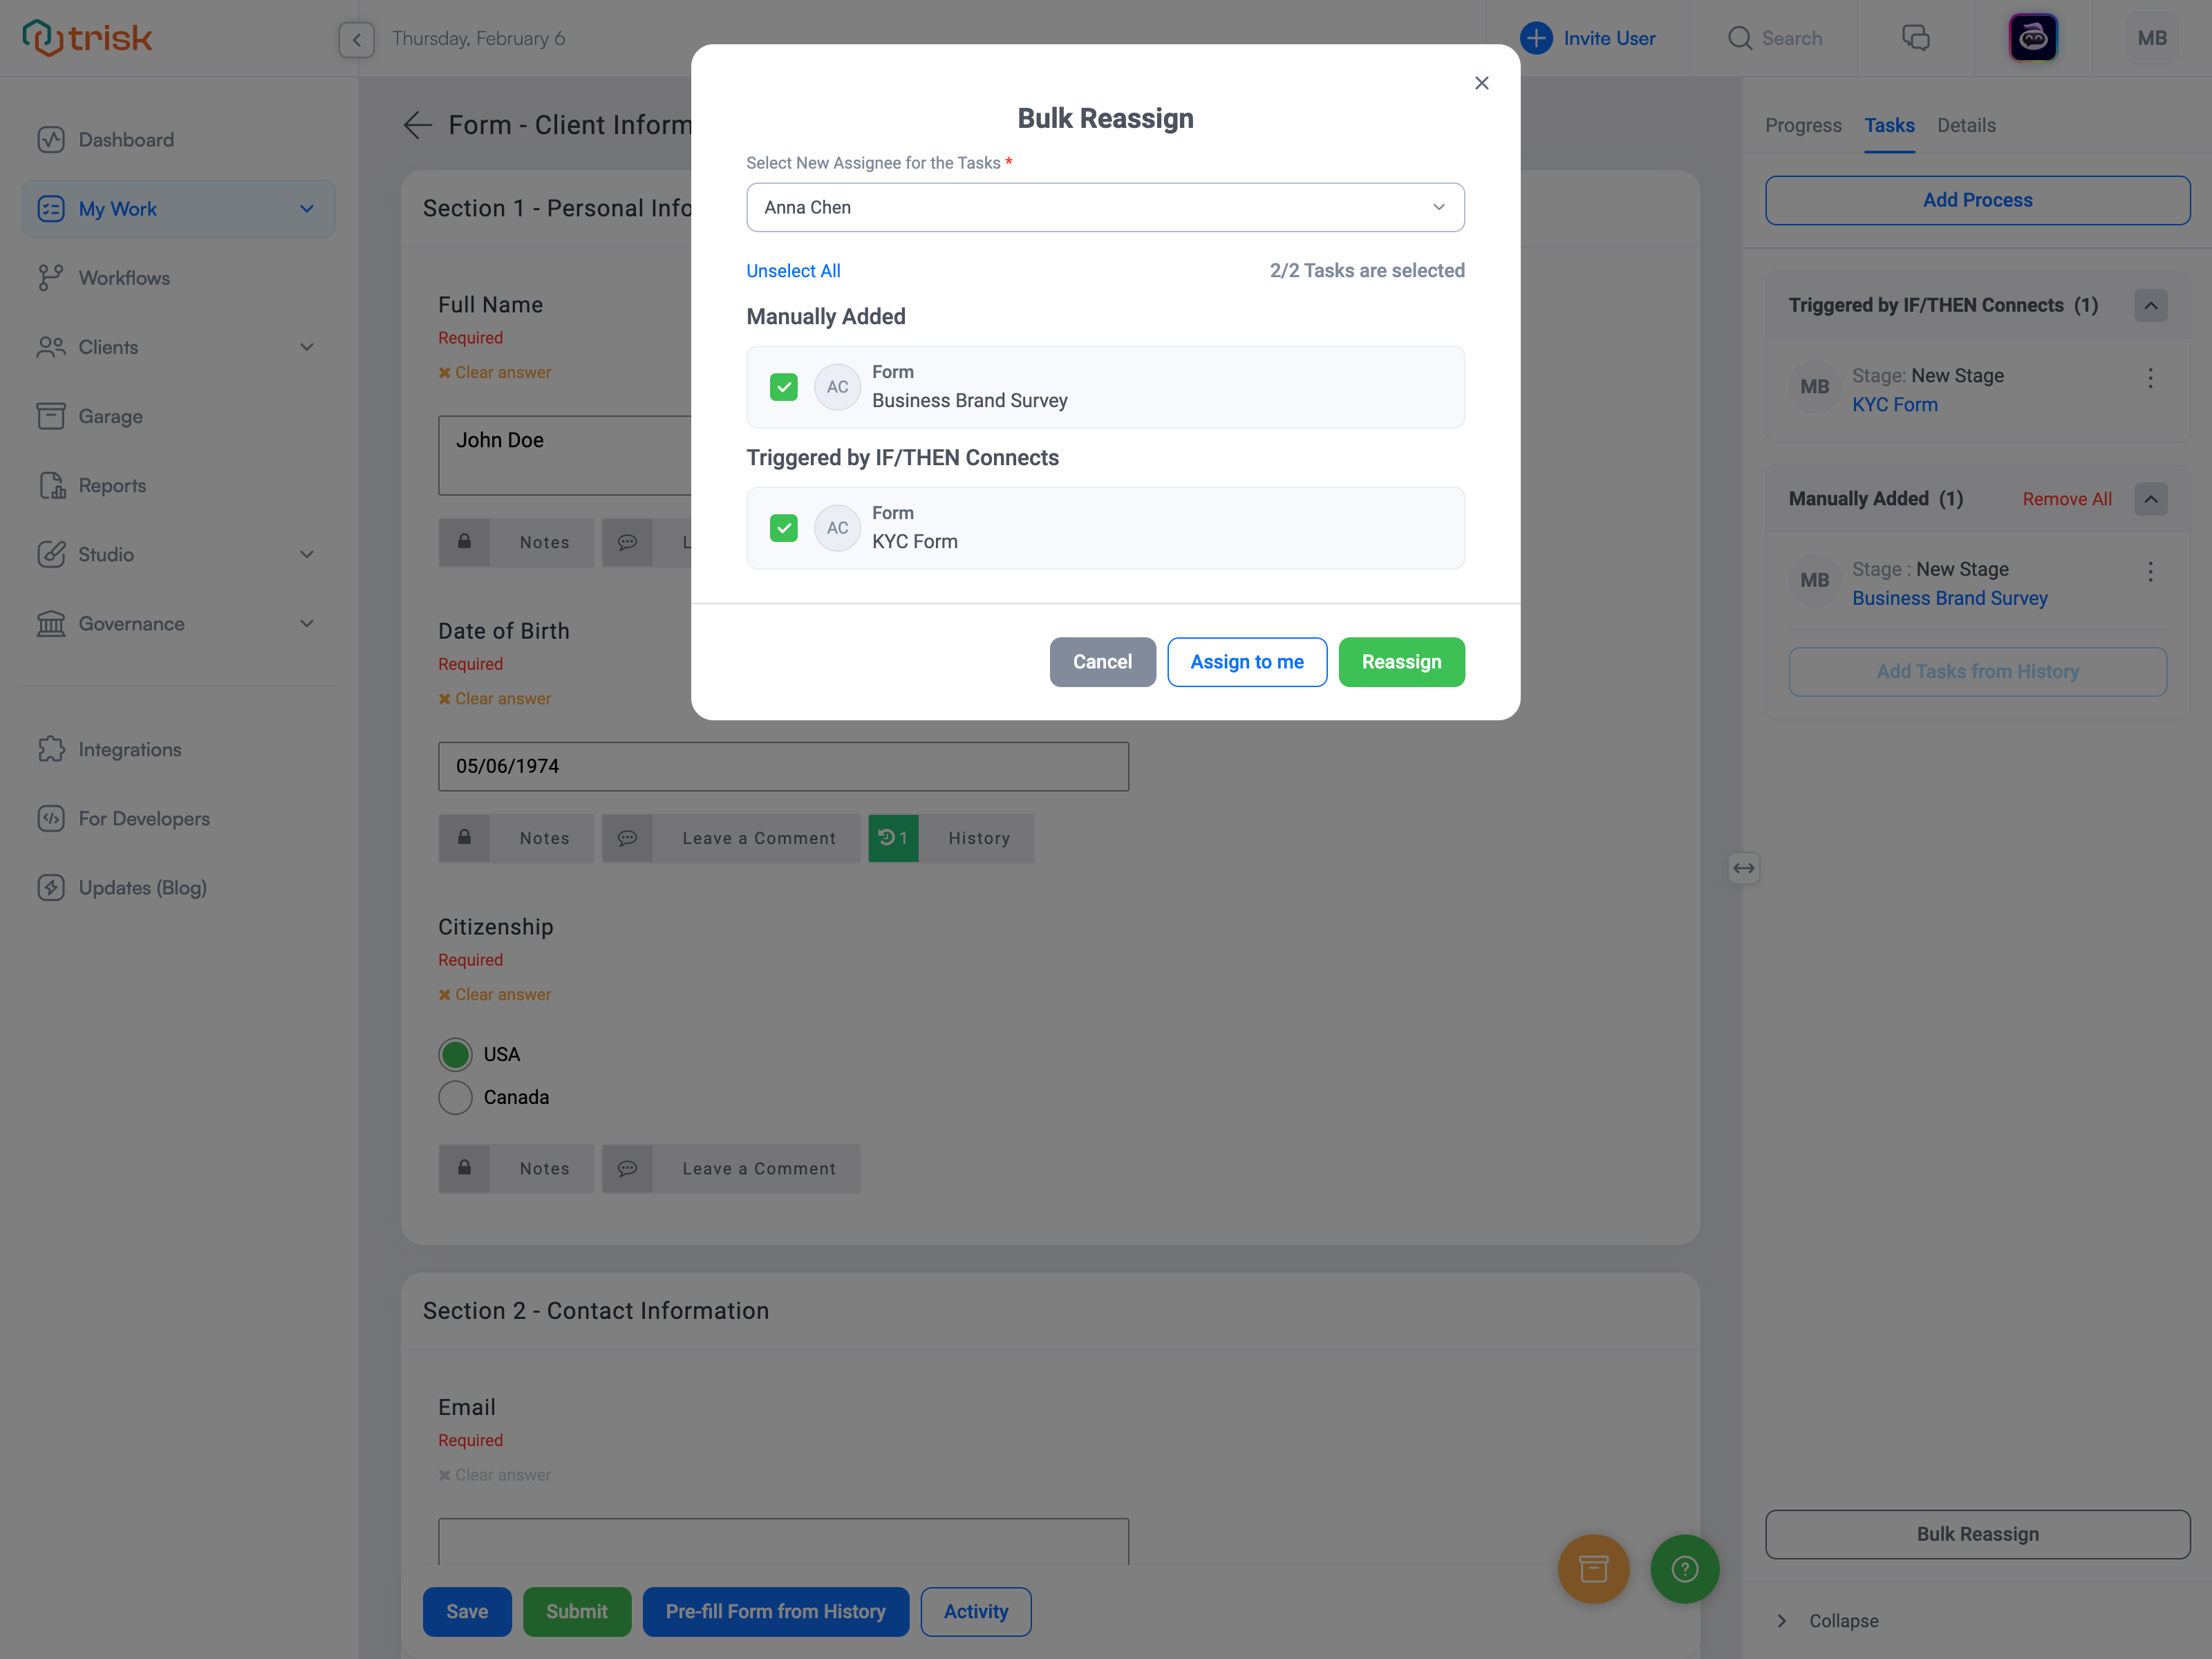
Bulk Reassign
The Bulk Reassign button allows for the reassignment of multiple tasks at once. To bulk reassign tasks:
- Click the "Bulk Reassign" button.
- A pop-up will appear to select the new assignee.
- Select the tasks to be reassigned.
- Select New Assignee for the Task
- Click the green “Reassign” button.
Details Tab
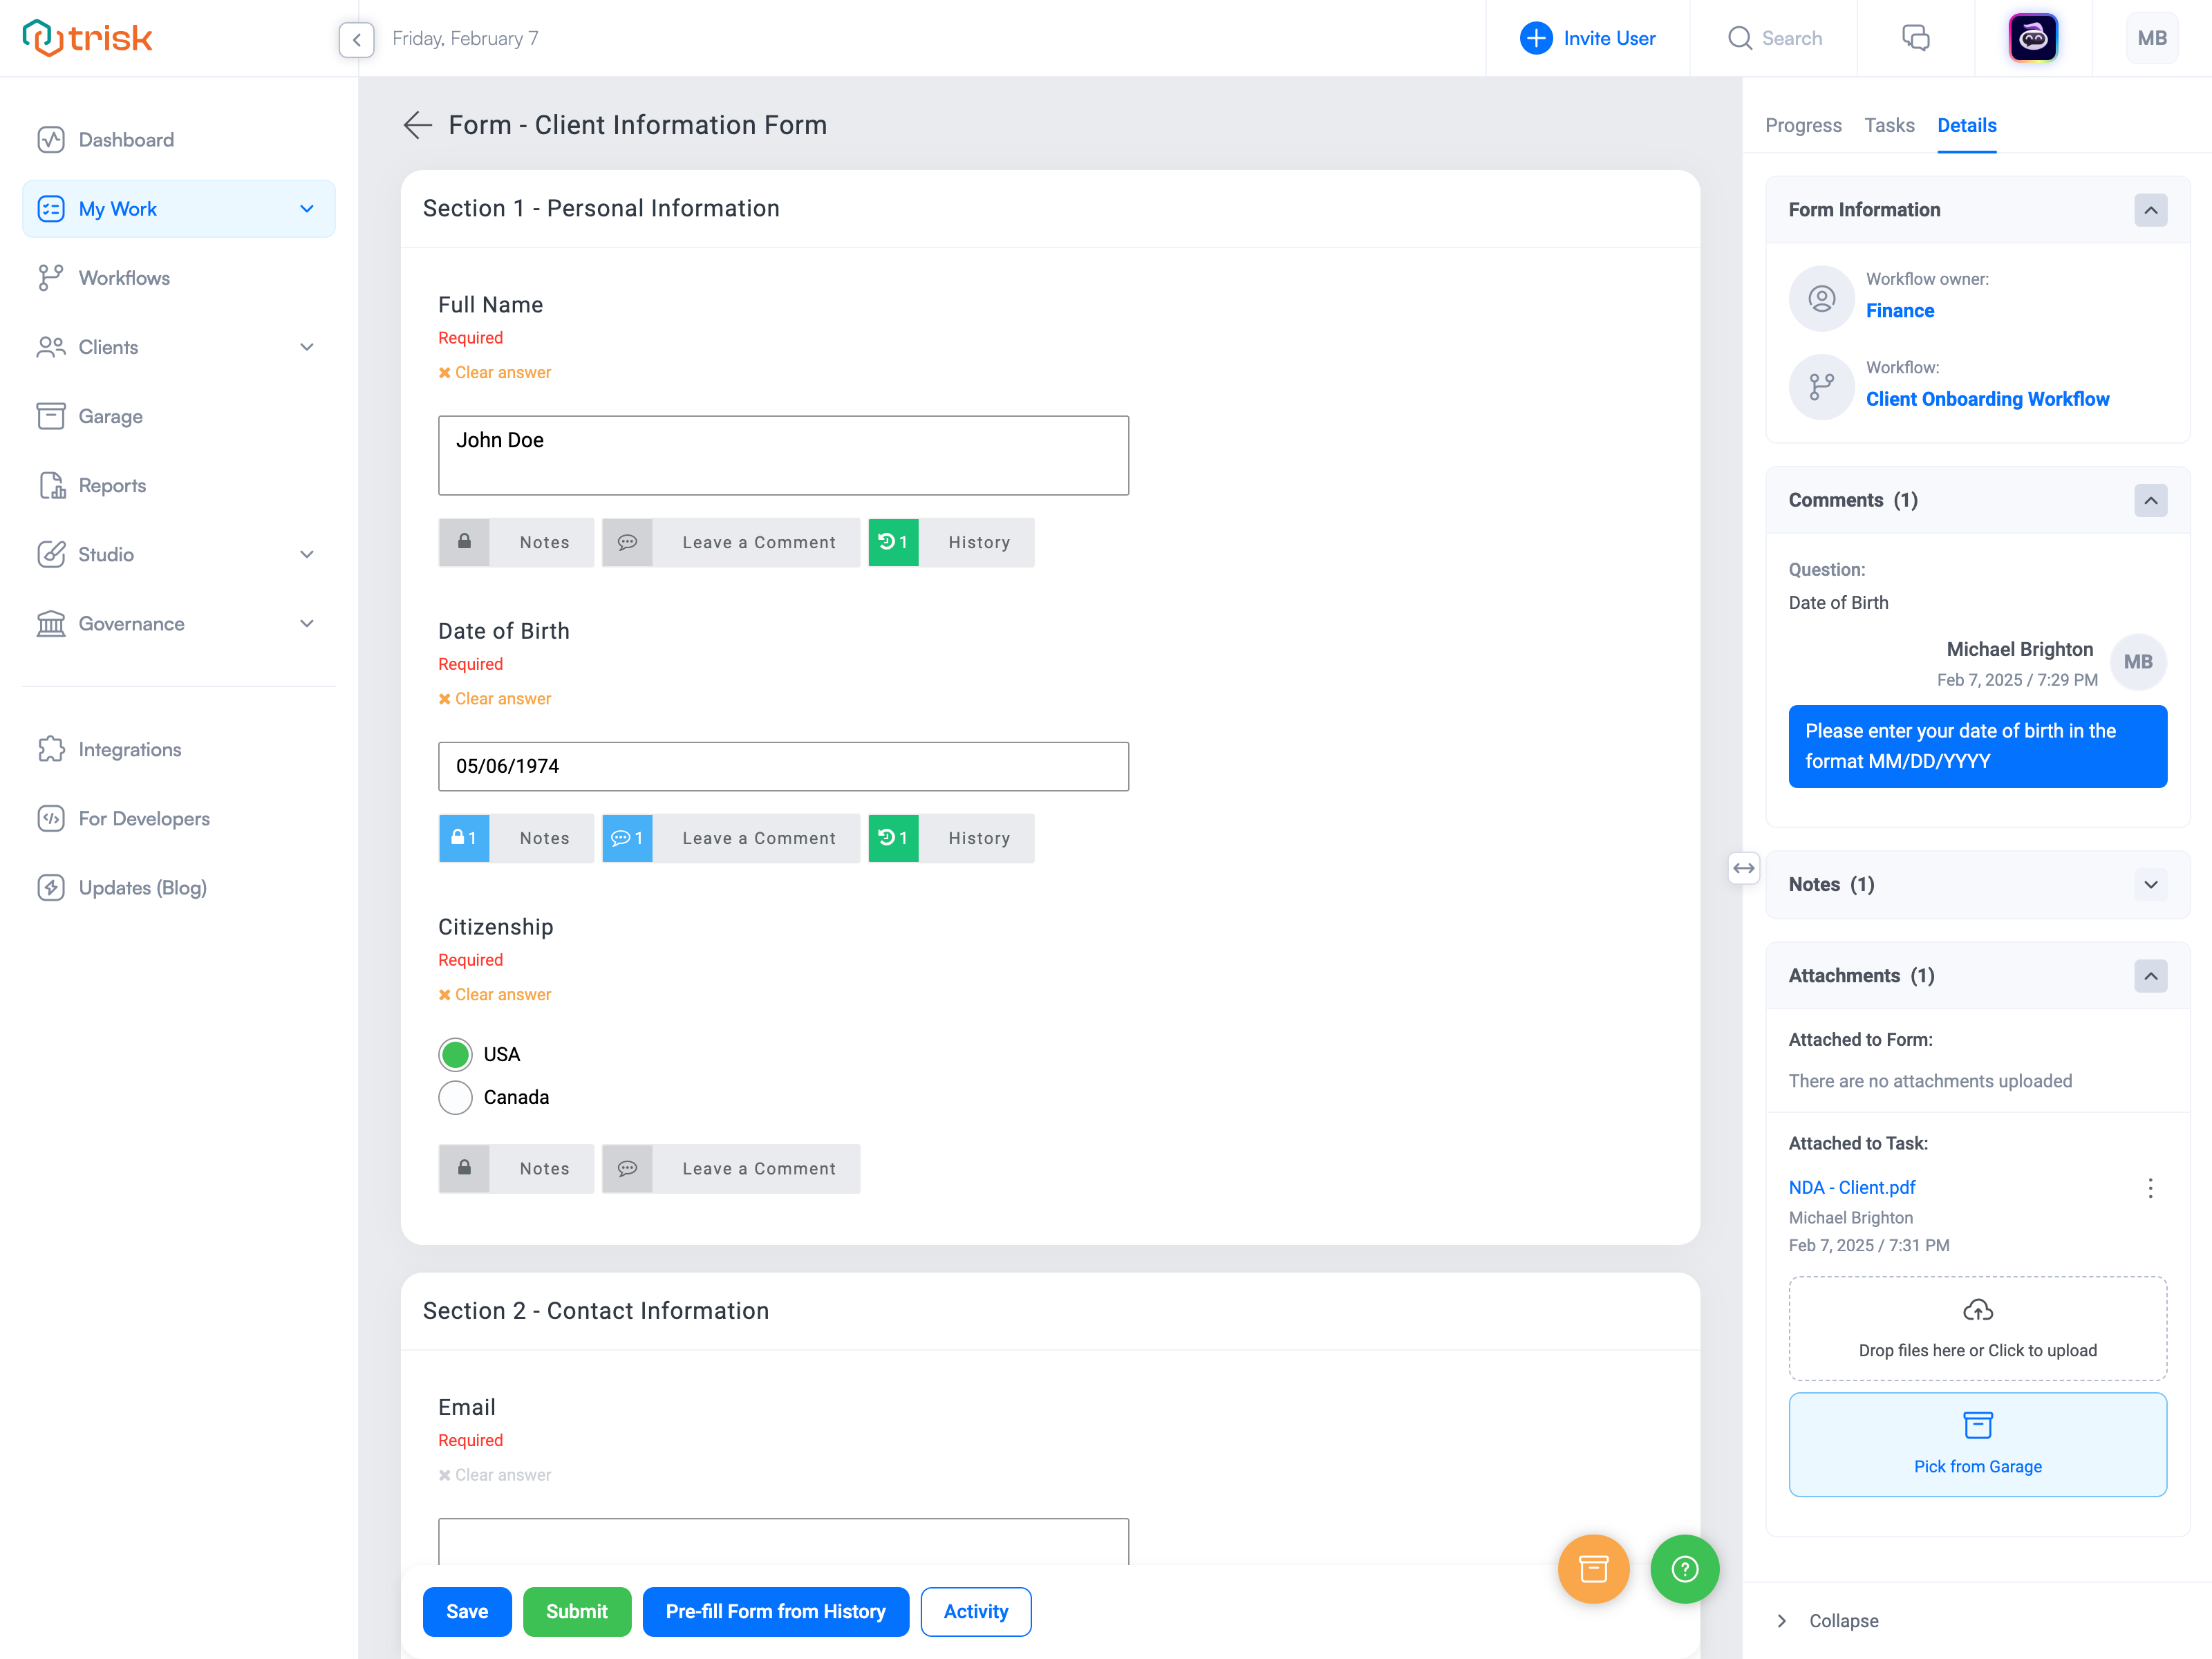
The Details tab provides an overview of key task information, including workflow details, Сomments, Notes, and attachments associated with the Form task.
Form Information
This section displays essential details about the workflow, including:
- Workflow owner: The individual responsible for managing the workflow.
- Workflow: The title of the workflow in which the form is included.
Comments
The Comments section contains all comments made within the form task.
Notes
The Notes section contains all your private notes. This feature is helpful for keeping personal reminders or observations.
Attachments
The Attachments section is divided into two parts:
- Attached to Form:
- Lists all attachments uploaded directly within the form fields where file uploads are required.
- Attached to Task:
- Displays all files uploaded via the Foldover, providing additional reference materials related to the task.
- Users can upload attachments by:
- Dragging and dropping files.
- Clicking to upload files from their device.
- Selecting files stored in the Garage
Co-Working
Upon navigating to a launched Form task, multiple users can interact with the same form simultaneously. Unlike traditional screen-sharing tools, each participant has complete control over their screen while viewing real-time updates made by others. This ensures seamless collaboration and enhances productivity.
How Co-Working Works
- Each participant operates independently within the form, and any updates are instantly visible to all collaborators.
- Users can track each other’s actions, making aligning on shared tasks easier and reducing errors.
Key Considerations for Co-Working
To ensure a seamless co-working experience, all participants must have the appropriate permissions to access the form. These permissions are set at the workflow level, meaning they must be configured within the workflow builder before the launch of the workflow.
To enable co-working for a Form task, follow these steps during the workflow-building process:
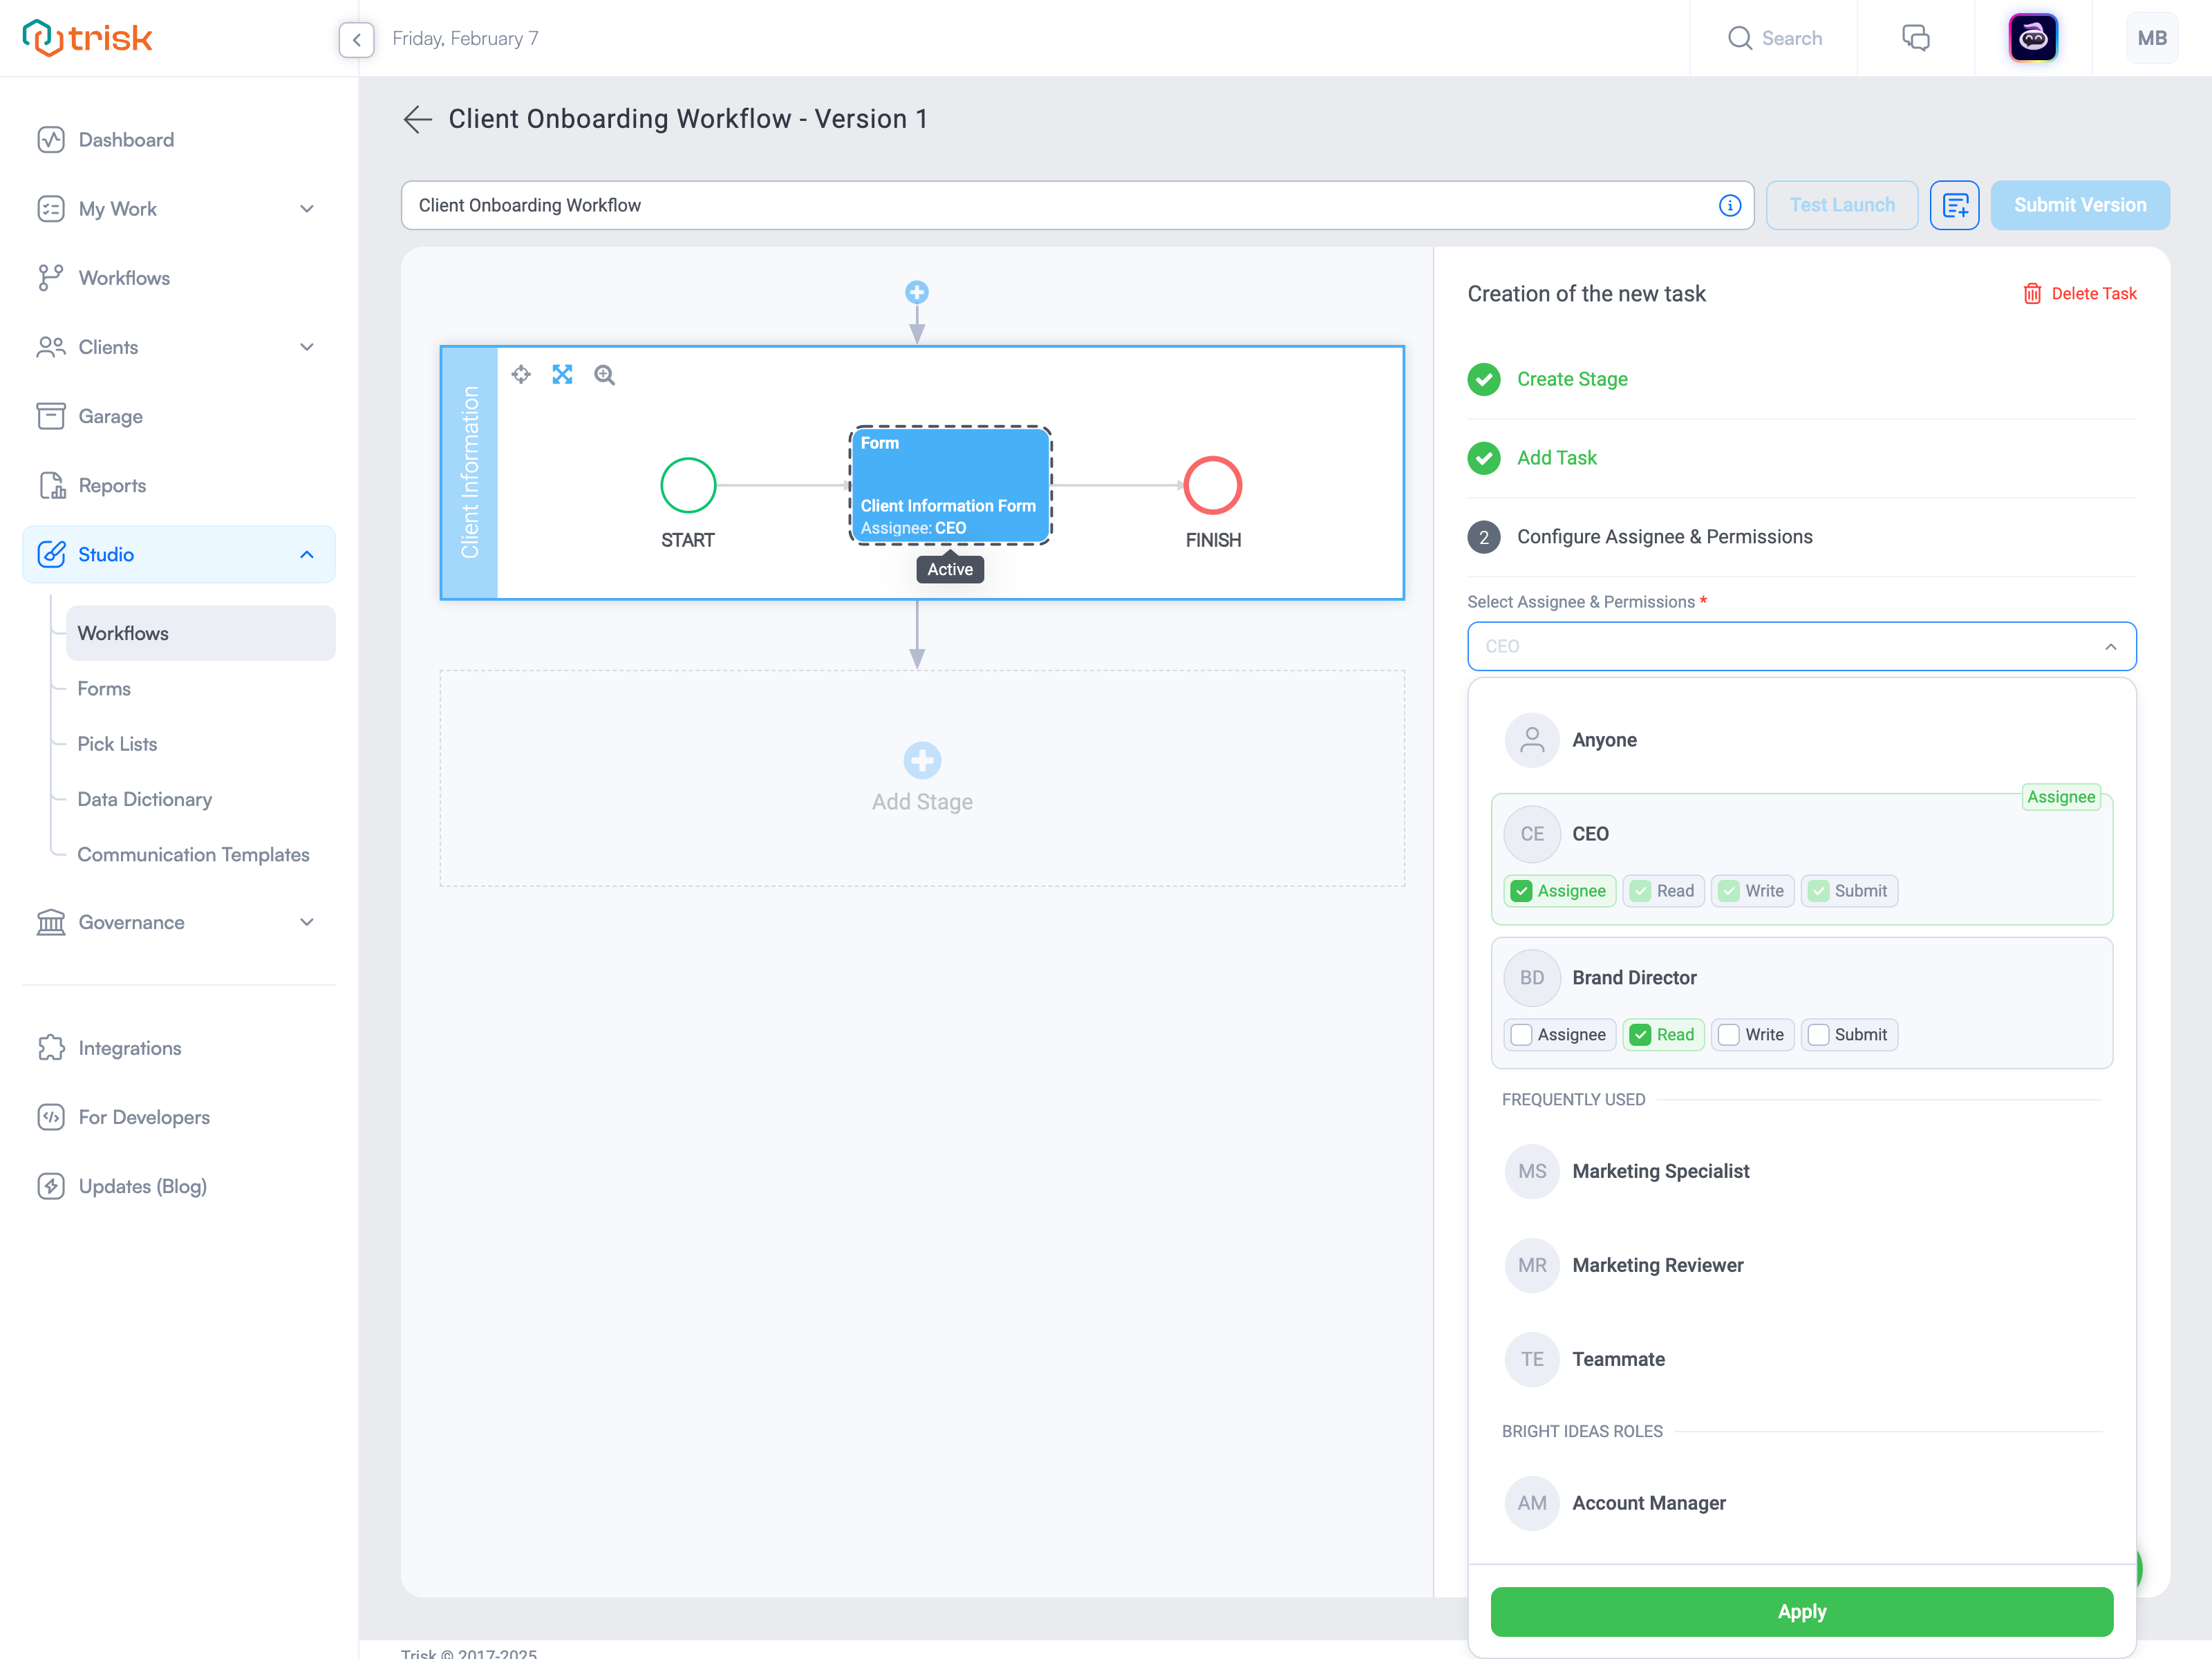
- Assign Permissions:
During the "Configure Assignee & Permissions" step, select the appropriate assignee(s) and define their access level. Assigning the correct permissions ensures users can view, edit, and submit the form as required.
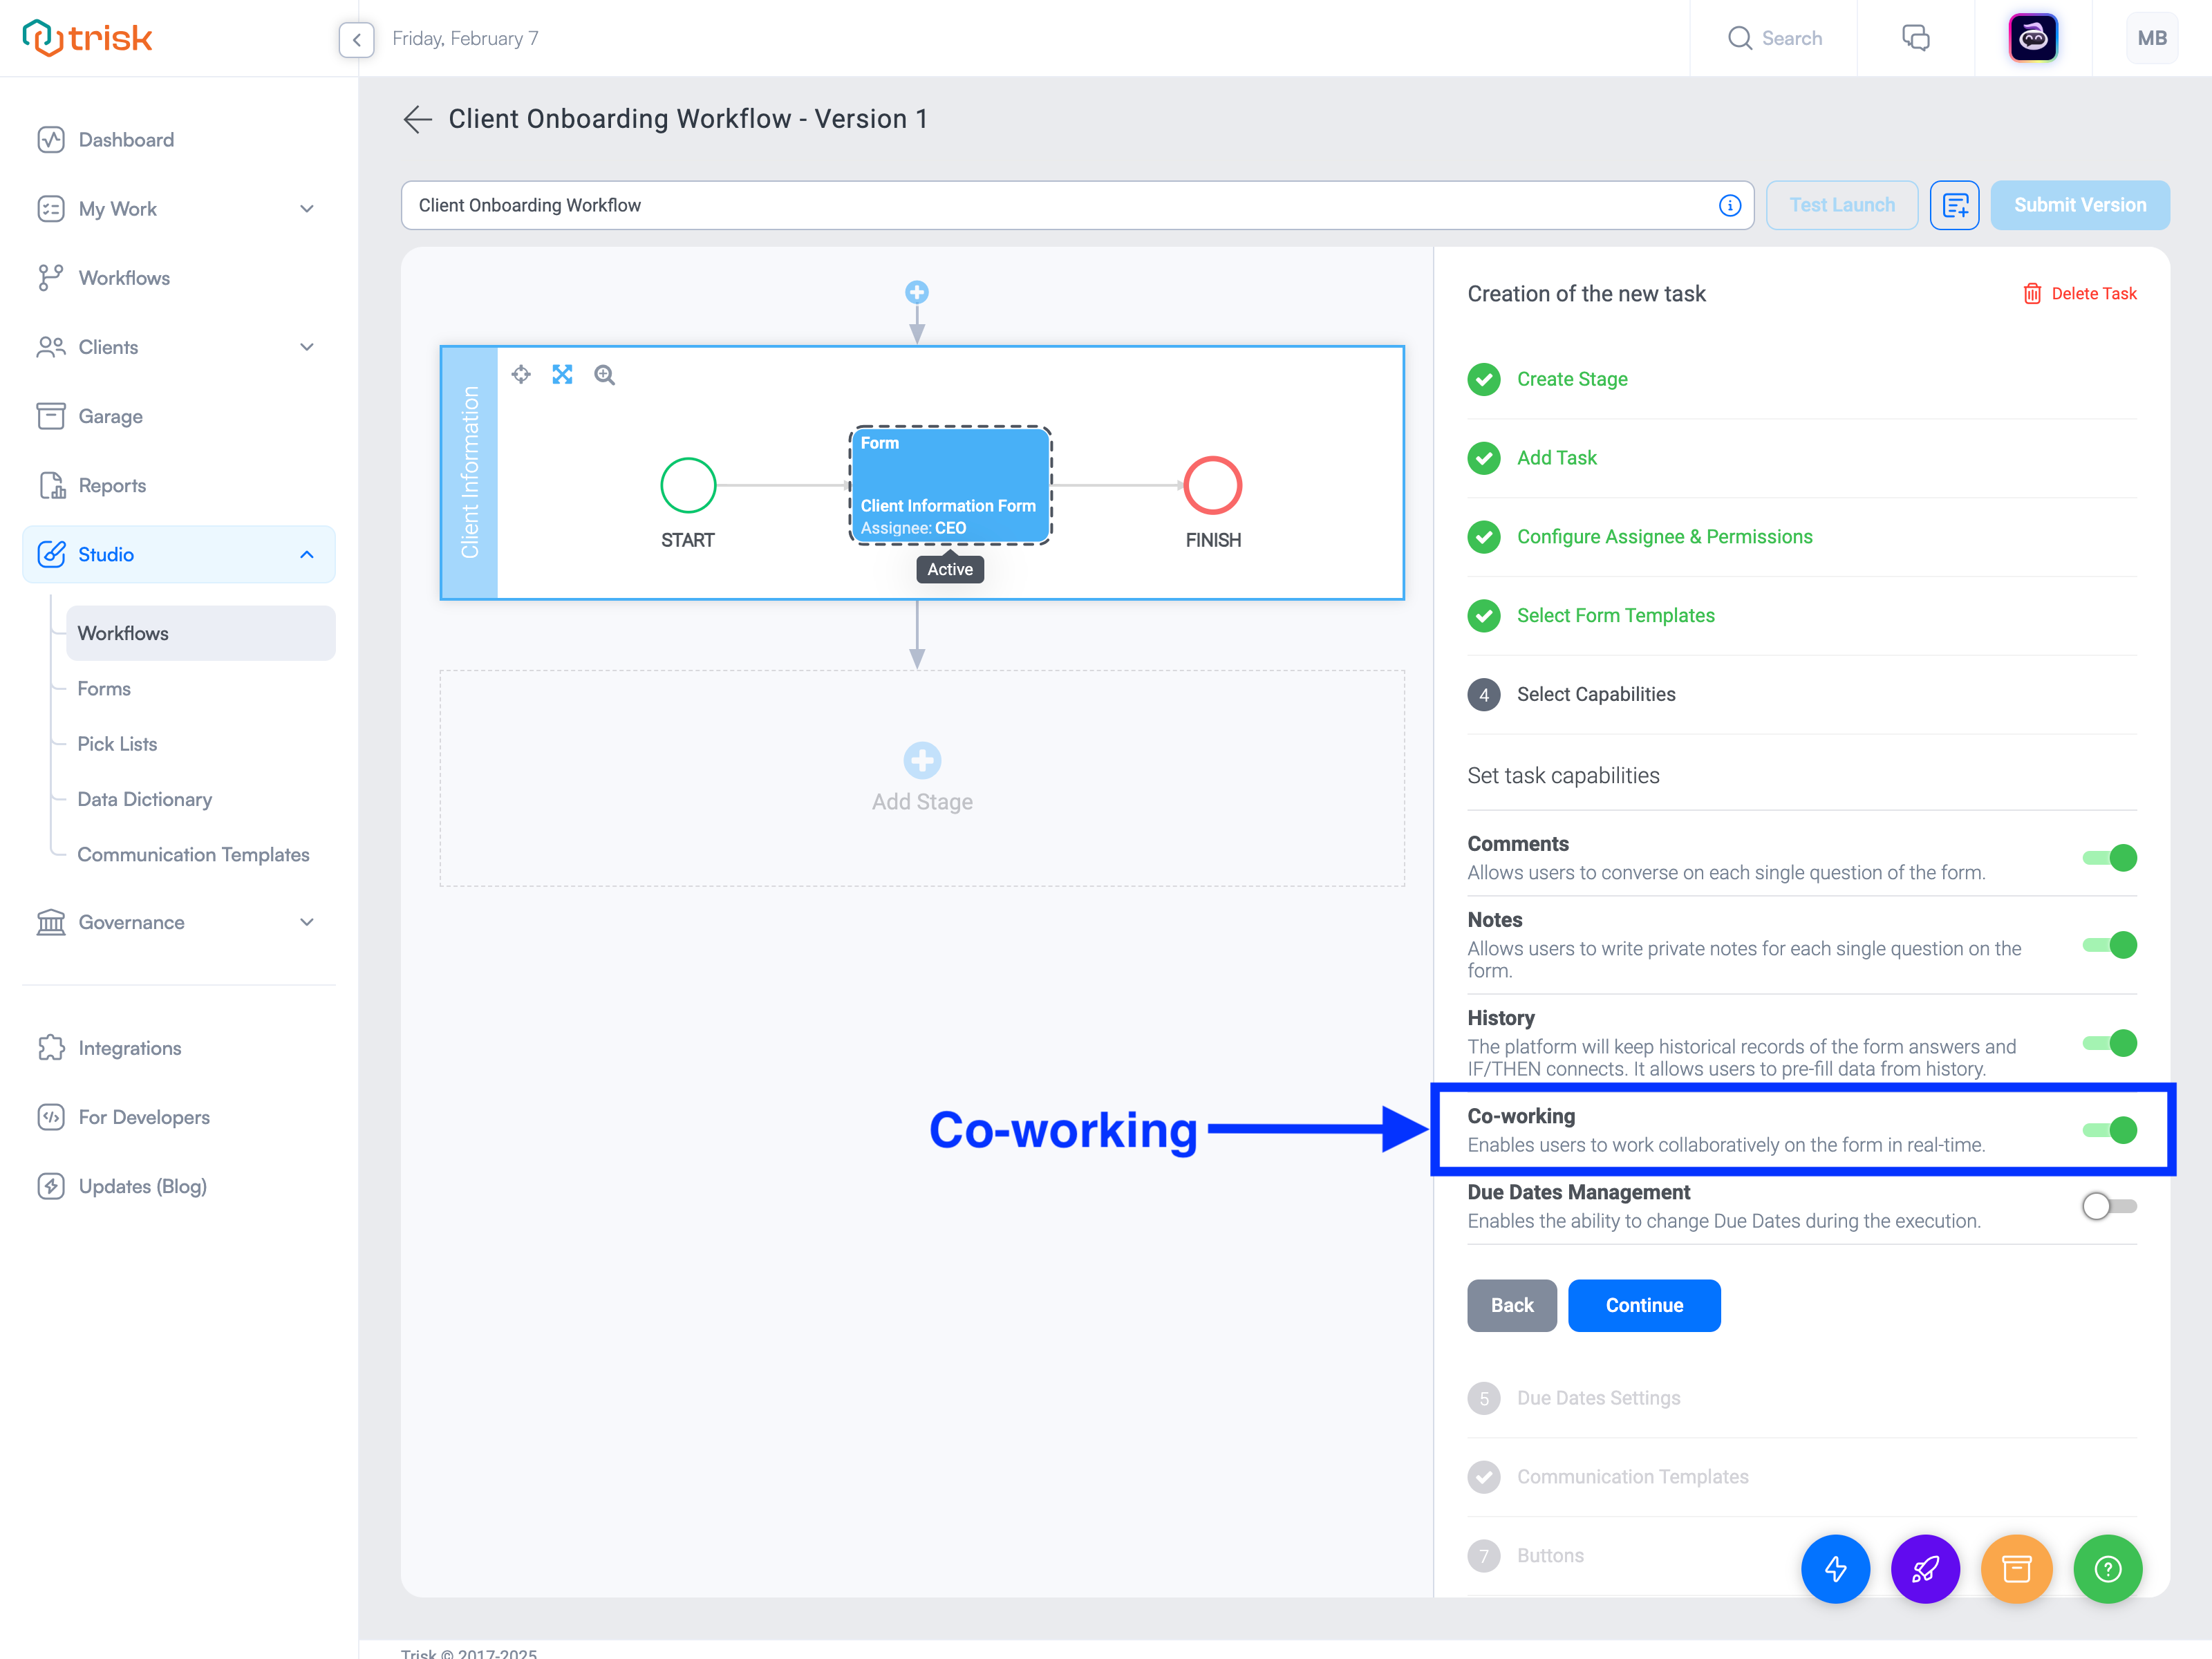
- Enable Co-Working:
In the "Select Capabilities" step, turn on the "Co-working" toggle to allow real-time collaboration on the form. This setting must be enabled to let multiple users to work on the form simultaneously.
By following these steps, you can ensure all users have the correct access and capabilities needed for efficient co-working within Trisk. By leveraging the Co-Working feature, teams can collaborate more effectively, ensuring that all required information is accurately captured and shared in real-time.
How to Launch a Co-working Session:
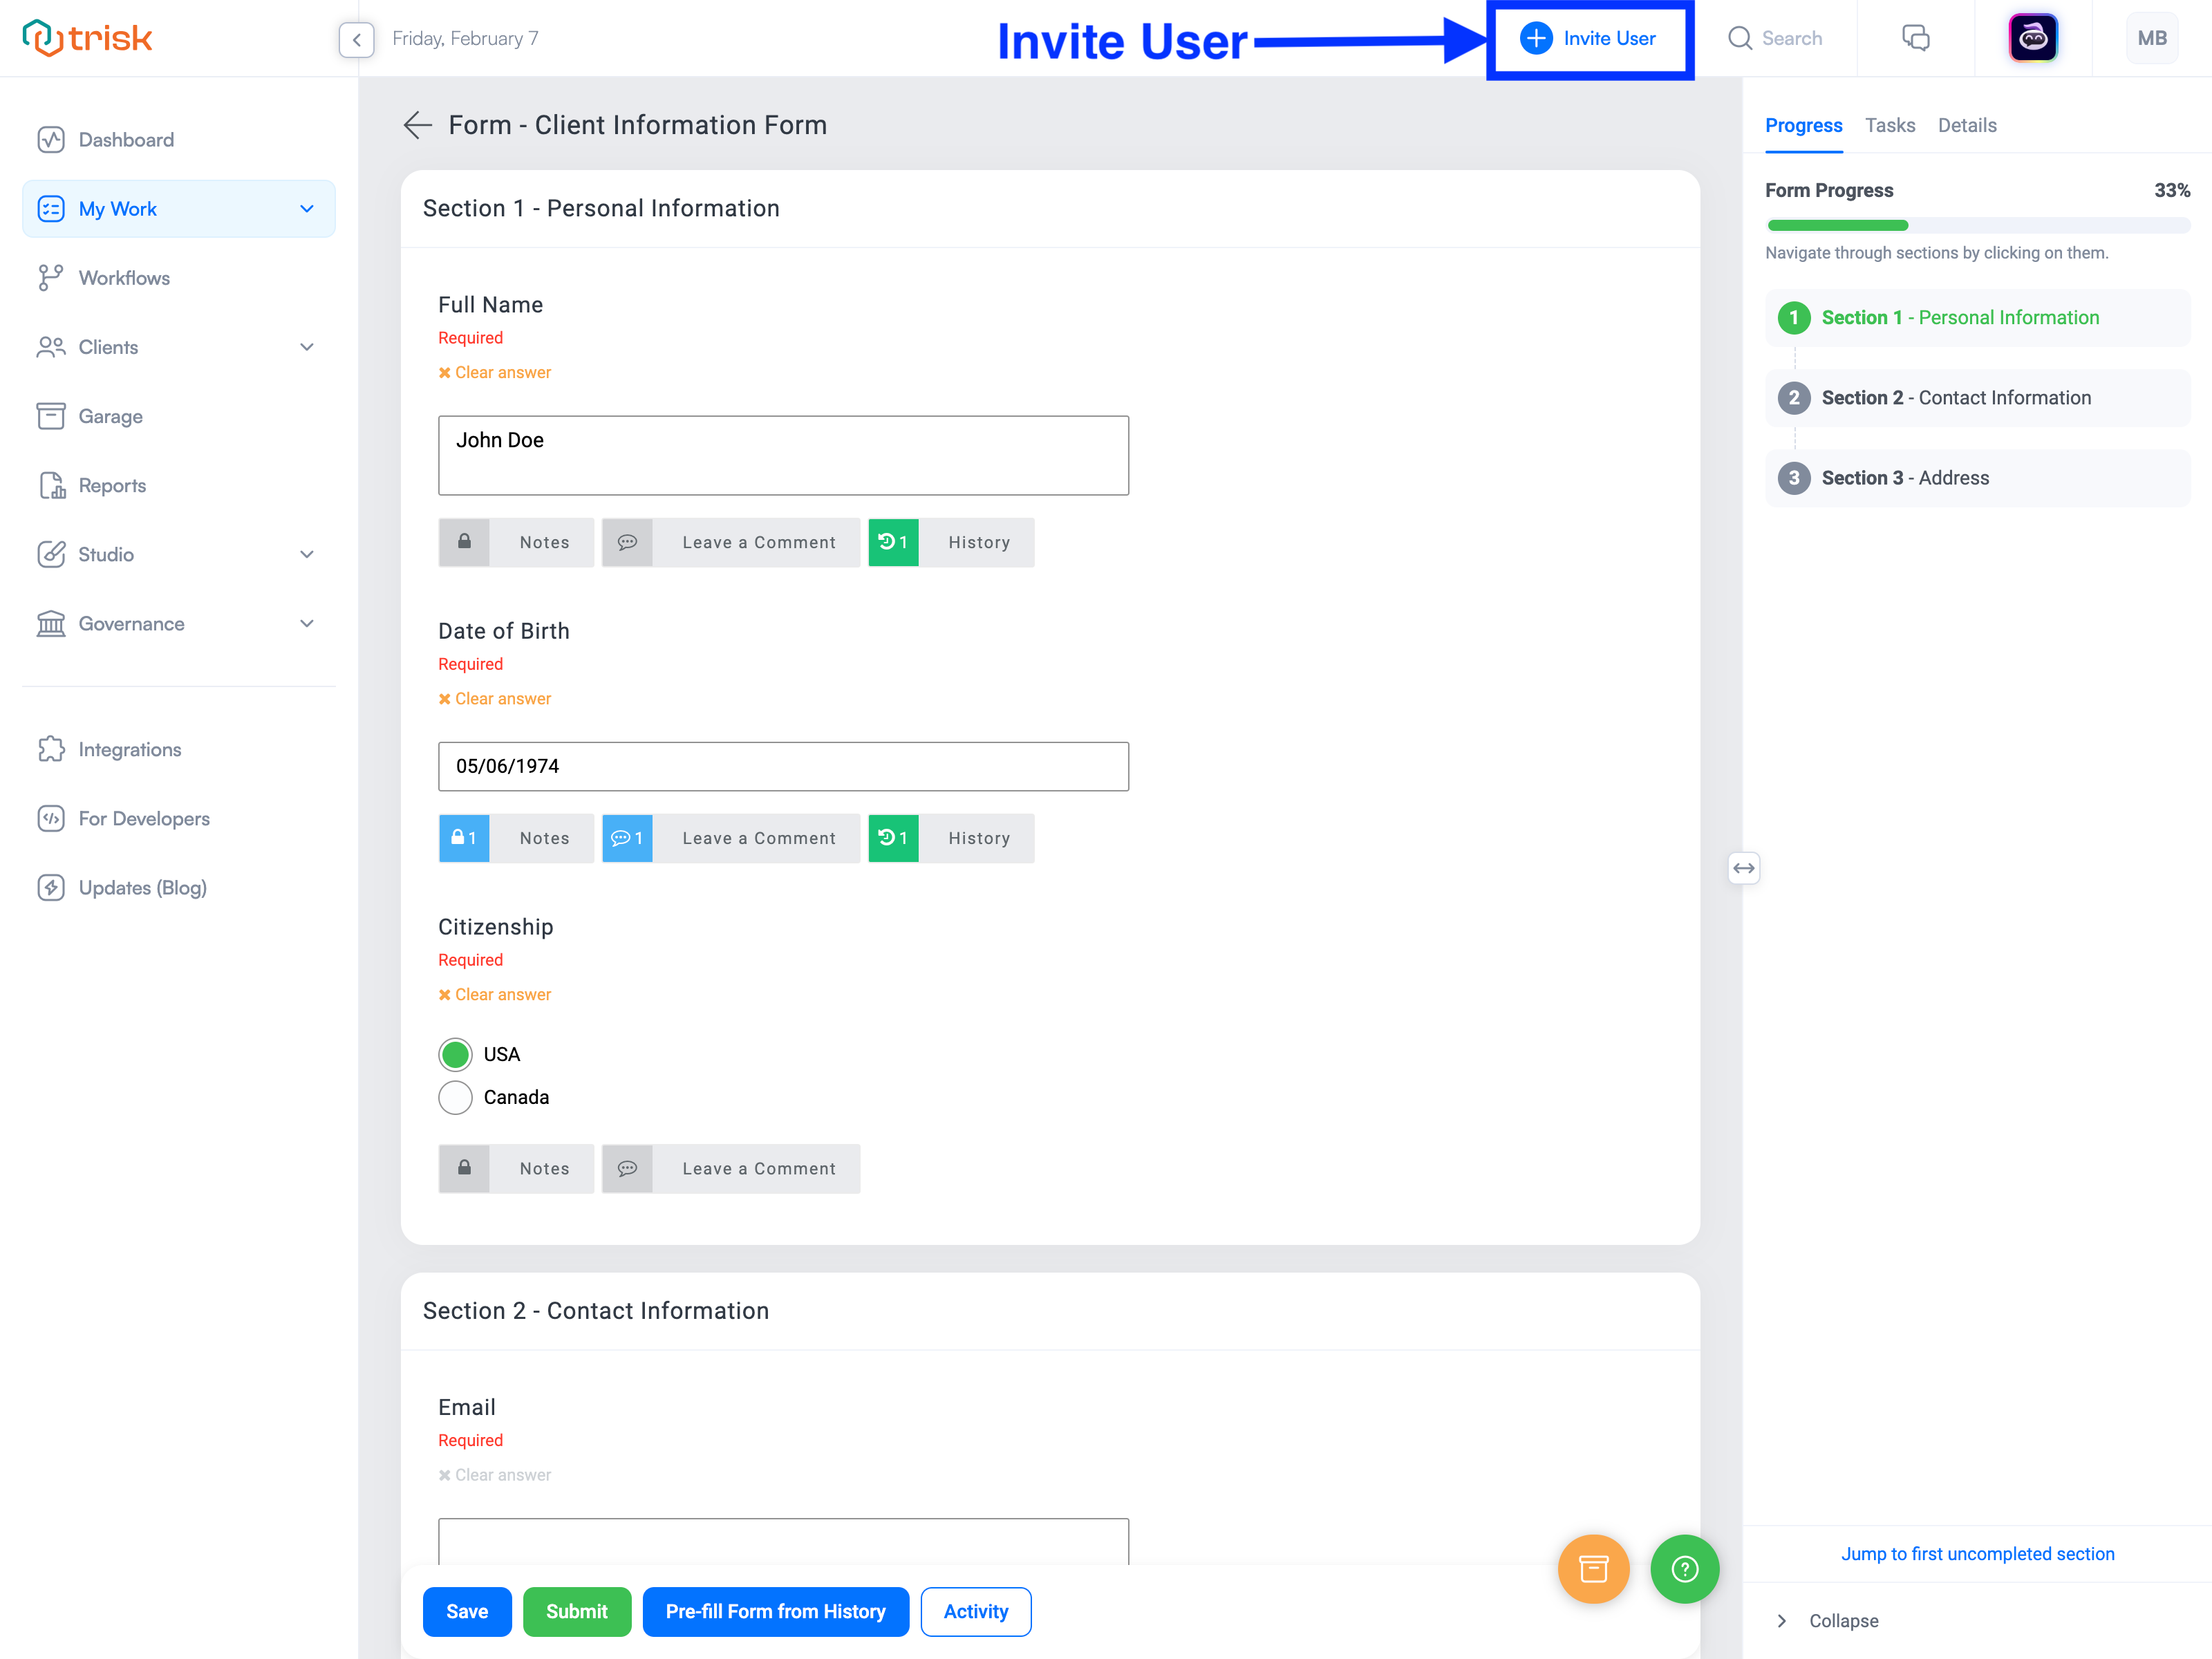
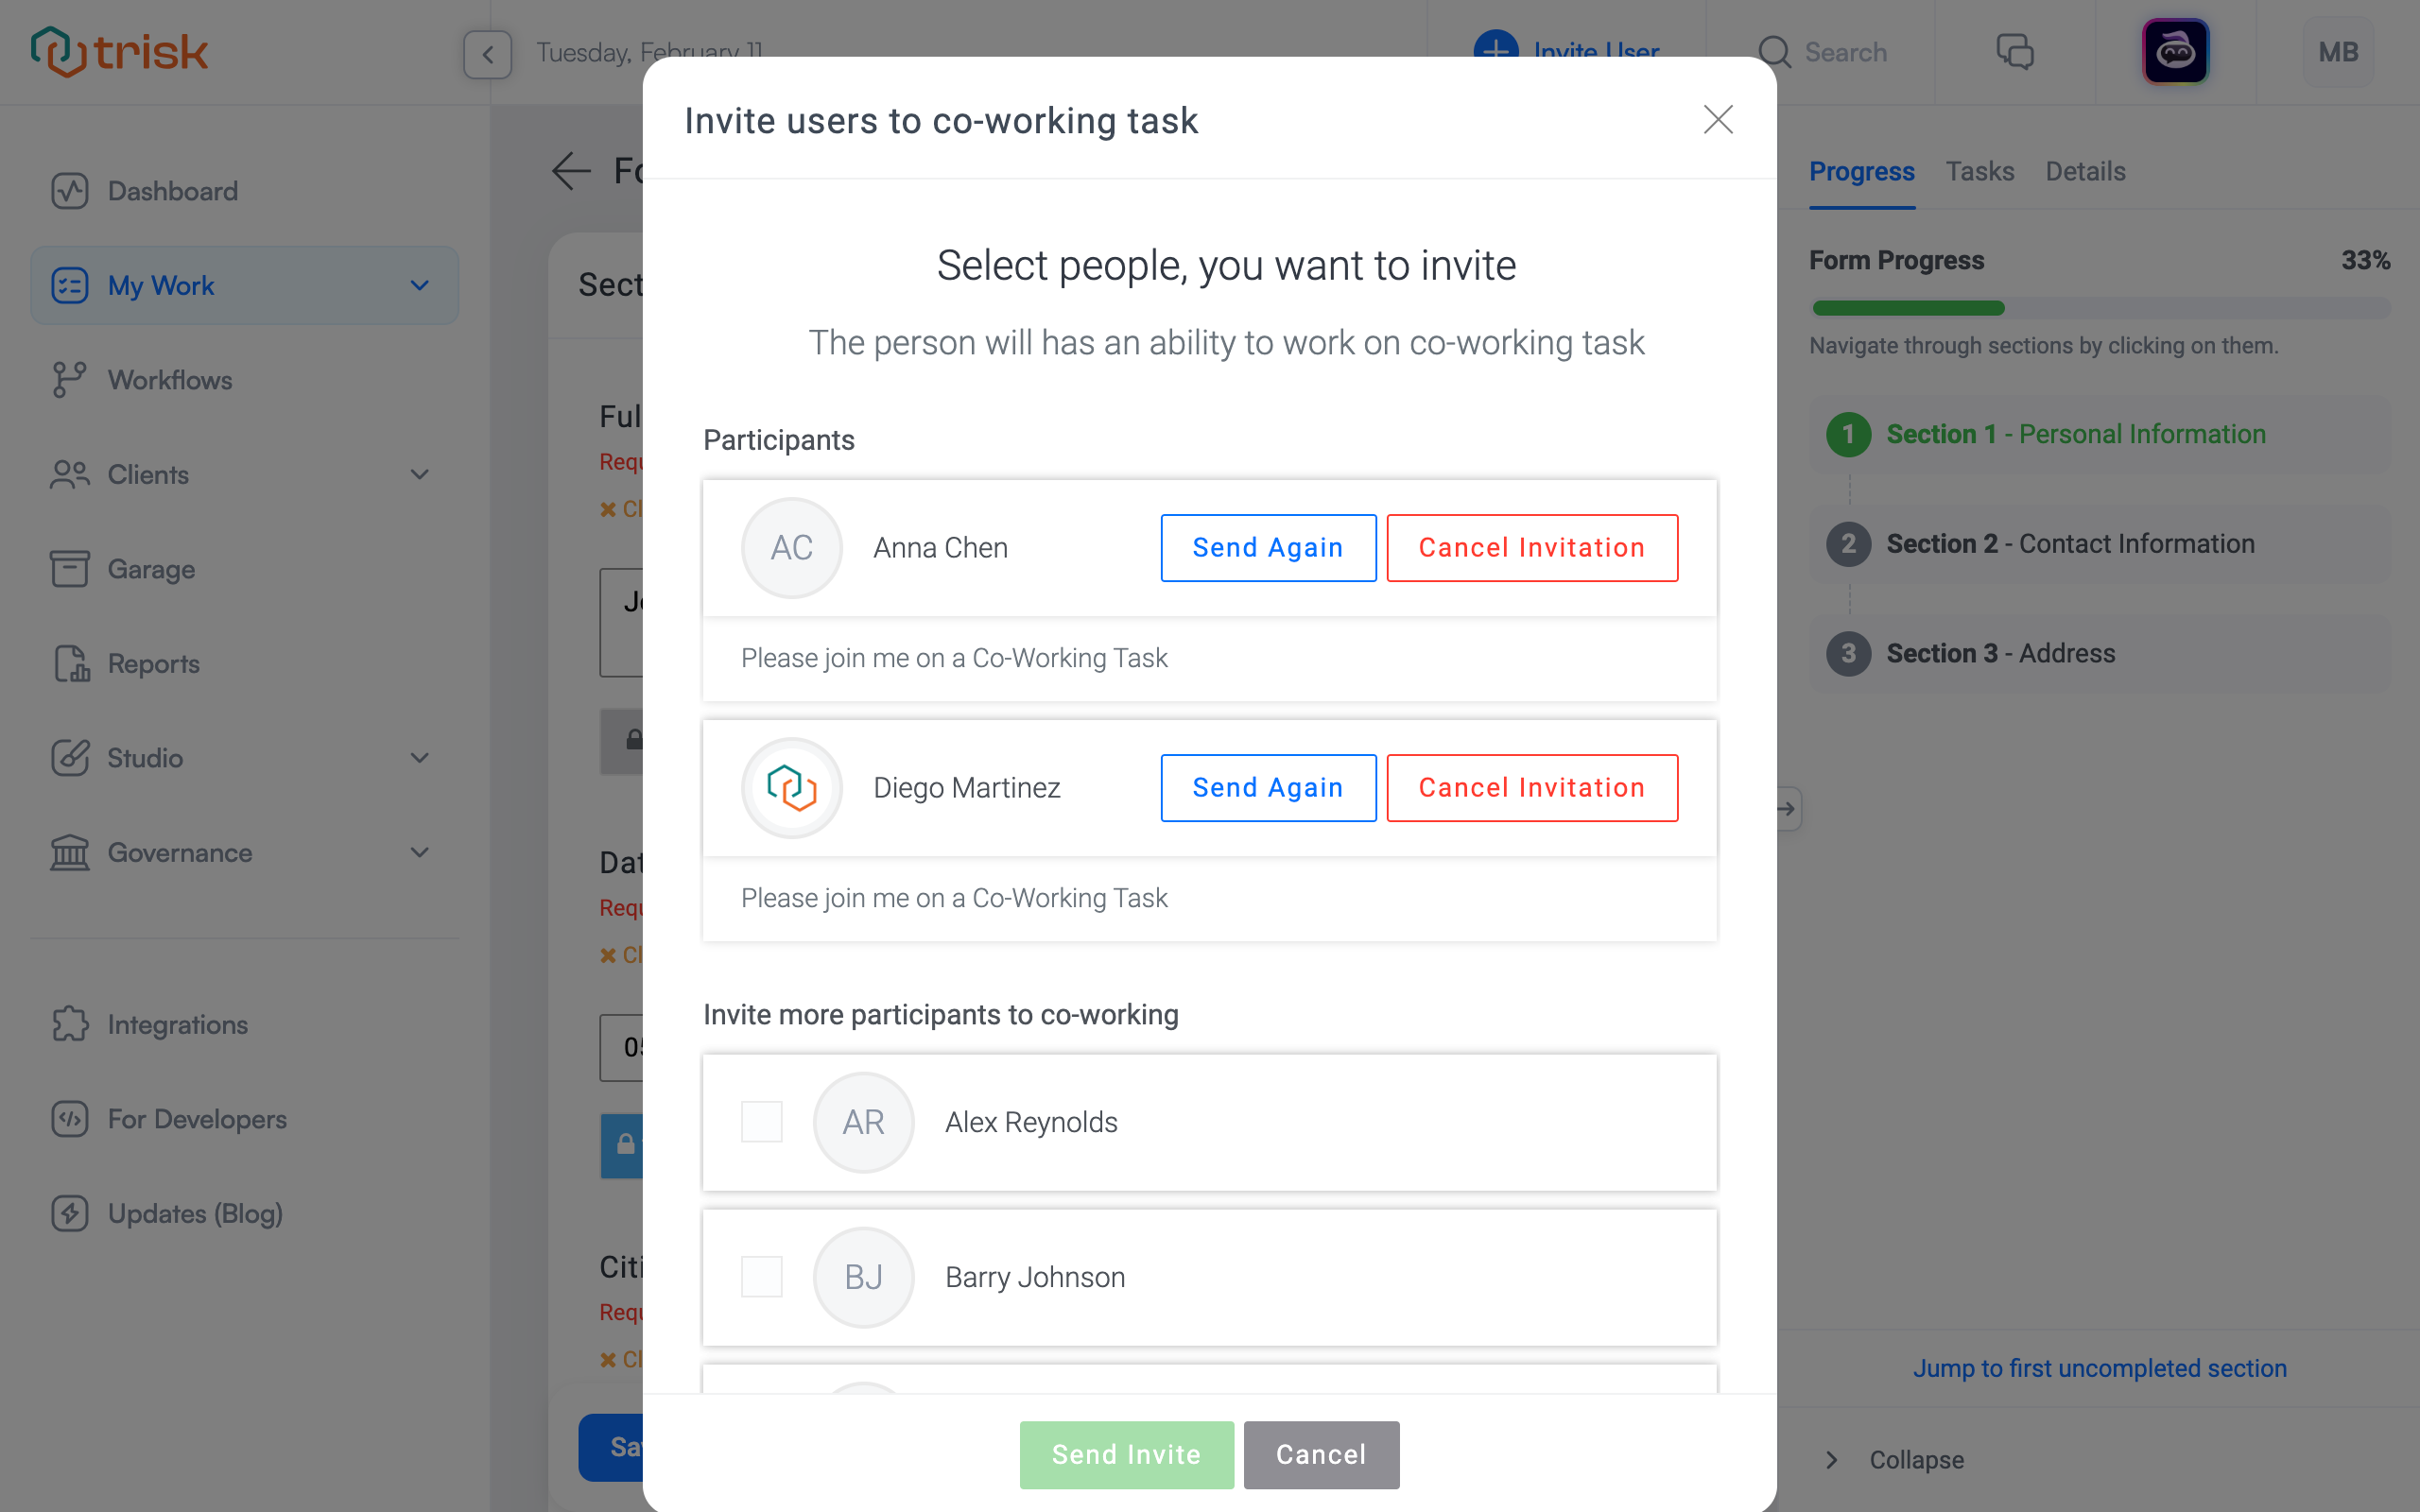
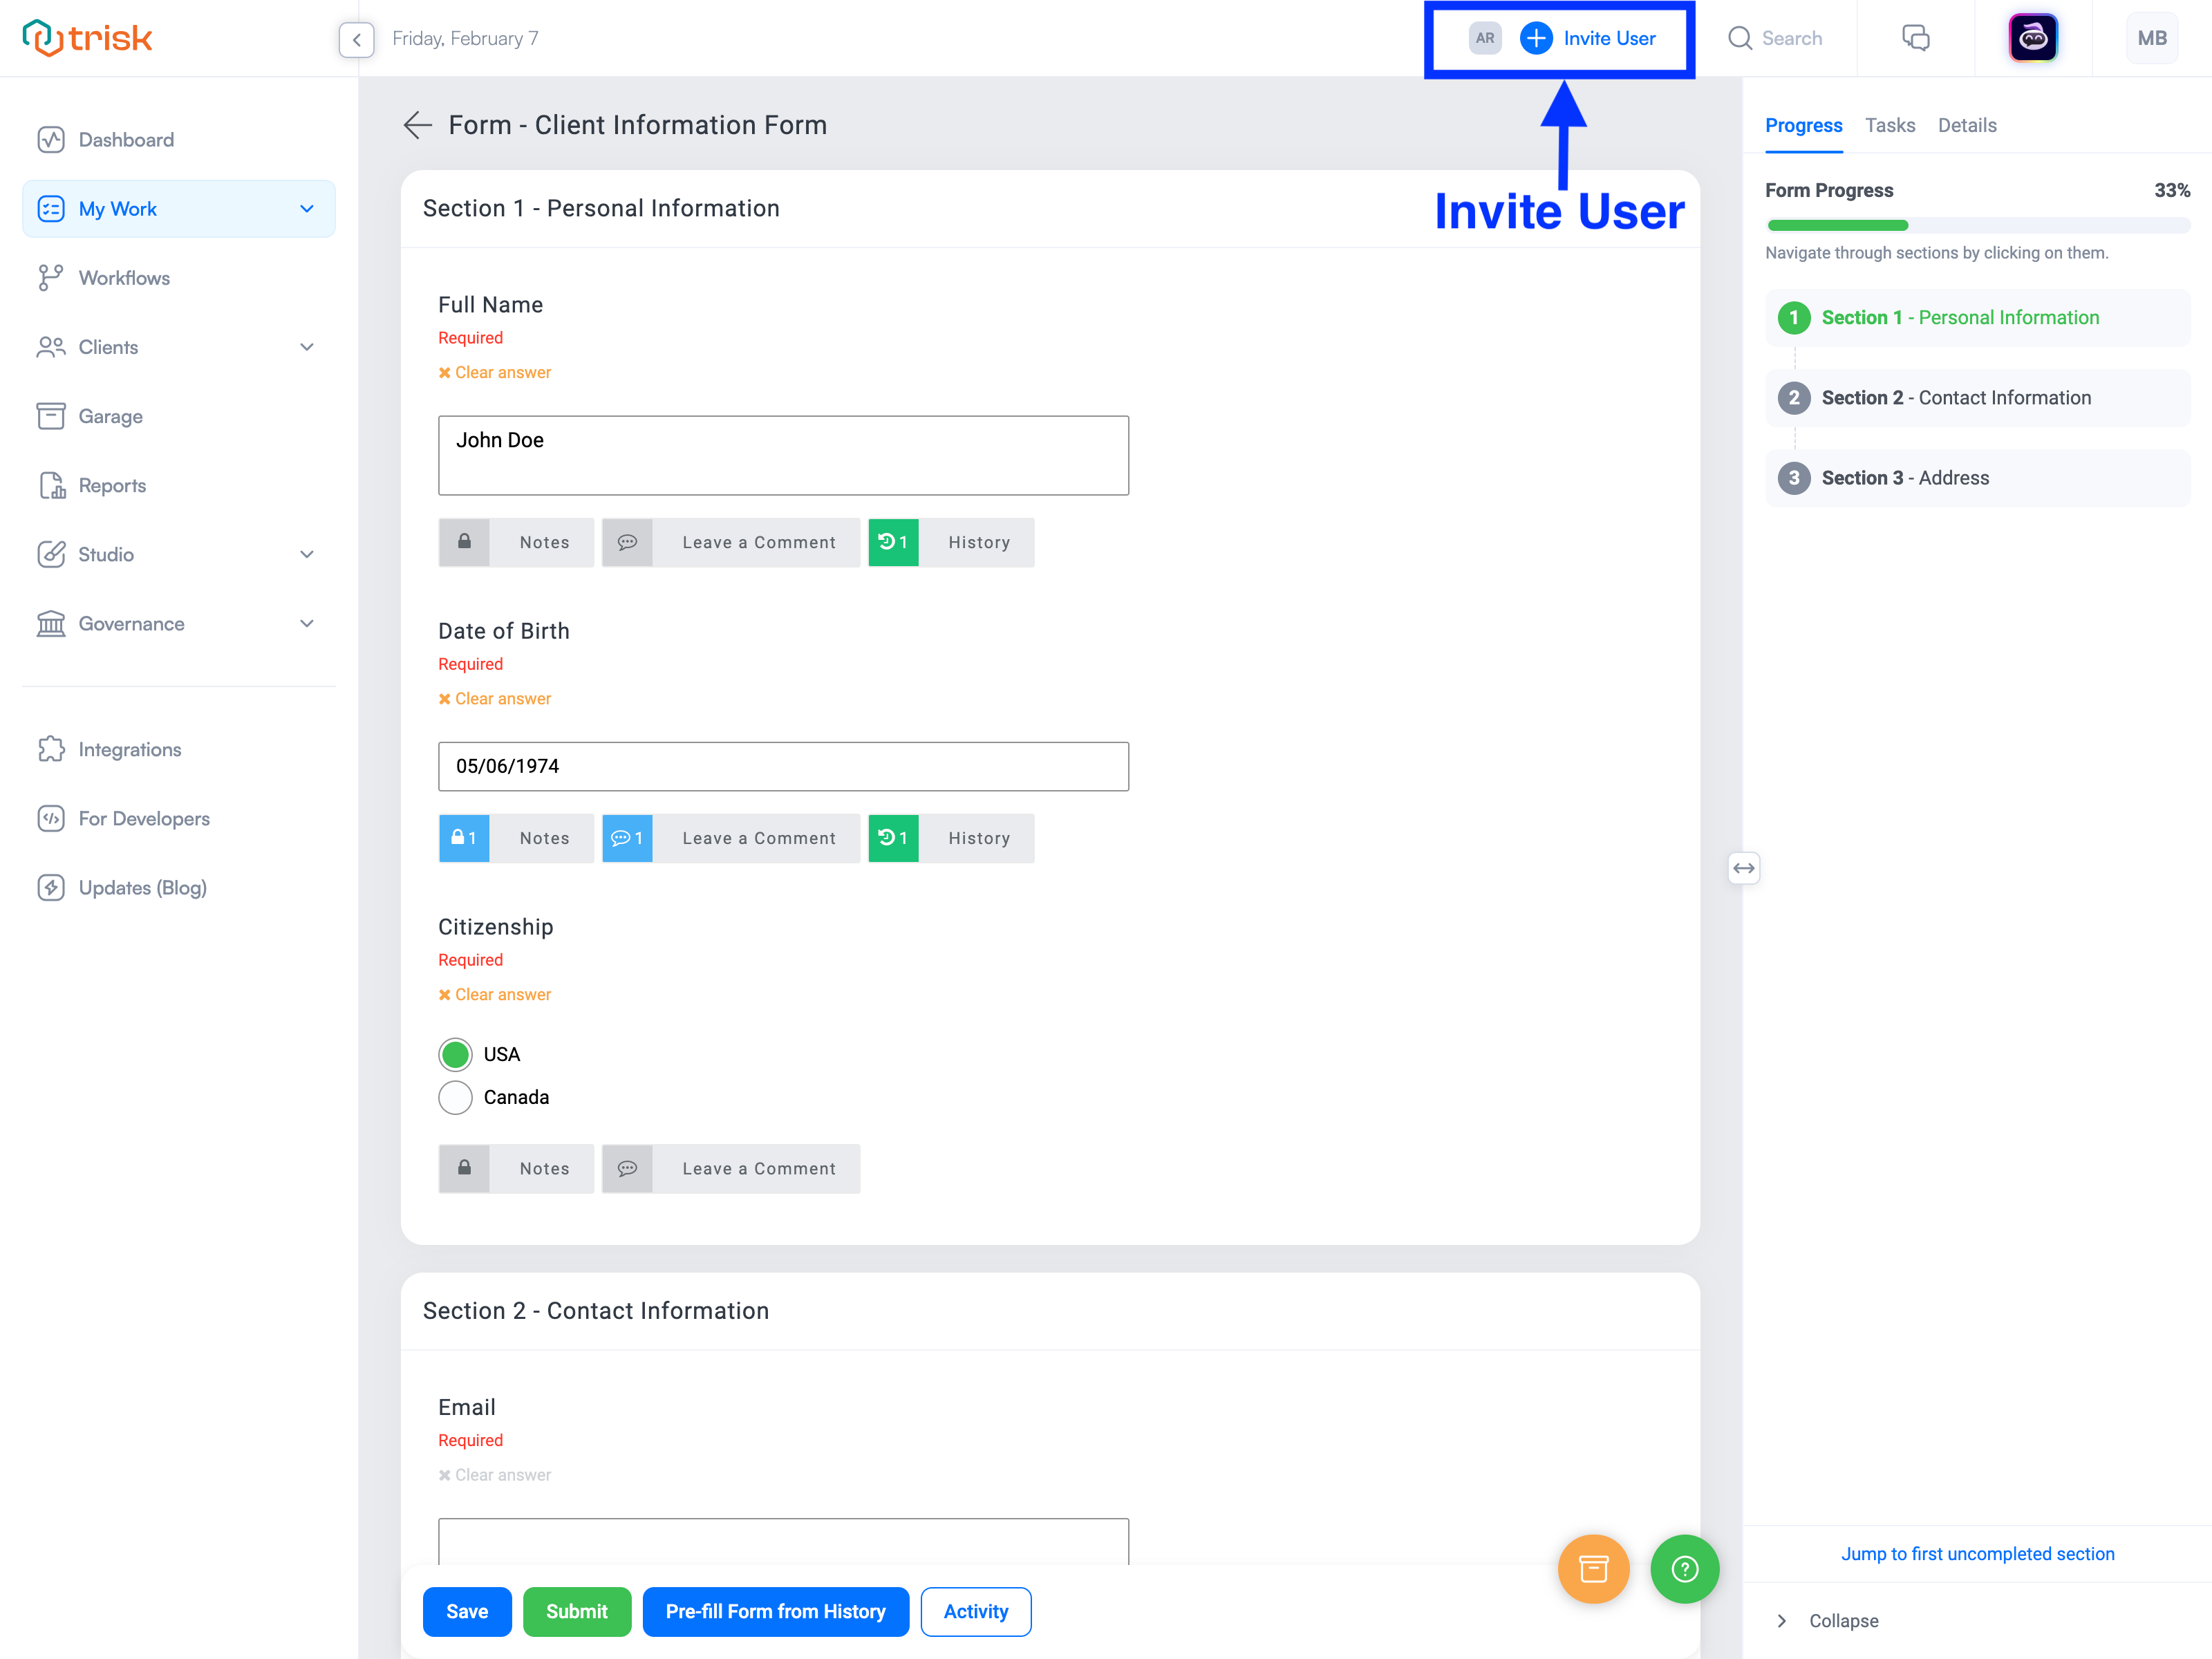
Invite Participants
- Navigate to the launched Form task and click the blue "Invite User" button at the top-right corner of the screen.
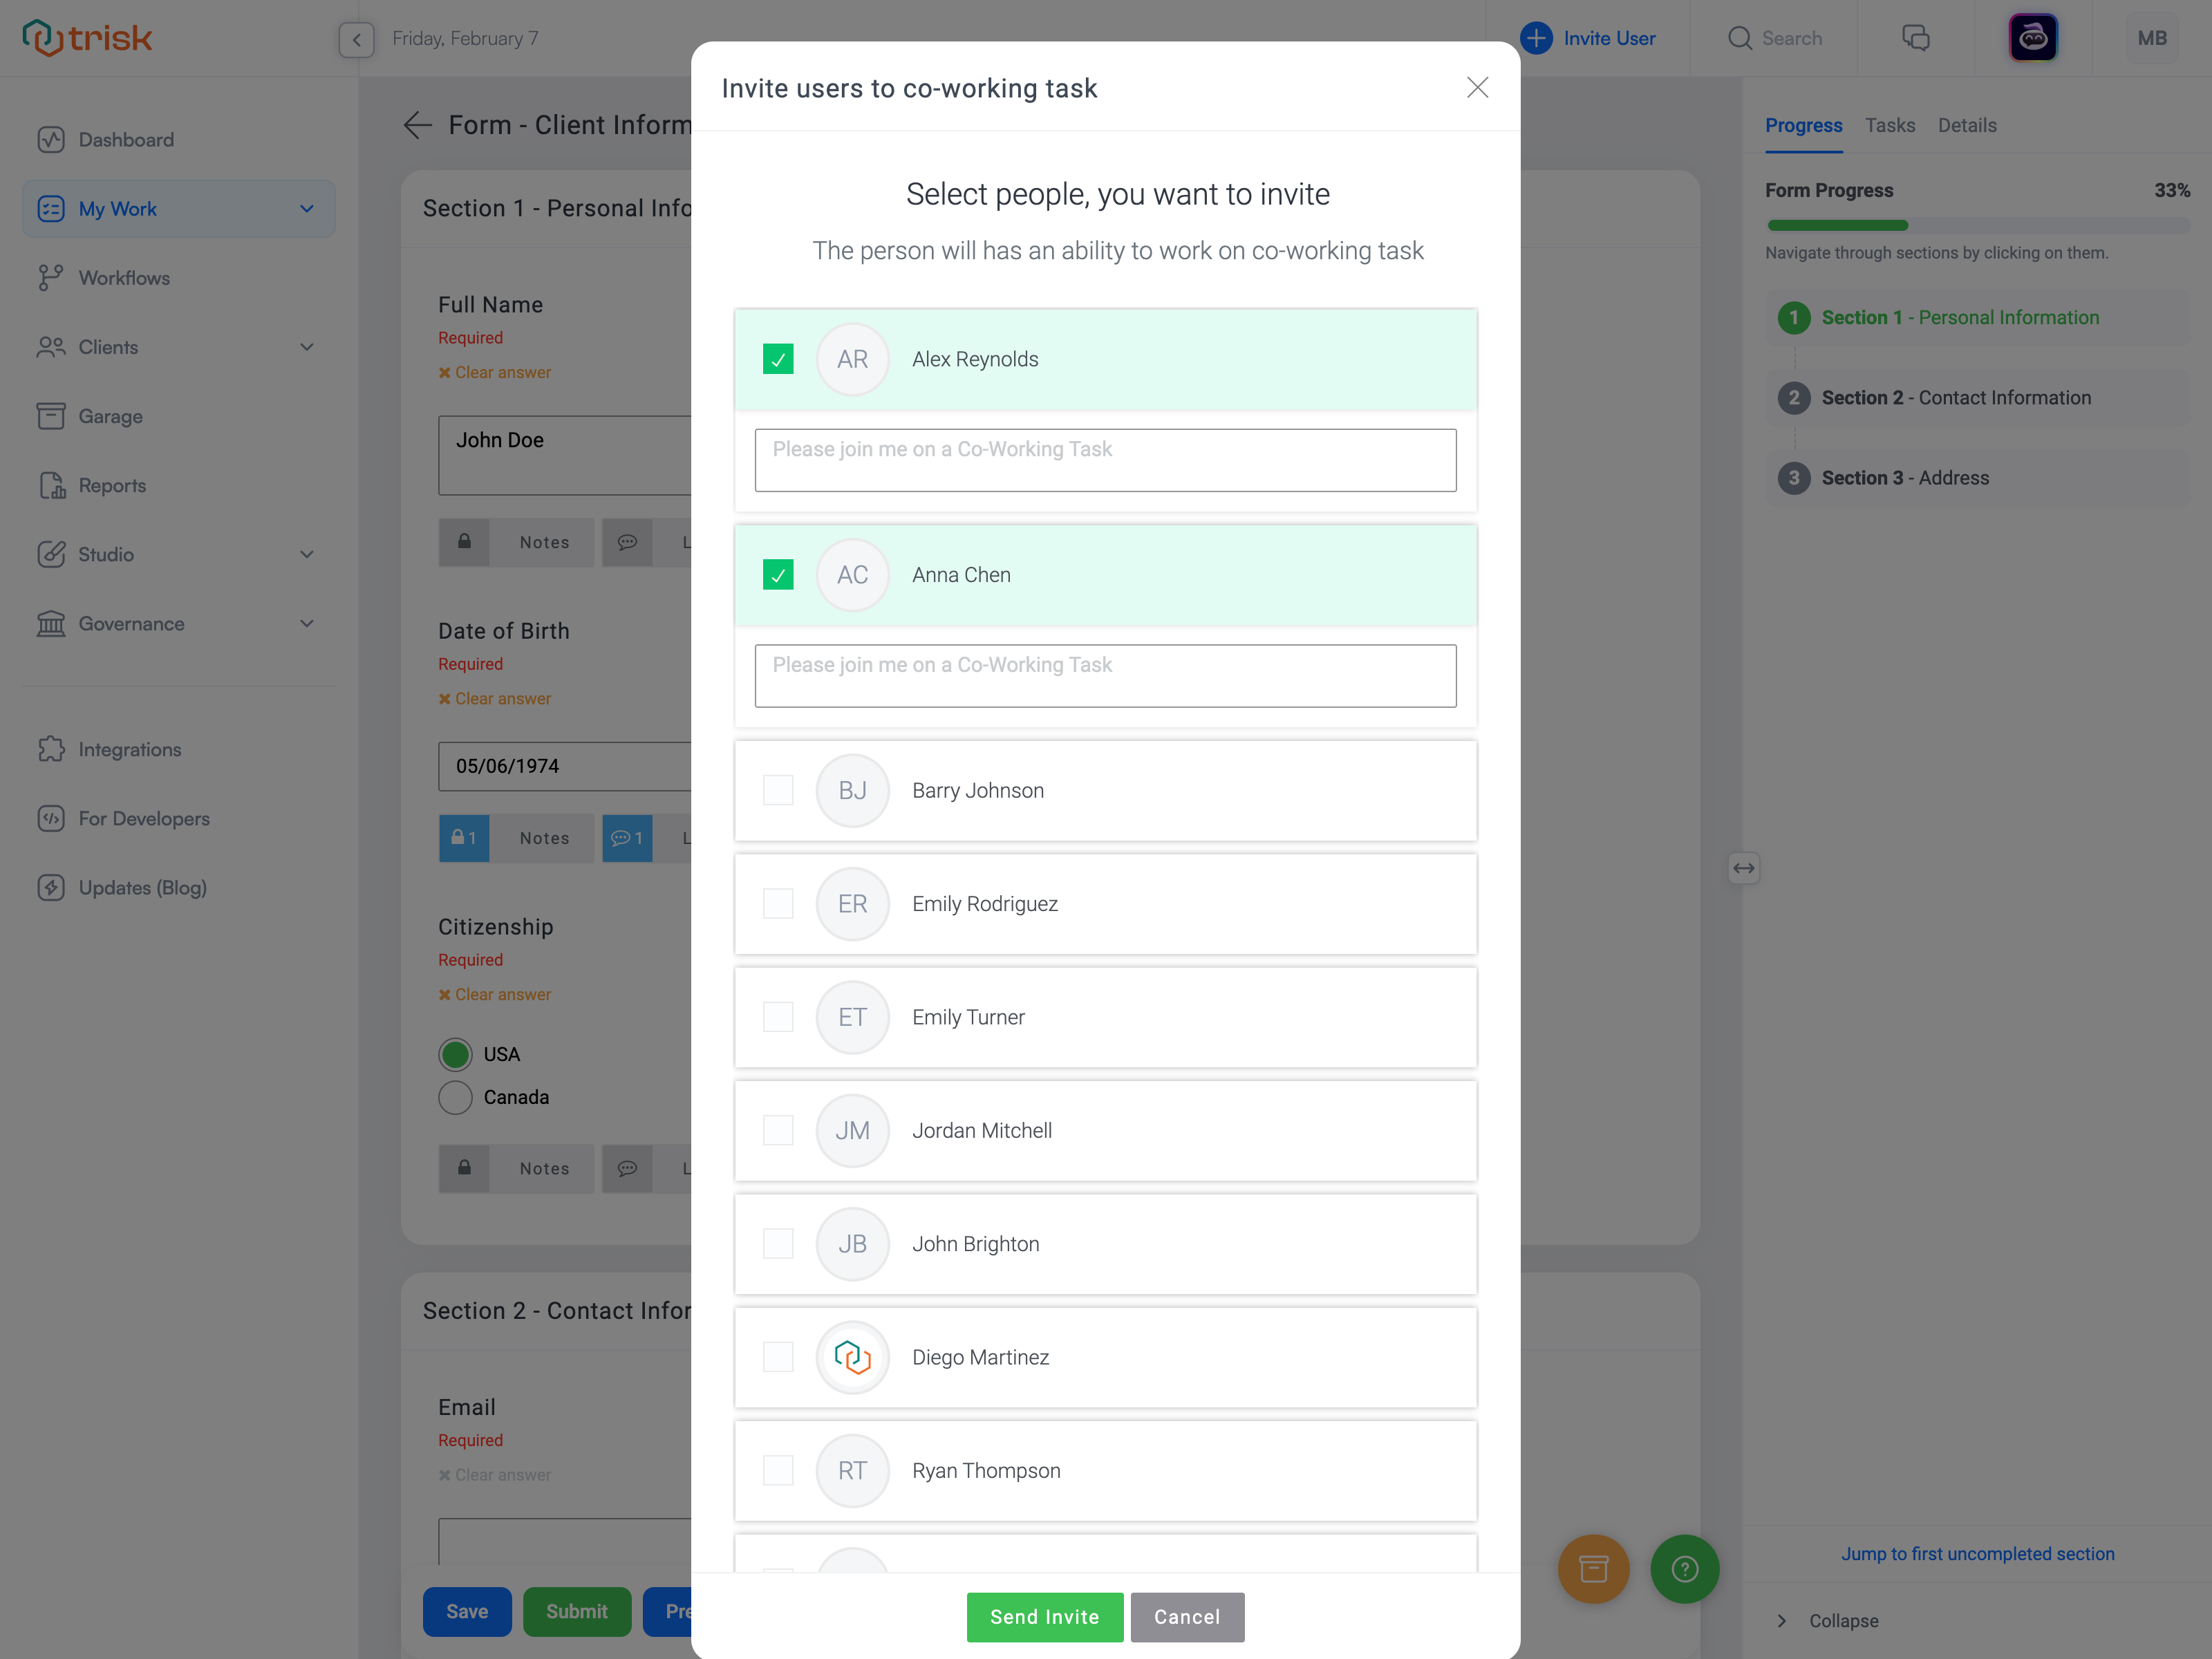
- A pop-up will appear where you can:
- Select users to invite.
- Customize the invitation message in the provided text box below their name.
- Click "Send Invite" to send the invitation.
If a participant has already been invited, you can resend the invitation by clicking the blue "Send Again" button next to the user name.
Receiving Invitations
-
Invited users will receive a notification through Trisk:
- Company Users will see the co-working invitation in a colored banner at the top of their screen.
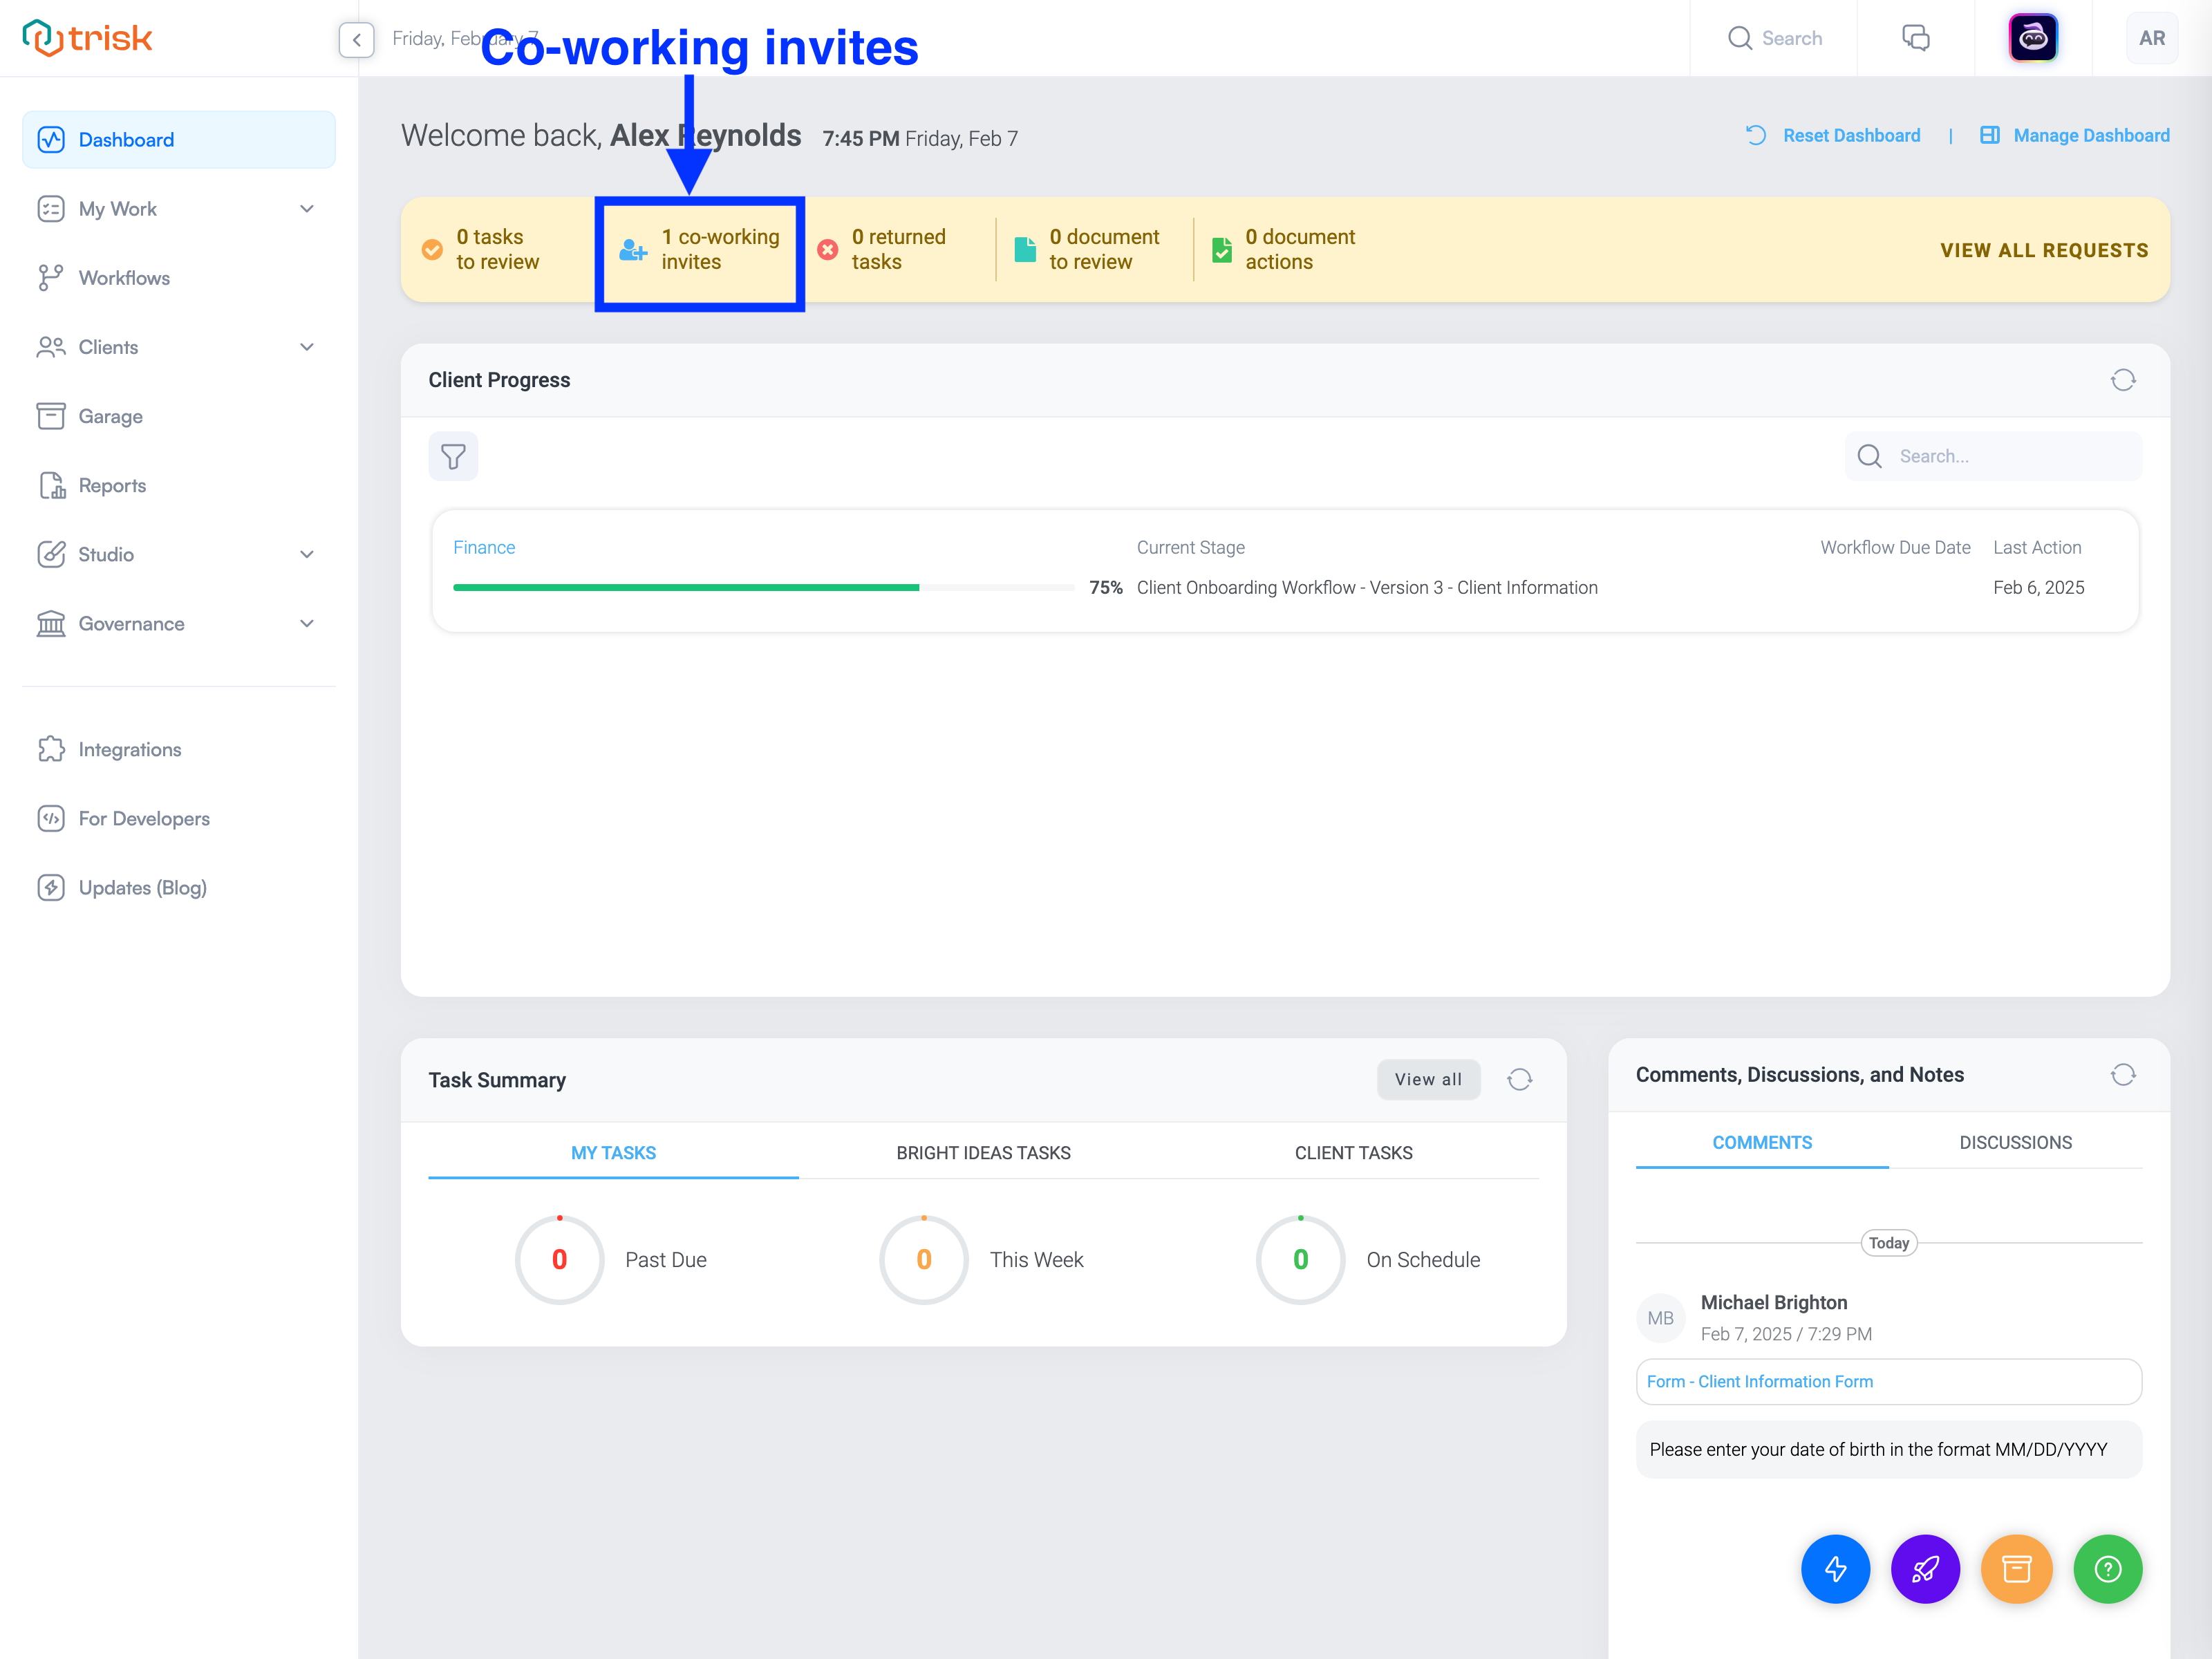
- Client Users will see a green "Join" button in the colored banner.
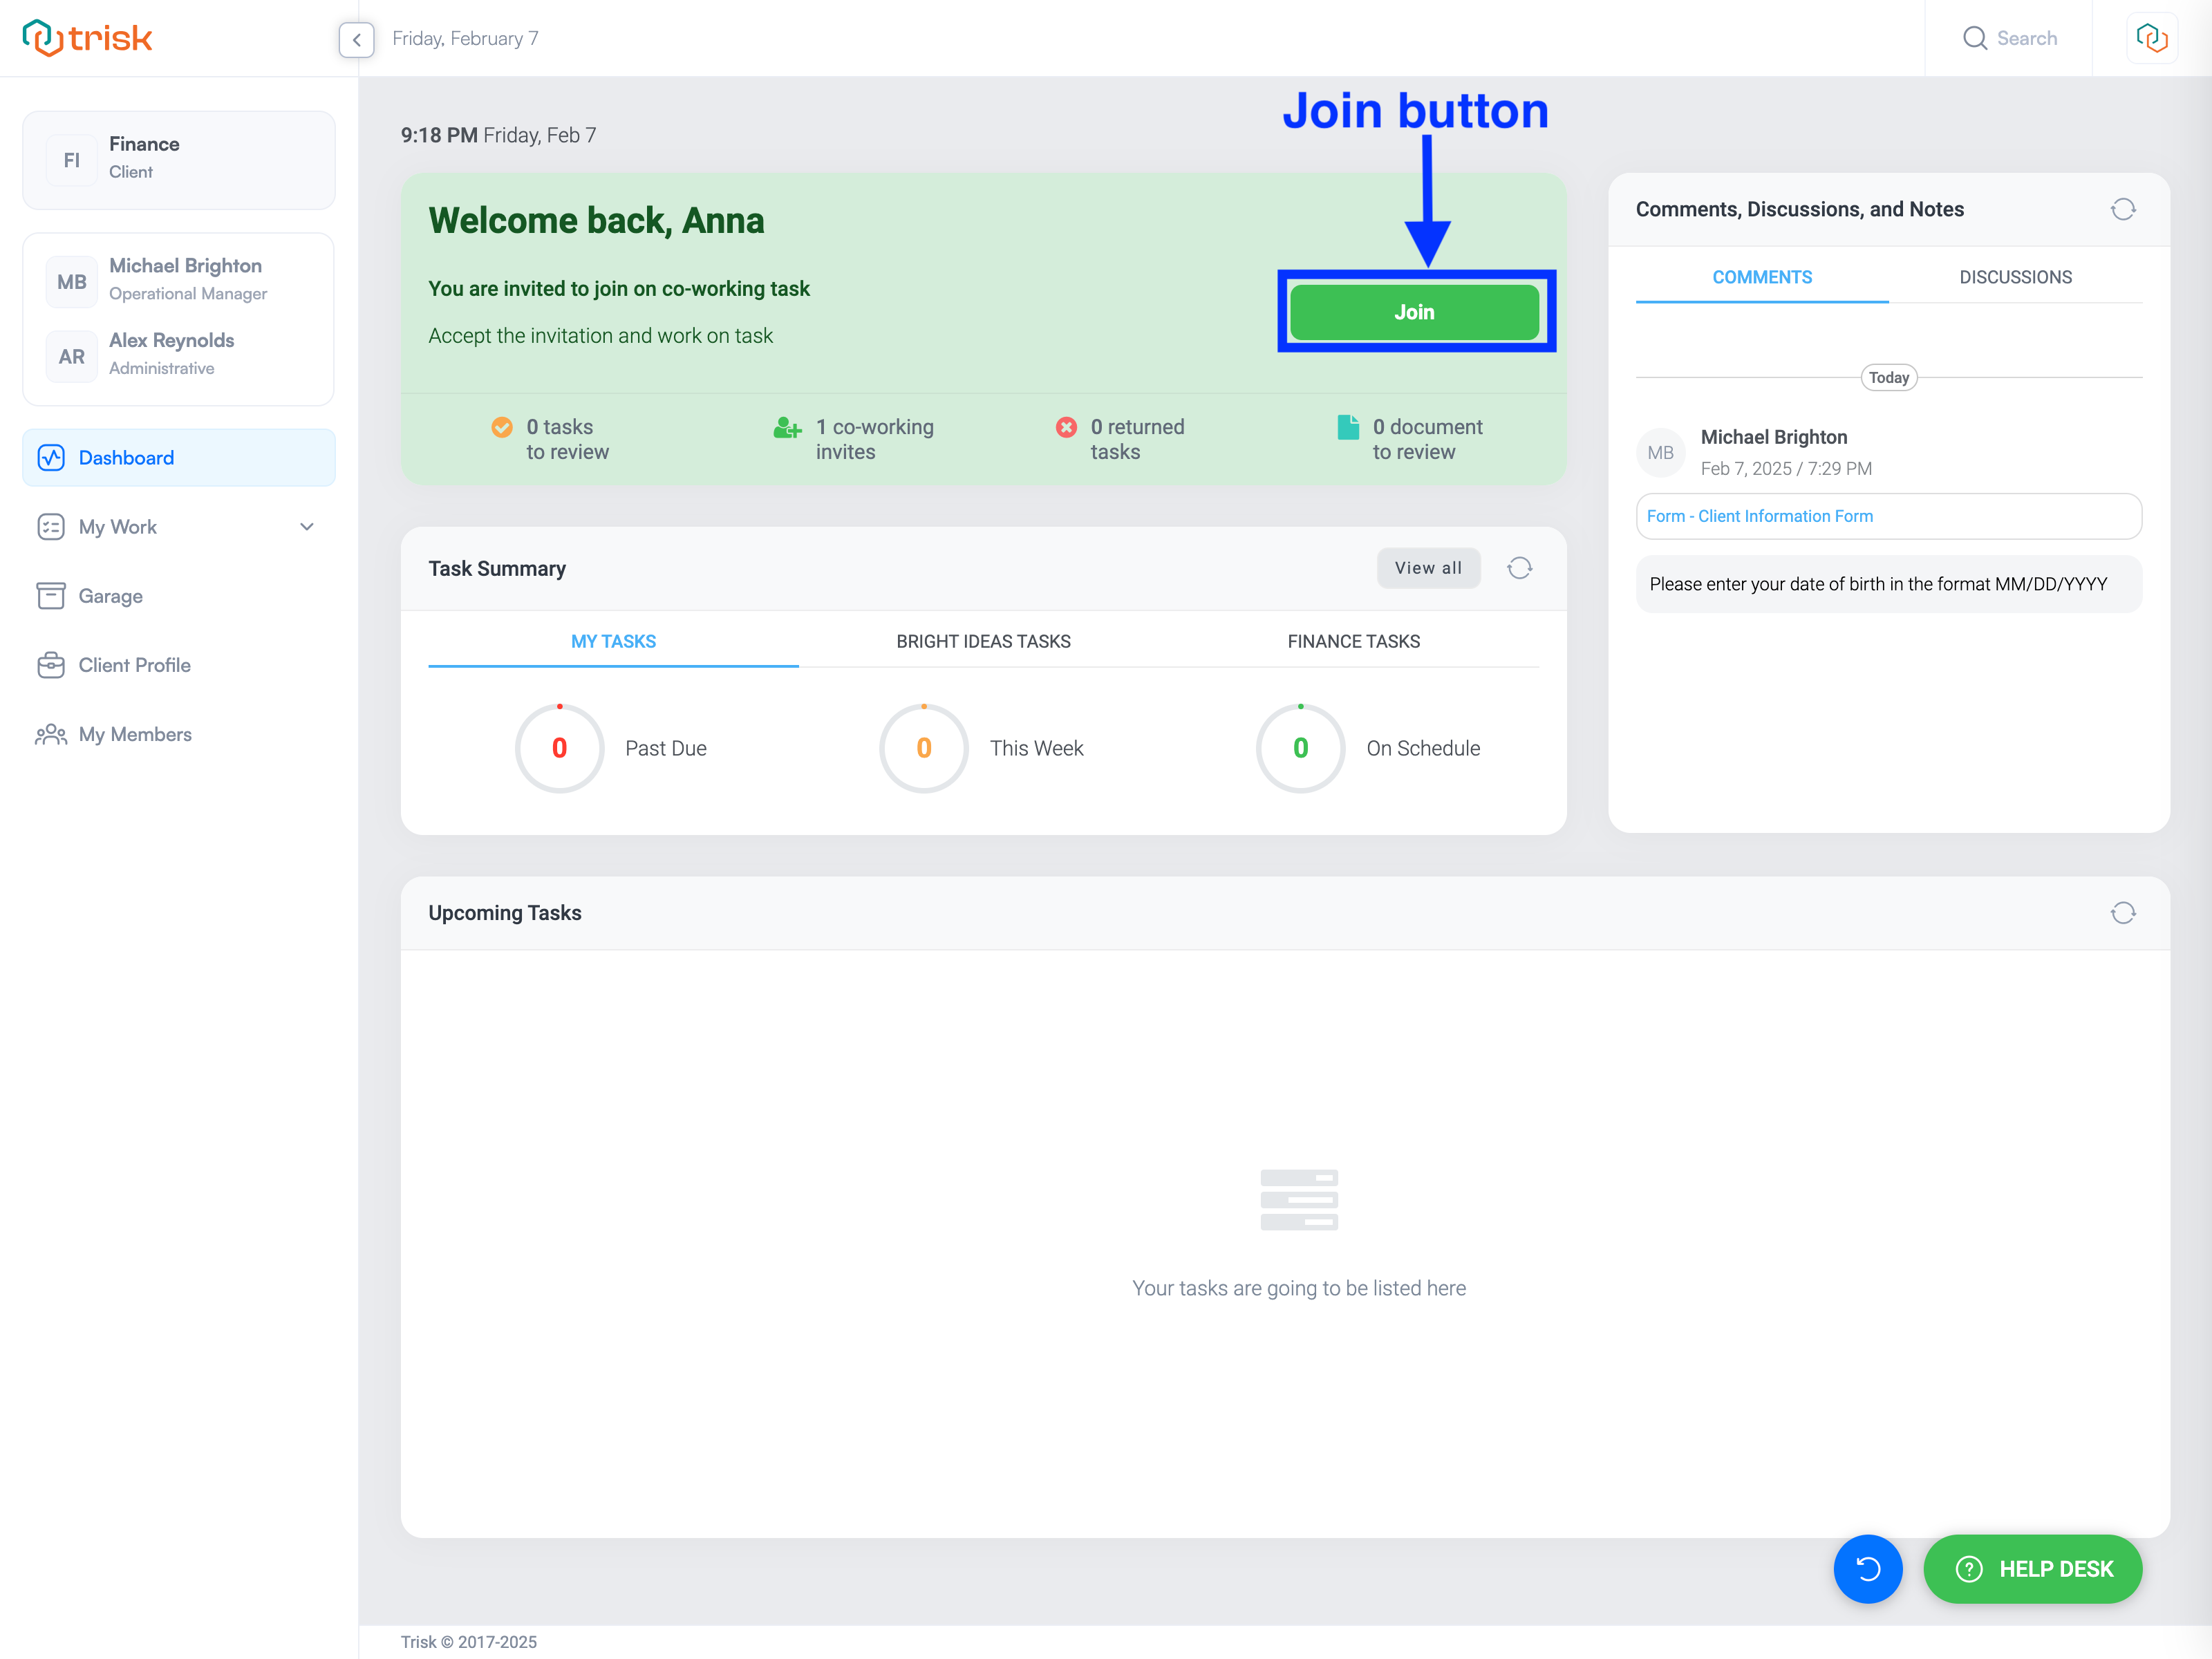
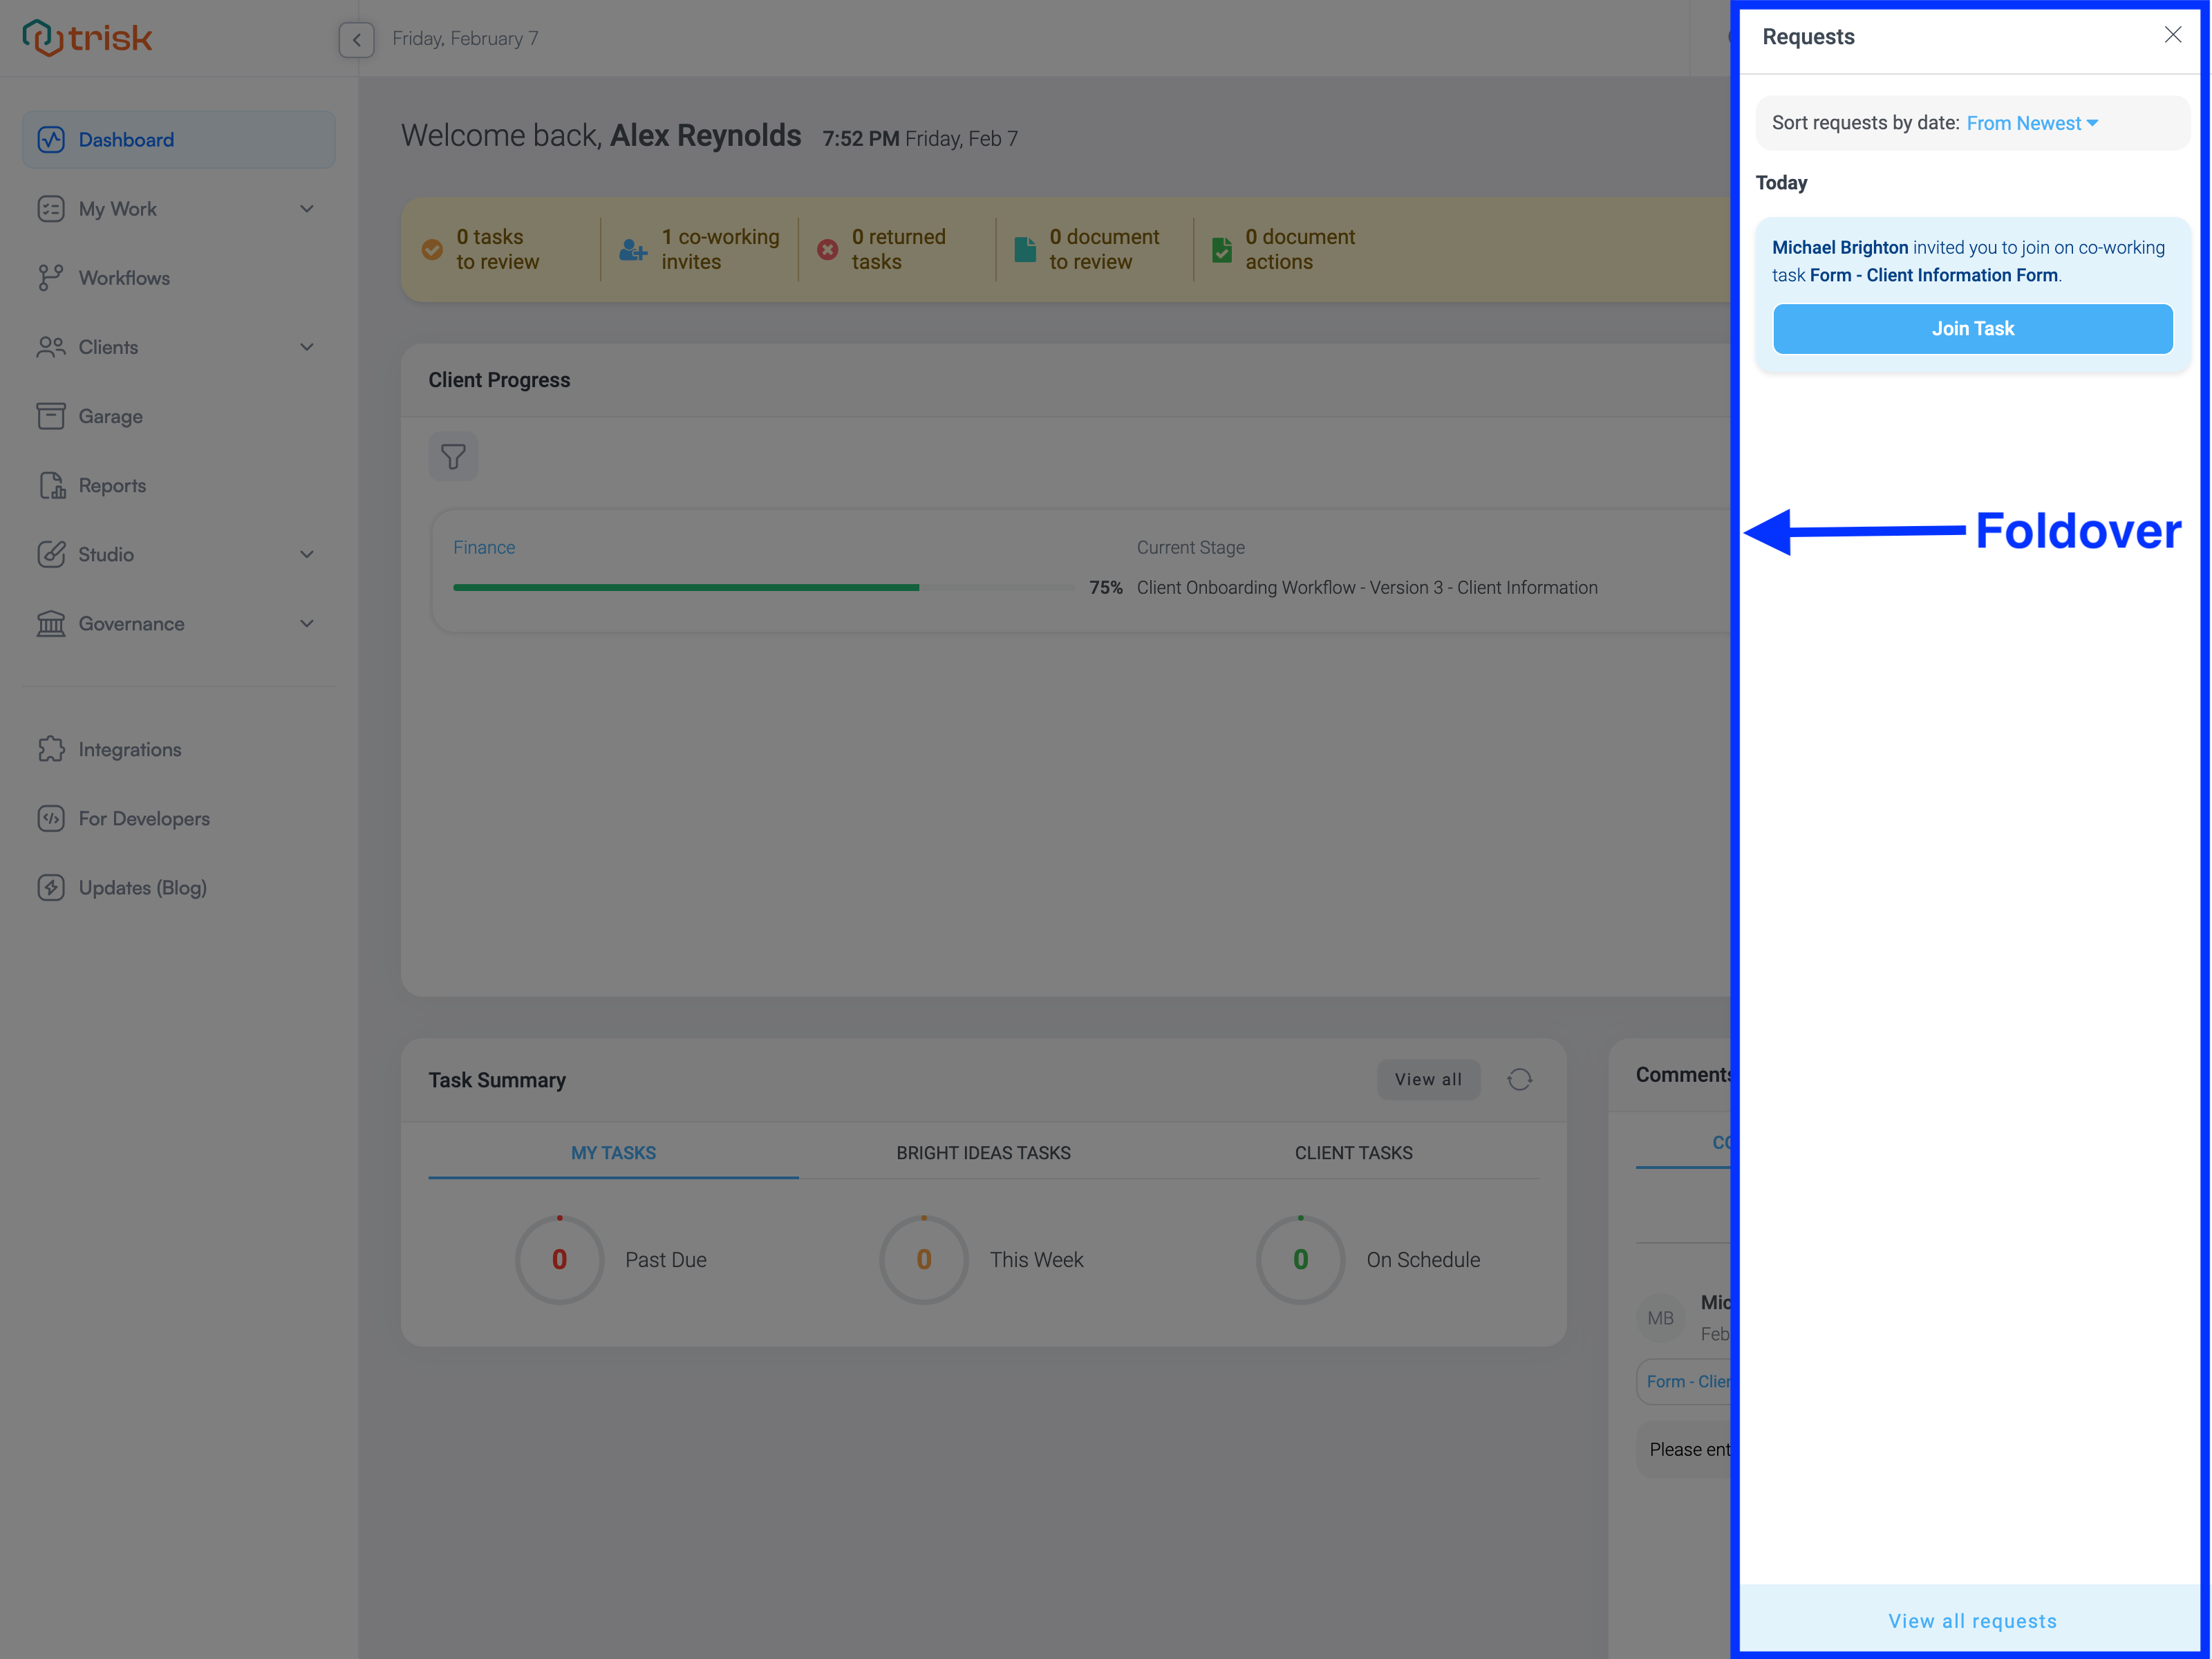
- A foldover displaying all requests will appear after clicking the notification or "Join" button. Users must click the "Join Task" button to access the co-working form.
Joining the Session
- Once participants join the session, their avatars will appear next to the blue "Invite User" button at the top of the form task screen.
How Co-Working Sessions Function
When multiple participants work on the same form, Trisk dynamically synchronizes their activity:
- Live Updates: As one participant answers a question, all other users' screens will highlight the same question, and show the responding user's name and entered input.
- Real-Time Comments: Comments added by any participant are instantly visible to all users. Notifications alert participants when a note is added, ensuring clear communication during the session.